Easy Halloween Popsicle Stick Window Craft for Kids
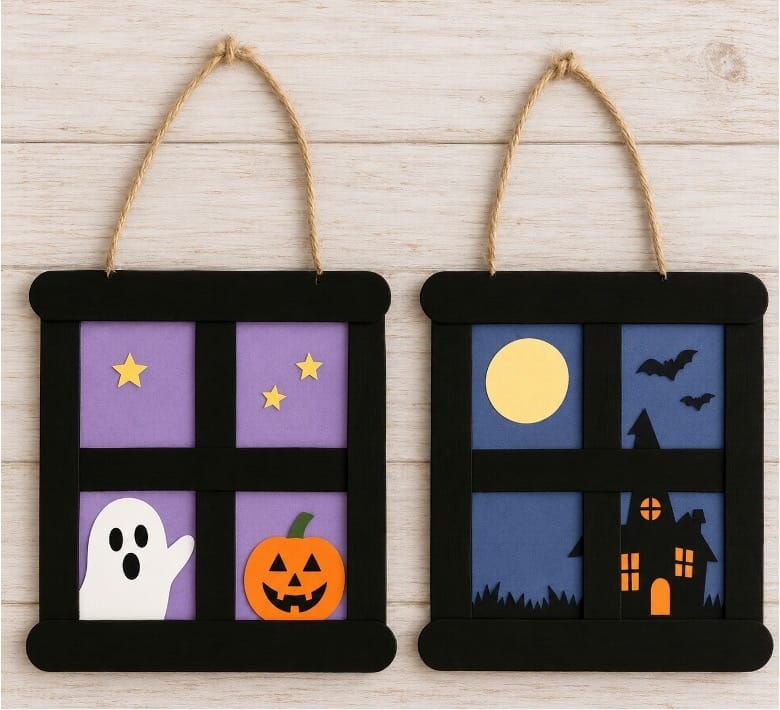
Make a spooky little Halloween scene with this Easy Halloween Popsicle Stick Window Craft for Kids. Using simple popsicle sticks, colored paper, and printable Halloween pictures, children can create a cute window filled with ghosts, pumpkins, bats, haunted houses, and other Halloween characters.
Kids can choose their favorite Halloween colors and create their own scene behind the popsicle stick window frame. Add a piece of yarn or string at the top, and the finished craft can also become a fun Halloween hanging decoration.
This Halloween popsicle stick craft is perfect for preschool, kindergarten, elementary school, homeschool, classroom activities, or Halloween crafting at home.
What You Need:
- Popsicle sticks of the same size
- Printable Halloween templates
- Colored paper
- White printer paper
- Paint
- Paintbrush
- Crayons
- Markers or colored pencils
- Scissors
- Craft glue or double-sided tape
- Hot glue with adult help (optional)
- Yarn, ribbon, or string for hanging (optional)
How to Make a Halloween Popsicle Stick Window Craft:
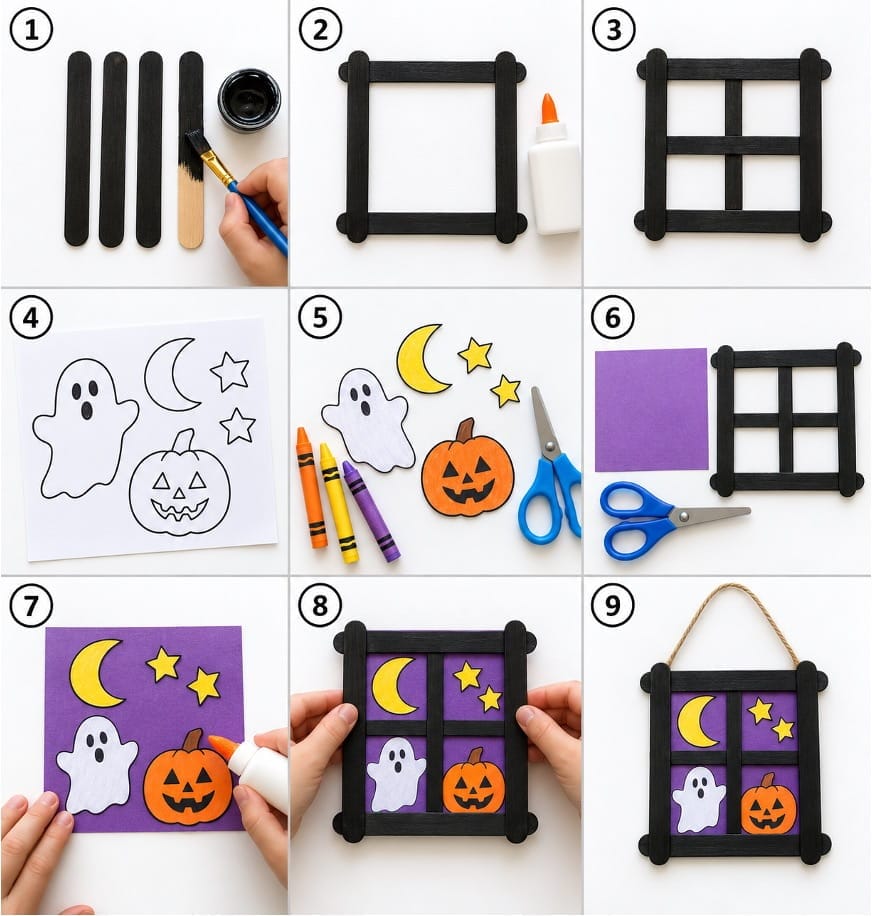
1. Prepare the Popsicle Sticks
- Take four popsicle sticks of the same size.
- Color or paint them using black, brown, purple, or any other color you like. Black works especially well for a spooky Halloween window.
- Keep the sticks aside and let the paint dry completely.
2. Make the Window Frame
- Arrange the four popsicle sticks to create a simple window frame.
- Place two sticks horizontally at the top and bottom. Then, place the other two sticks vertically to create the sides of the window.
- Glue the sticks together where they meet. You can use craft glue, strong double-sided tape, or hot glue with adult help.
3. Add the Window Cross
- To create the window sections, you can use two extra popsicle sticks.
- Place one vertically through the middle and one horizontally across the middle to create a cross inside the window.
- Glue them securely in place and let them dry.
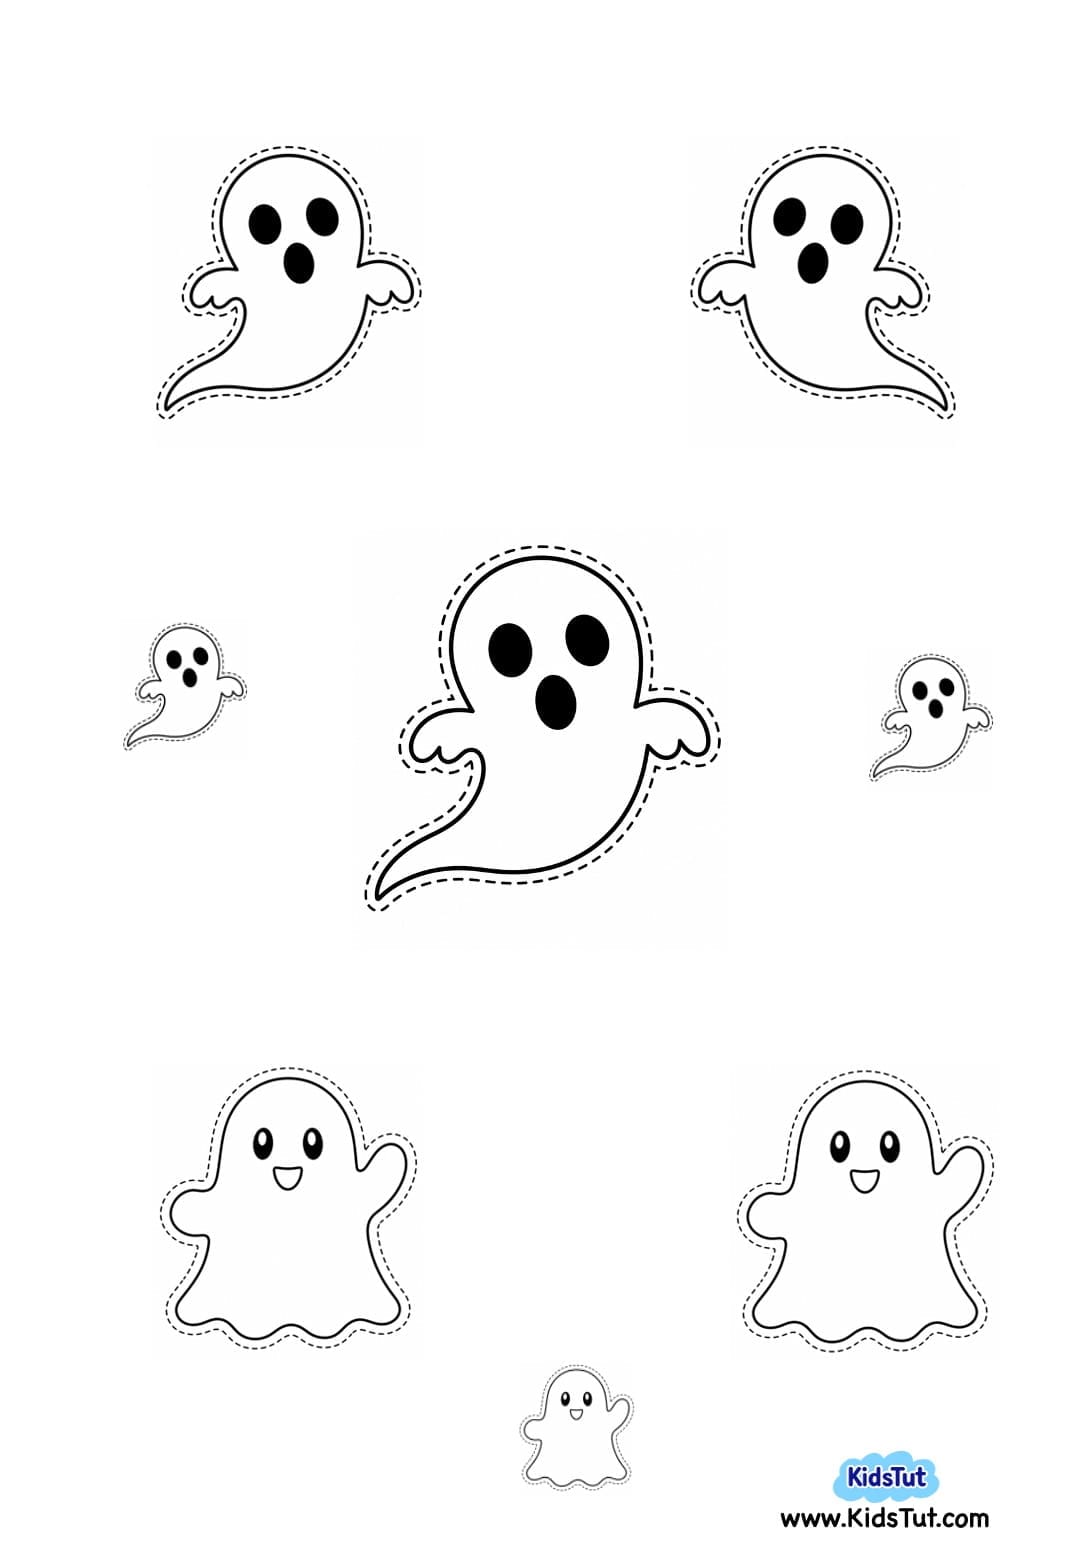
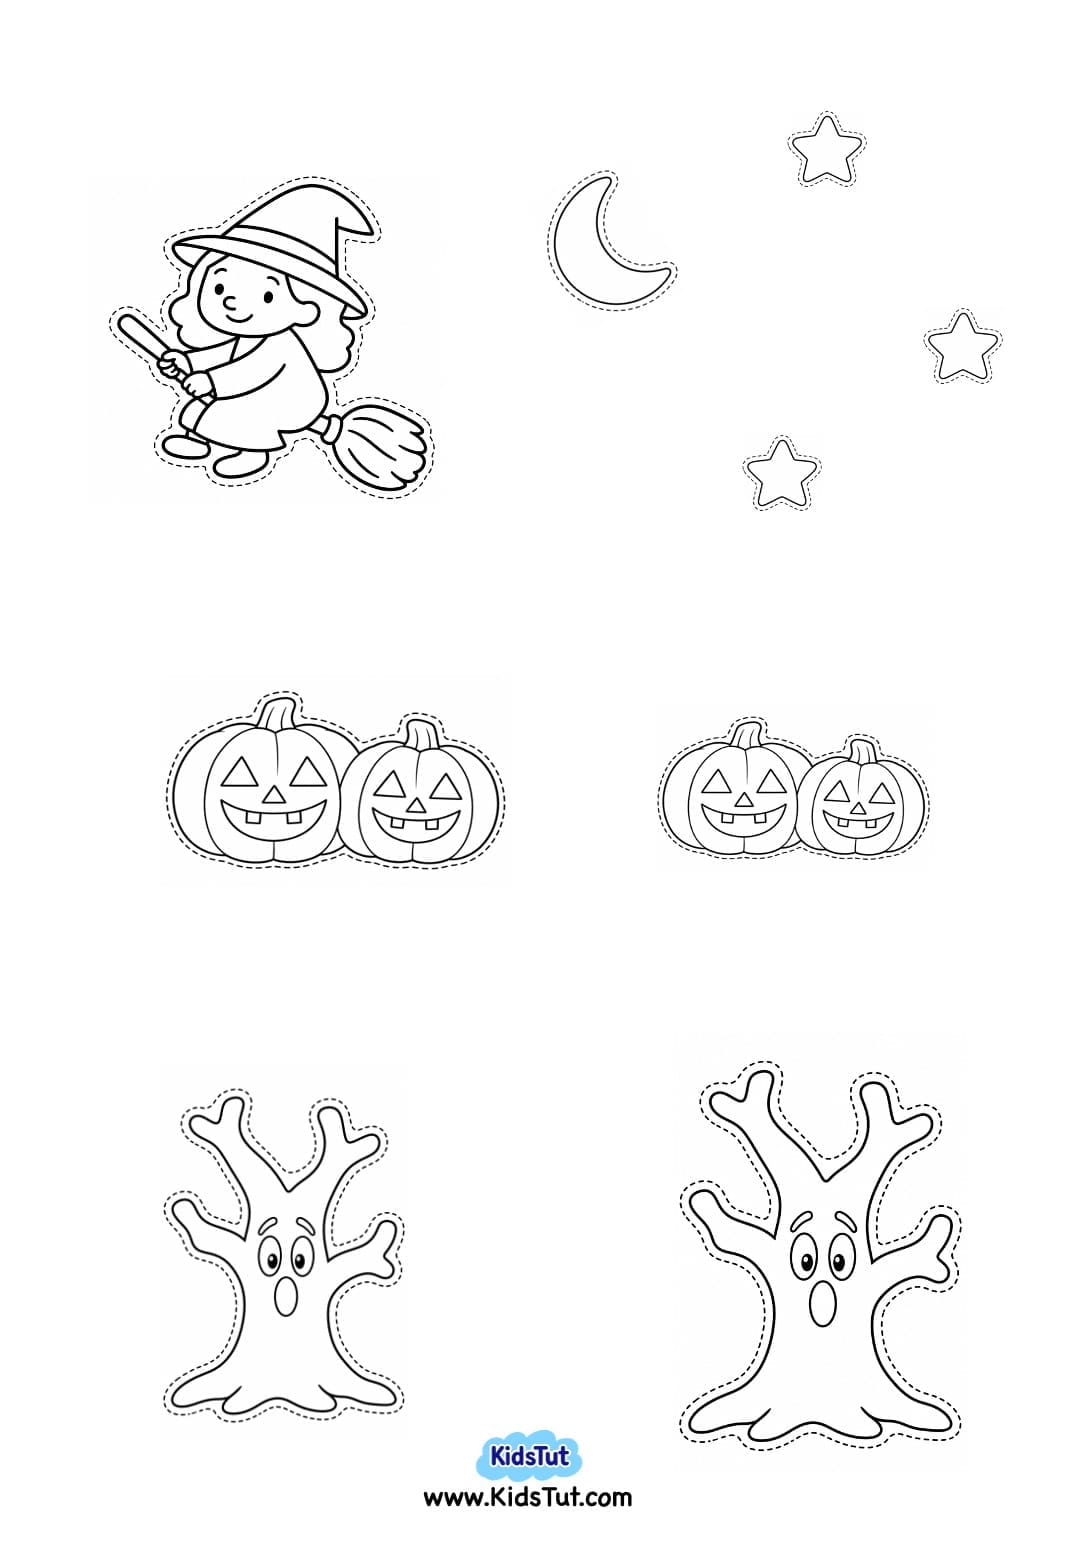
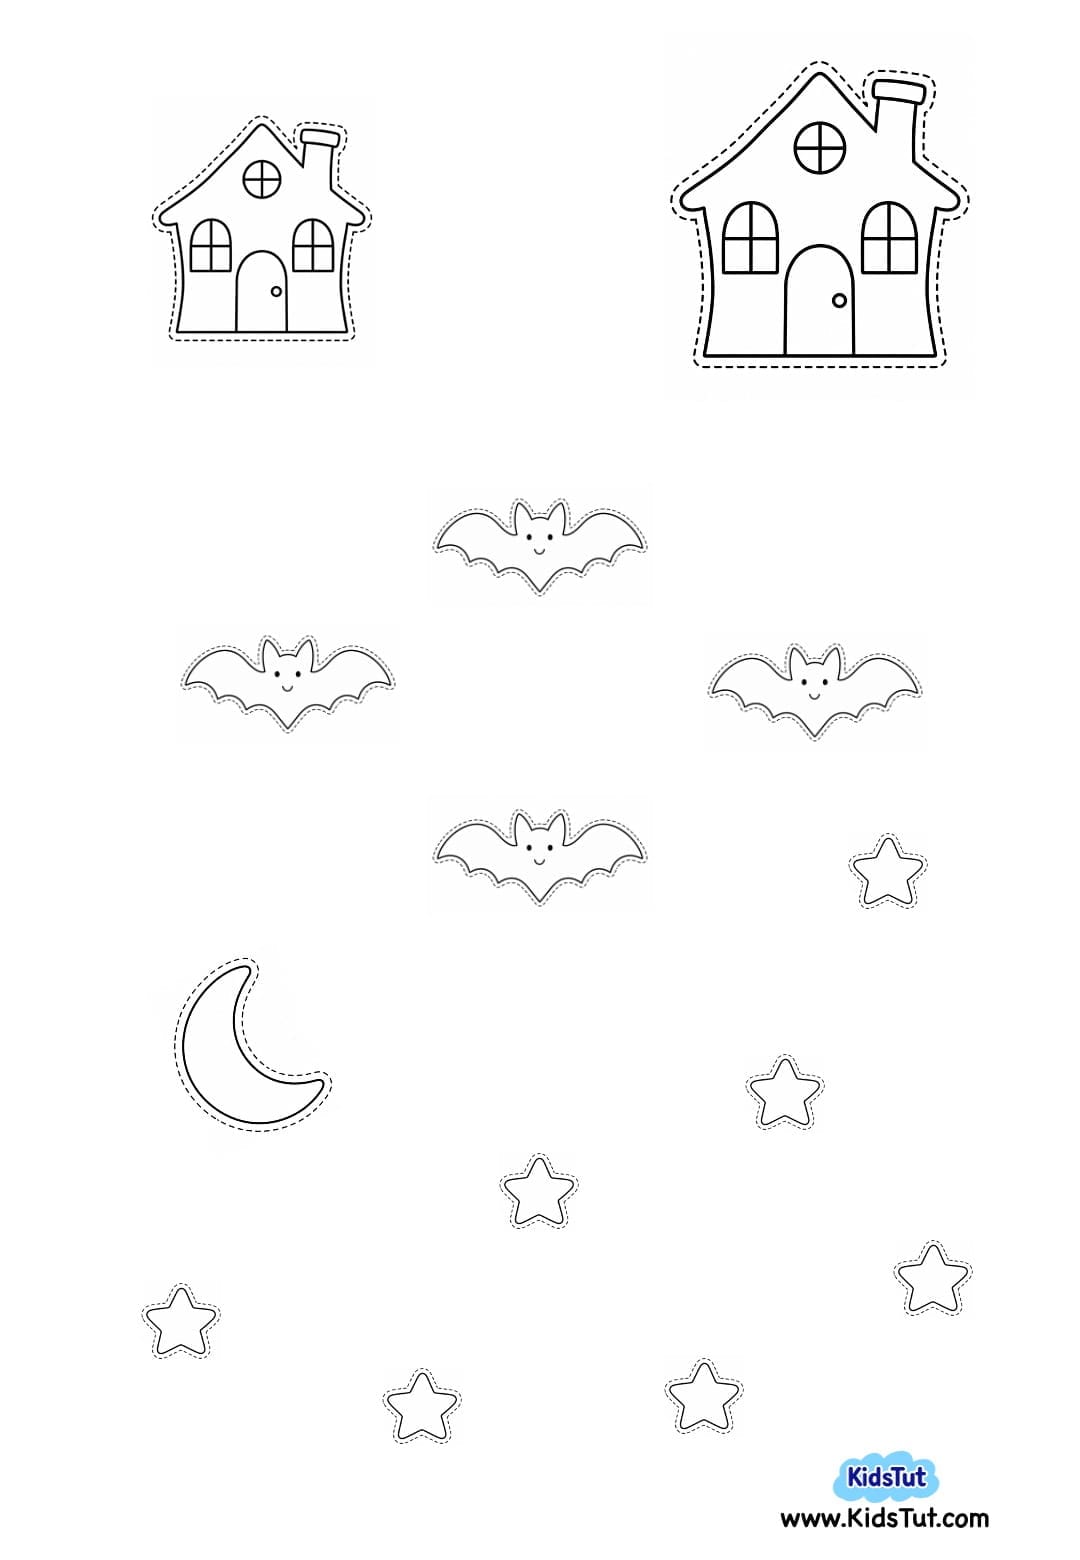
4. Print the Halloween Pictures
- Choose your favorite printable Halloween images and print them on white paper.
- You can choose pictures such as: Ghosts, Jack-o'-lanterns, Bats, Moon and stars, Haunted houses, Witches, Black cats, Spooky trees
- Choose only a few pieces for each window so the scene does not become too crowded.
Halloween image templates:
5. Color and Cut the Halloween Pieces
- Color the Halloween pictures using crayons, markers, or colored pencils.
- Once you finish coloring, carefully cut around the outside outline of each picture.
6. Prepare the Halloween Background
- Choose a colored sheet for the background. Purple, dark blue, orange, or black are great choices for a Halloween theme.
- Cut the paper into a square or rectangle that matches the size of your popsicle stick window frame.
7. Create the Halloween Scene
- Arrange your Halloween cutouts on the colored background.
- For example, you can make a ghost and pumpkin scene with stars in the sky, or create a spooky night scene with a moon, bats, and a haunted house.
- Once you are happy with the arrangement, glue all the pieces onto the colored paper.
8. Attach the Scene to the Window
- Turn the popsicle stick window frame over.
- Place your finished Halloween scene behind the frame so the pictures can be seen through the window sections.
- Attach the colored background to the back of the popsicle stick frame using glue or double-sided tape.
- Gently press everything together and let it dry completely.
9. Add a Hanging Loop
- If you want to turn your craft into a hanging decoration, cut a piece of yarn, ribbon, or string.
- Attach both ends to the back of the top part of the window frame to create a loop.
- Once everything is secure, your Halloween popsicle stick window craft is ready to hang and display.
Method 2: Use the Printable Popsicle Stick Templates
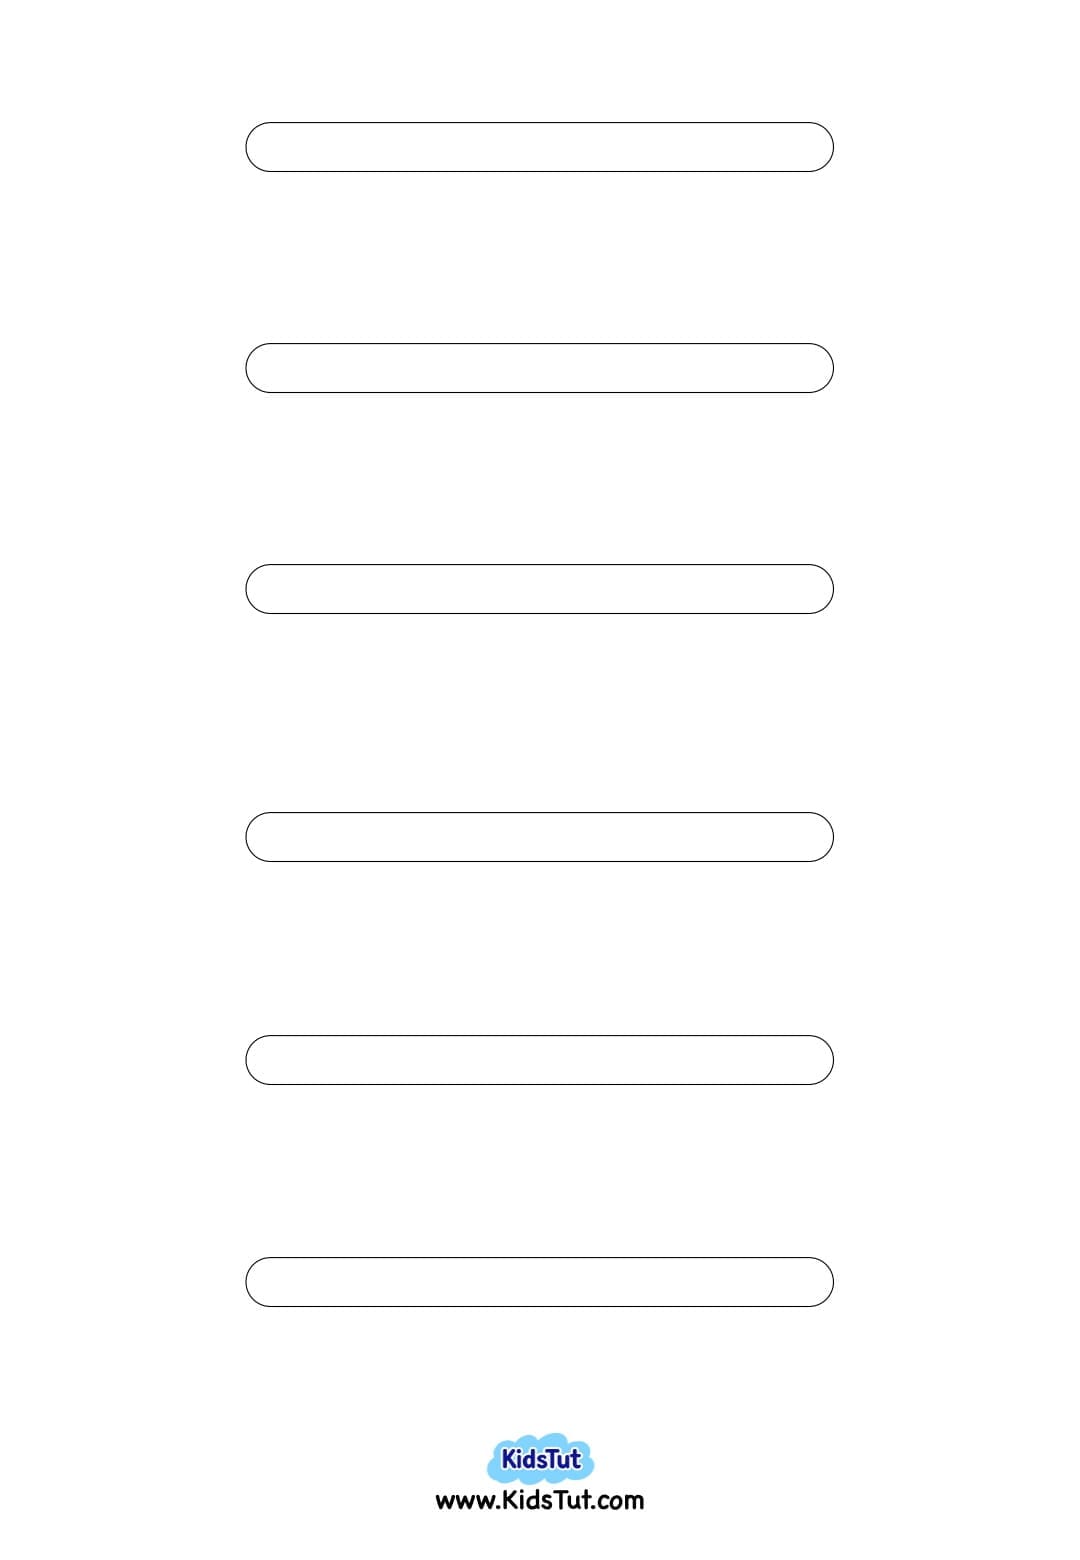
- If you don’t have real popsicle sticks, you can use the provided printable popsicle stick templates instead.
- Print the templates on white paper and color them using crayons, markers, colored pencils, or oil pastels. You can use brown, black, purple, orange, or any color you like.
- Then, carefully cut out each popsicle stick shape. Arrange the paper sticks to create the outside window frame and the cross in the middle. Glue the pieces together and let them dry completely.
- Finally, follow the same steps above to create your Halloween scene and attach it to the back of the paper window frame.
Popsicle stick templates:
Benefits of This Halloween Popsicle Stick Craft
- Develops fine motor skills – Painting, coloring, cutting, and gluing strengthen little hands and fingers.
- Practices cutting skills – Children learn to follow the outlines of different Halloween pictures.
- Improves hand-eye coordination – Kids carefully arrange and glue the small pieces into their scene.
- Encourages creativity – Children can choose their own background colors, characters, and Halloween scenes.
- Builds spatial awareness – Kids learn how to arrange several pictures inside a limited window space.
- Supports color recognition – Children can explore Halloween colors such as black, purple, orange, yellow, and dark blue.
- Introduces mixed-material crafts – Kids learn how paper and popsicle sticks can be combined to create one project.
- Makes Halloween learning fun – Ghosts, pumpkins, bats, and haunted houses make this an exciting seasonal activity.
- Creates a fun decoration – The finished craft can be displayed on a wall, door, window, or classroom bulletin board.

Click here to get the FREE PDF template: Download (Printable)