Easy Christmas Rainbow Silhouette Crafts for Kids
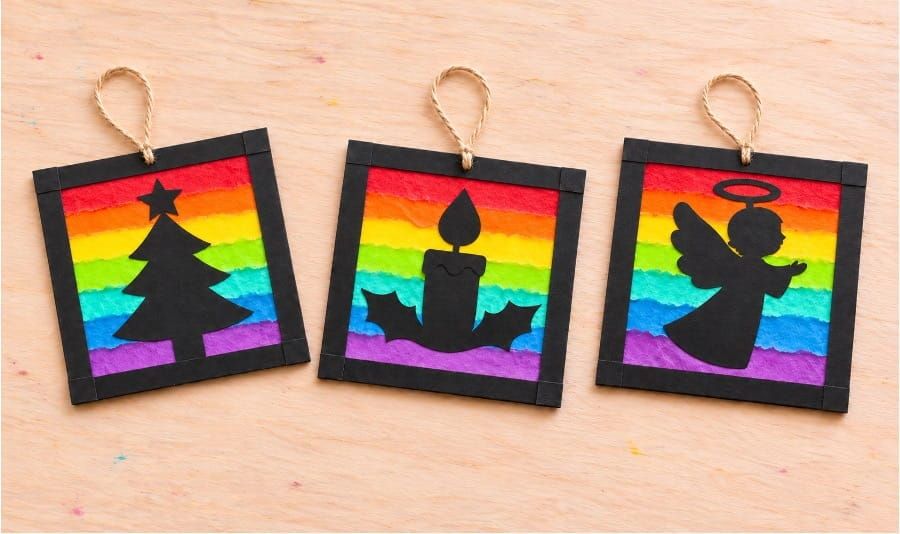
Looking for a colorful and creative Christmas craft for kids? These Easy Christmas Rainbow Silhouette Crafts for Kids are a fun way to make beautiful holiday decorations using colorful paper strips, black Christmas silhouettes, and simple handmade frames.
The black silhouettes stand out against the colorful rainbow backgrounds, giving each craft a lovely stained-glass-style look. Children can also add a black paper frame and a yarn loop to turn their artwork into hanging Christmas decorations.
These Christmas silhouette crafts for kids are perfect for kindergarten, elementary school, homeschool, and classroom Christmas activities. They are simple to prepare and help children practice cutting, tearing, gluing, and arranging colorful paper.
You can use the finished crafts as Christmas tree ornaments, classroom decorations, window hangings, or handmade holiday gifts.
What You Need
- Printable square frame templates
- Printable Christmas silhouette templates
- Craft board, bristle board, matte board, or cardboard
- Black construction paper
- Colorful tissue paper or construction paper
- White paper for printing templates
- Crayons, markers, or paints (optional)
- Pencil and ruler
- Child-safe scissors
- Craft knife or paper cutter (adult use only)
- Glue or glue sticks
- Double-sided tape (optional)
- Yarn, string, or ribbon for hanging
- Clear tape or strong glue for attaching the hanging loop
How to Make Christmas Rainbow Silhouette Crafts
Part 1: How to Make the Black Square Frame
- First, prepare a square frame for your Christmas rainbow silhouette craft.
- You can make the frame using any of the three simple methods below.
Method 1: Make a Square Frame from Craft Board
- Step 1: Take a piece of craft board, bristle board, matte board, or another suitable sturdy board.
- Step 2: Use a ruler and pencil to draw a 5.5 × 5.5-inch square.
- Step 3: Inside the large square, draw another square measuring 4.5 × 4.5 inches, keeping an equal border of 0.5 inches on all four sides.
- Step 4: Carefully cut around the outside square.
- Step 5: Have an adult cut out the middle square using a craft knife or paper cutter. Now you have a square frame with an empty center.
- Step 6: Paint the frame black and let it dry completely. Alternatively, cut the same square frame shape from black construction paper and glue it onto the board frame.
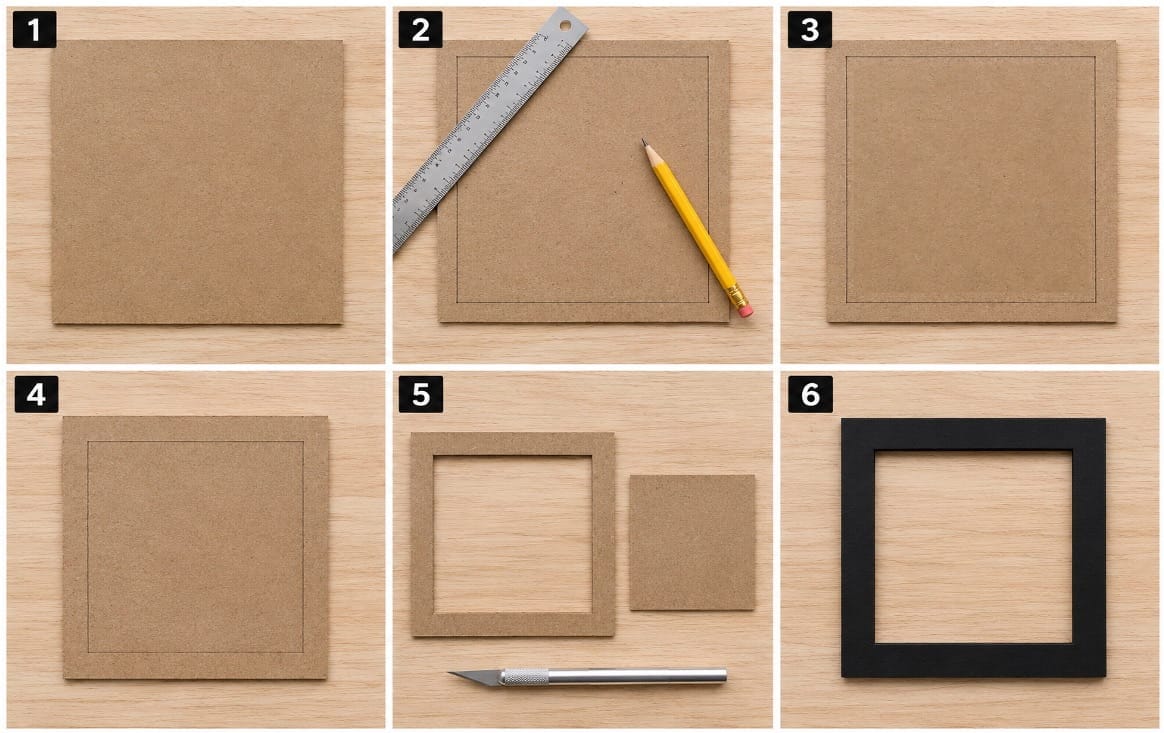
Your black square frame is ready!
Method 2: Make a Frame Using Four Paper Strips
This method is another easy way to create a square frame.
- Step 1: Take a piece of craft board or sturdy cardboard.
- Step 2: Measure and cut four strips, each 5.5 inches long and 0.5 inches wide.
- Step 3: Paint the strips black or cover them with black construction paper.
- Step 4: Arrange the four strips into a square shape, overlapping their ends at the corners.
- Step 5: Apply glue or double-sided tape where the strips meet.
- Step 6: Press the corners together and let the glue dry completely.
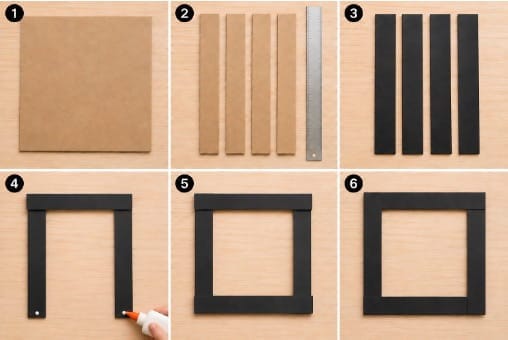
Now your square frame is ready for decorating!
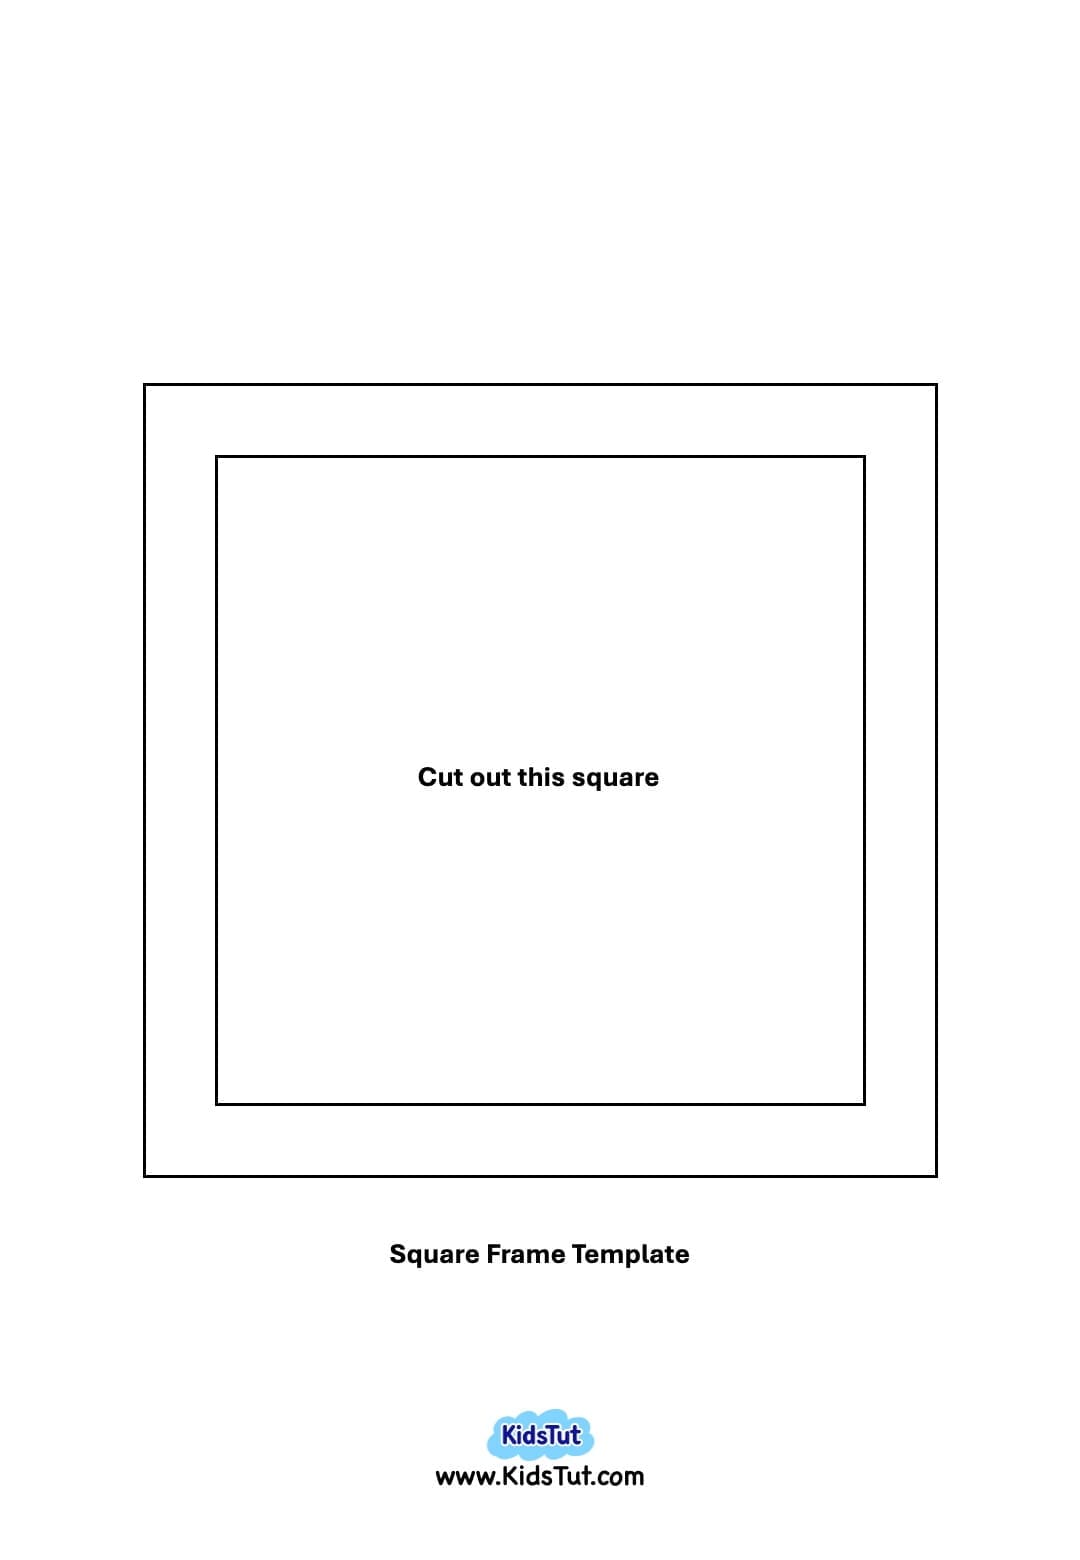
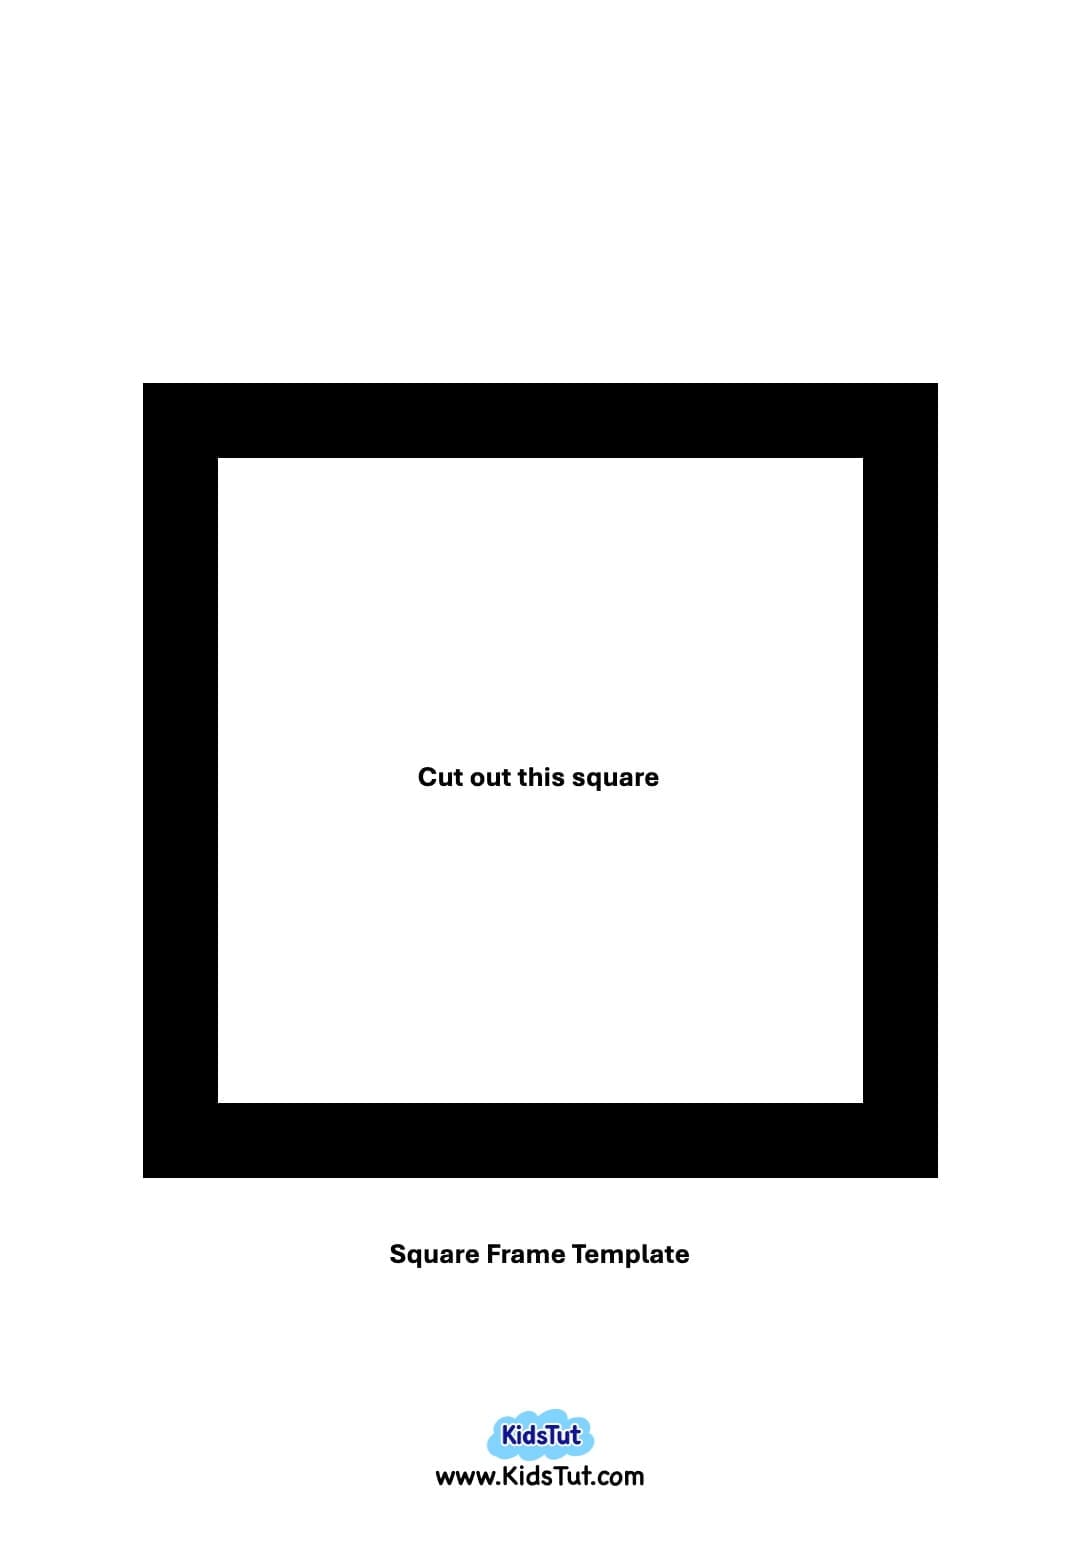
Method 3: Use the Printable Square Frame Template
If you prefer using printable templates, this method is a great option.
- Step 1: Print the provided square frame template on white or black construction paper.
- Step 2: Carefully cut around the outside outline of the square frame.
- Step 3: Cut out the middle square to create an empty opening.
- Step 4: Place the paper frame onto a piece of craft board or cardboard.
- Step 5: Trace around the outside and inside edges of the paper frame using a pencil.
- Step 6: Cut out the matching frame shape from the board. An adult should help with cutting the middle section.
- Step 7: Apply glue to the back of the printed paper frame and paste it onto the cardboard frame. Gently press it into place and let it dry.
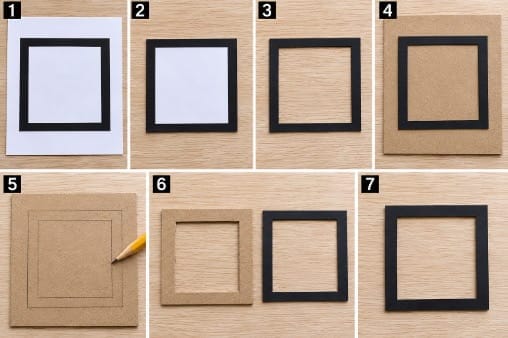
Your strong black square frame is now ready!
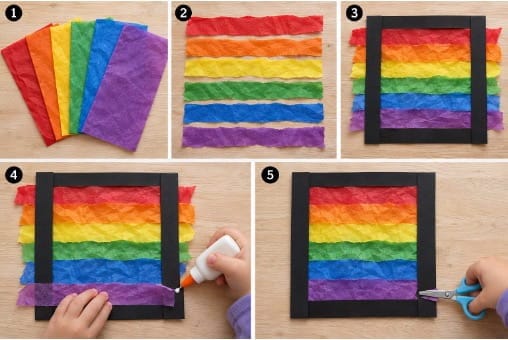
Part 2: How to Make the Rainbow Paper Background
Now it's time to create the colorful rainbow background for your Christmas silhouette craft.
Step 1: Choose Your Colorful Paper
- Collect colorful tissue paper, construction paper, or any other suitable craft paper you can easily find.
- Choose several bright colors, such as: Red, Orange, Yellow, Green, Blue, Purple
- You can use all six colors or choose your favorite color combination.
Step 2: Tear or Cut the Paper into Strips
- Take your colorful paper and tear or cut it into wide paper strips.
- Try to make the strips long enough to cover the square opening of your frame.
- You do not need to make perfectly straight edges. Slightly uneven torn edges can give the rainbow background a lovely handmade look.
Step 3: Arrange the Rainbow Paper Strips
- Place your prepared square frame face down on your table.
- Take the colorful paper strips and arrange them across the back of the frame opening.
- You can place the strips horizontally, starting with red at the top and continuing with orange, yellow, green, blue, and purple.
- Arrange the strips in your preferred color order.
Step 4: Paste the Colorful Paper Strips
- Once you are happy with the arrangement, apply a small amount of glue along the back of the frame and where the paper strips overlap.
- Carefully attach the colorful strips one by one.
- Make sure the strips overlap slightly so there are no empty gaps between them.
- Continue until the entire square opening is covered with colorful paper.
- Avoid using too much glue, especially when working with thin tissue paper.
Step 5: Trim the Extra Paper
- After attaching all the colorful strips, turn the frame over and check your rainbow background.
- Make sure the colors fill the entire square opening.
- Then, turn the frame back over and carefully trim away any extra paper extending beyond the outside edges of the frame.
- Keep the craft aside and let the glue dry completely.
- Your colorful rainbow background is now ready!
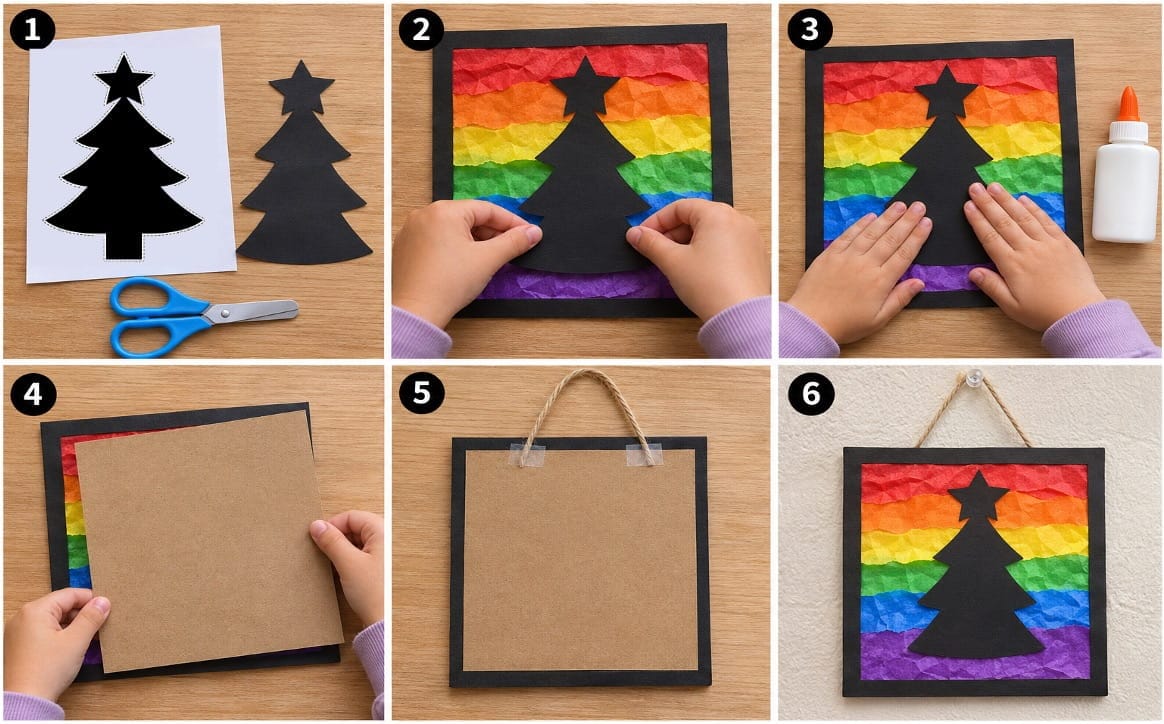
Part 3: How to Add the Christmas Silhouette
Step 1: Choose and Print Your Christmas Silhouette
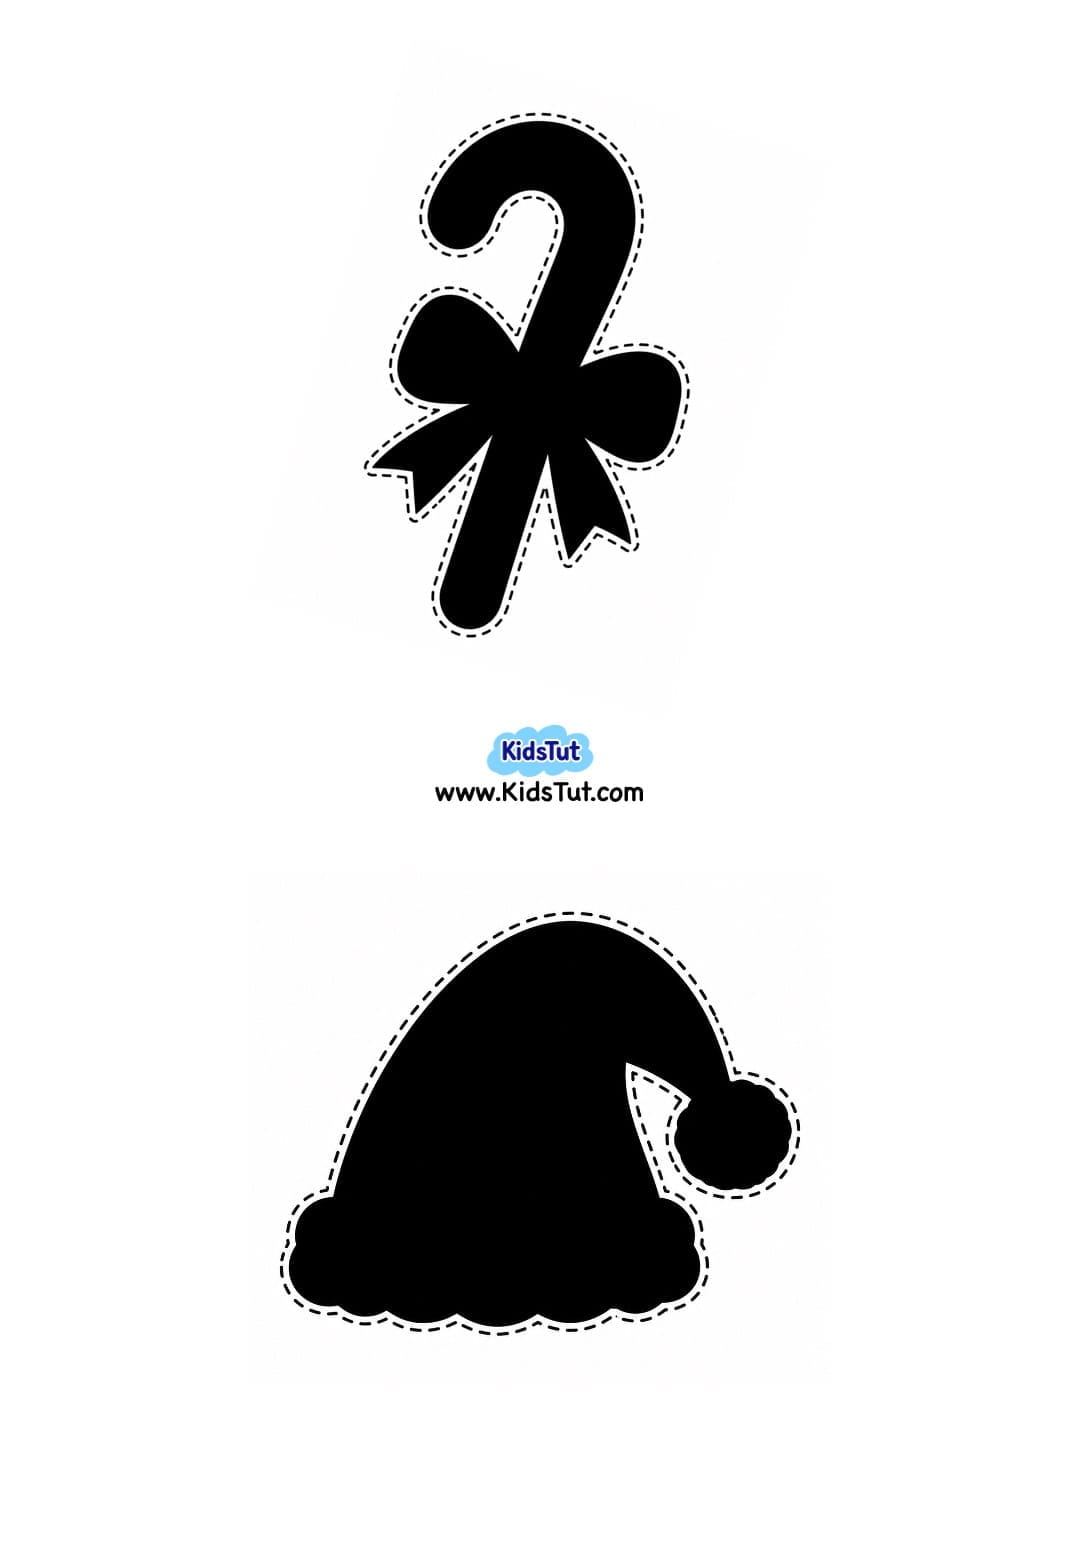
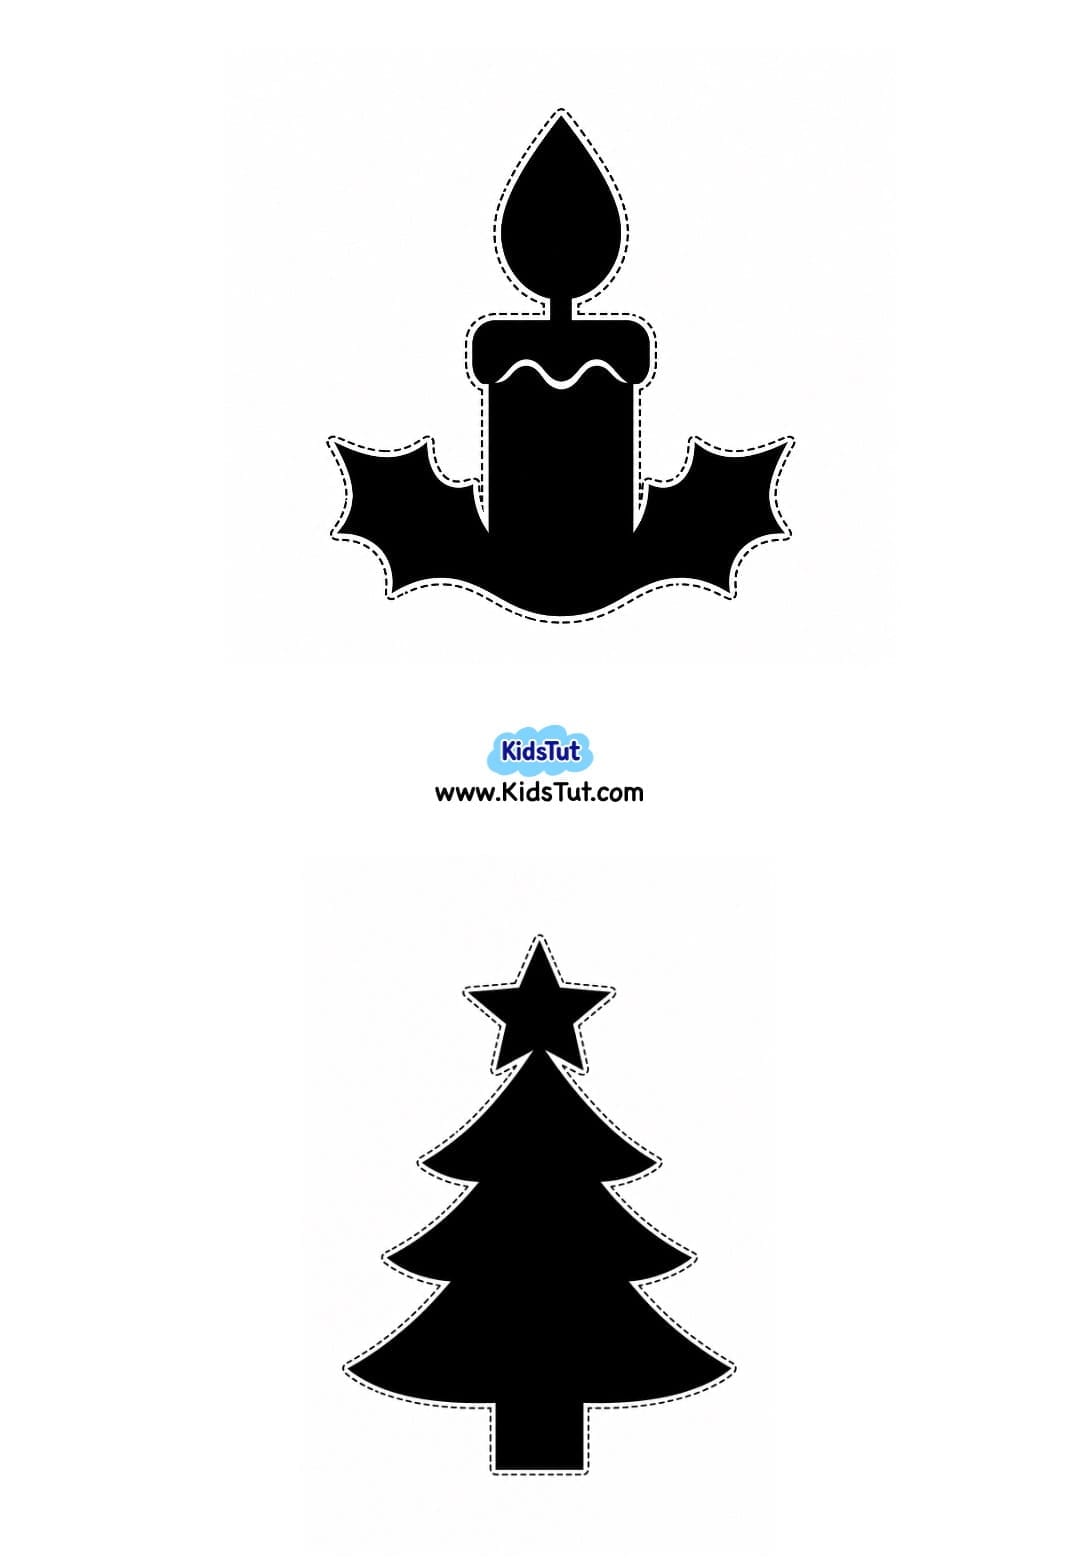
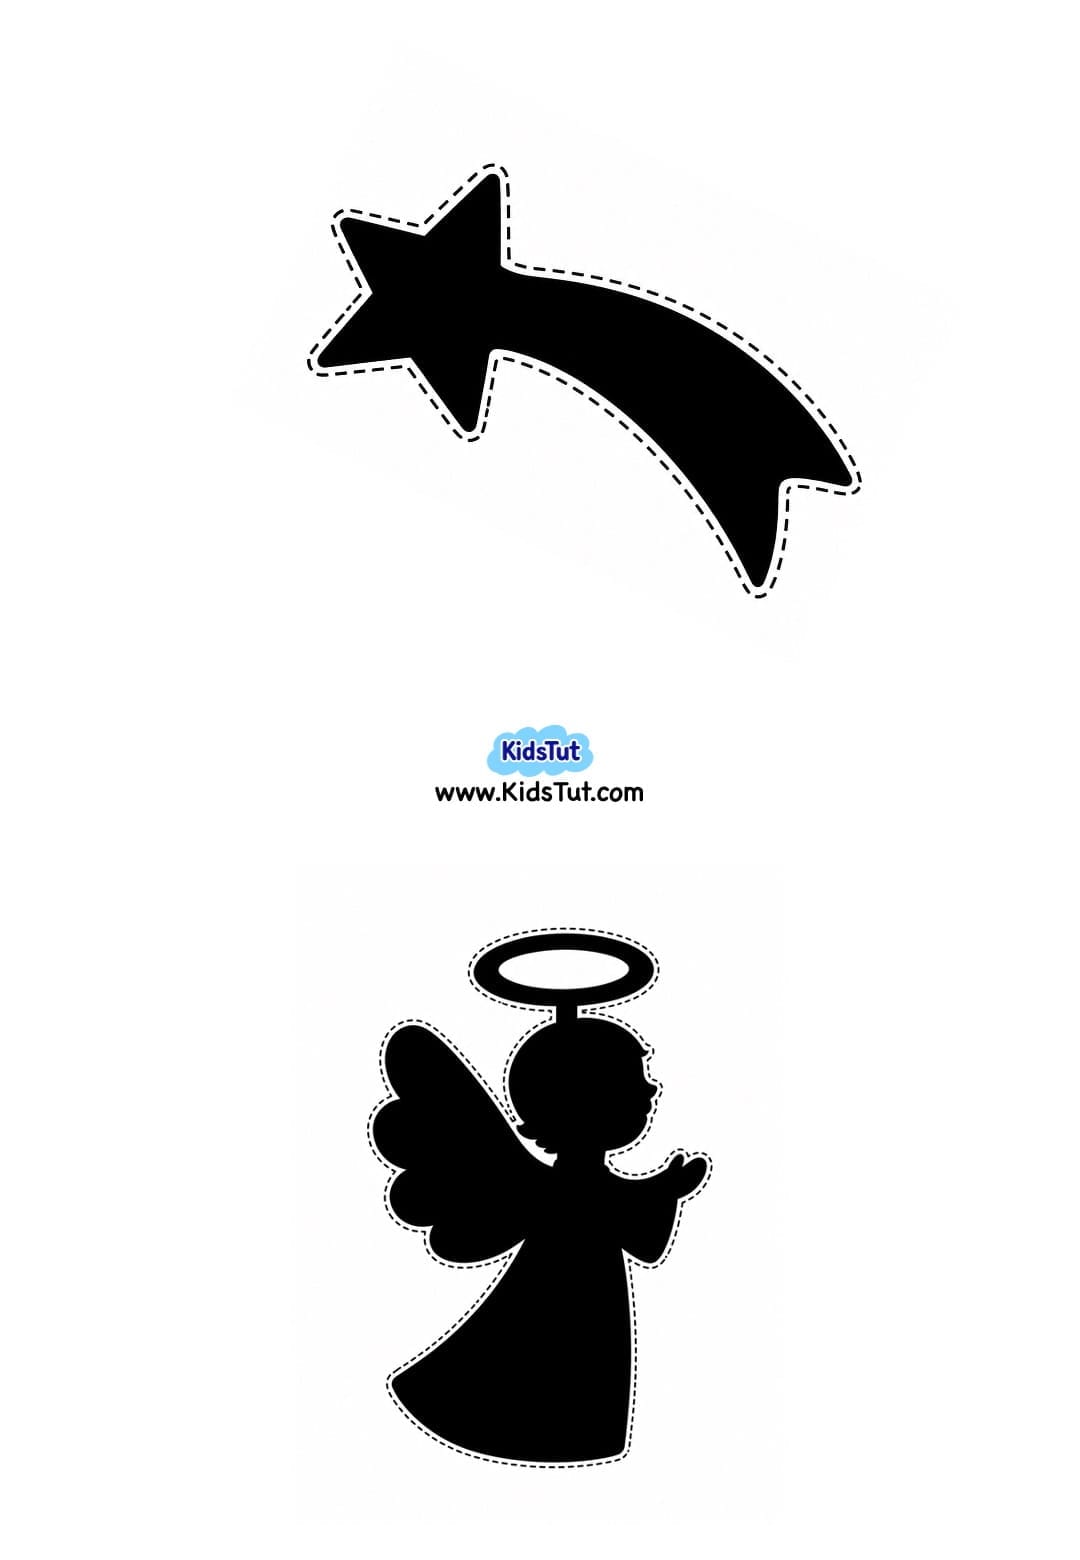
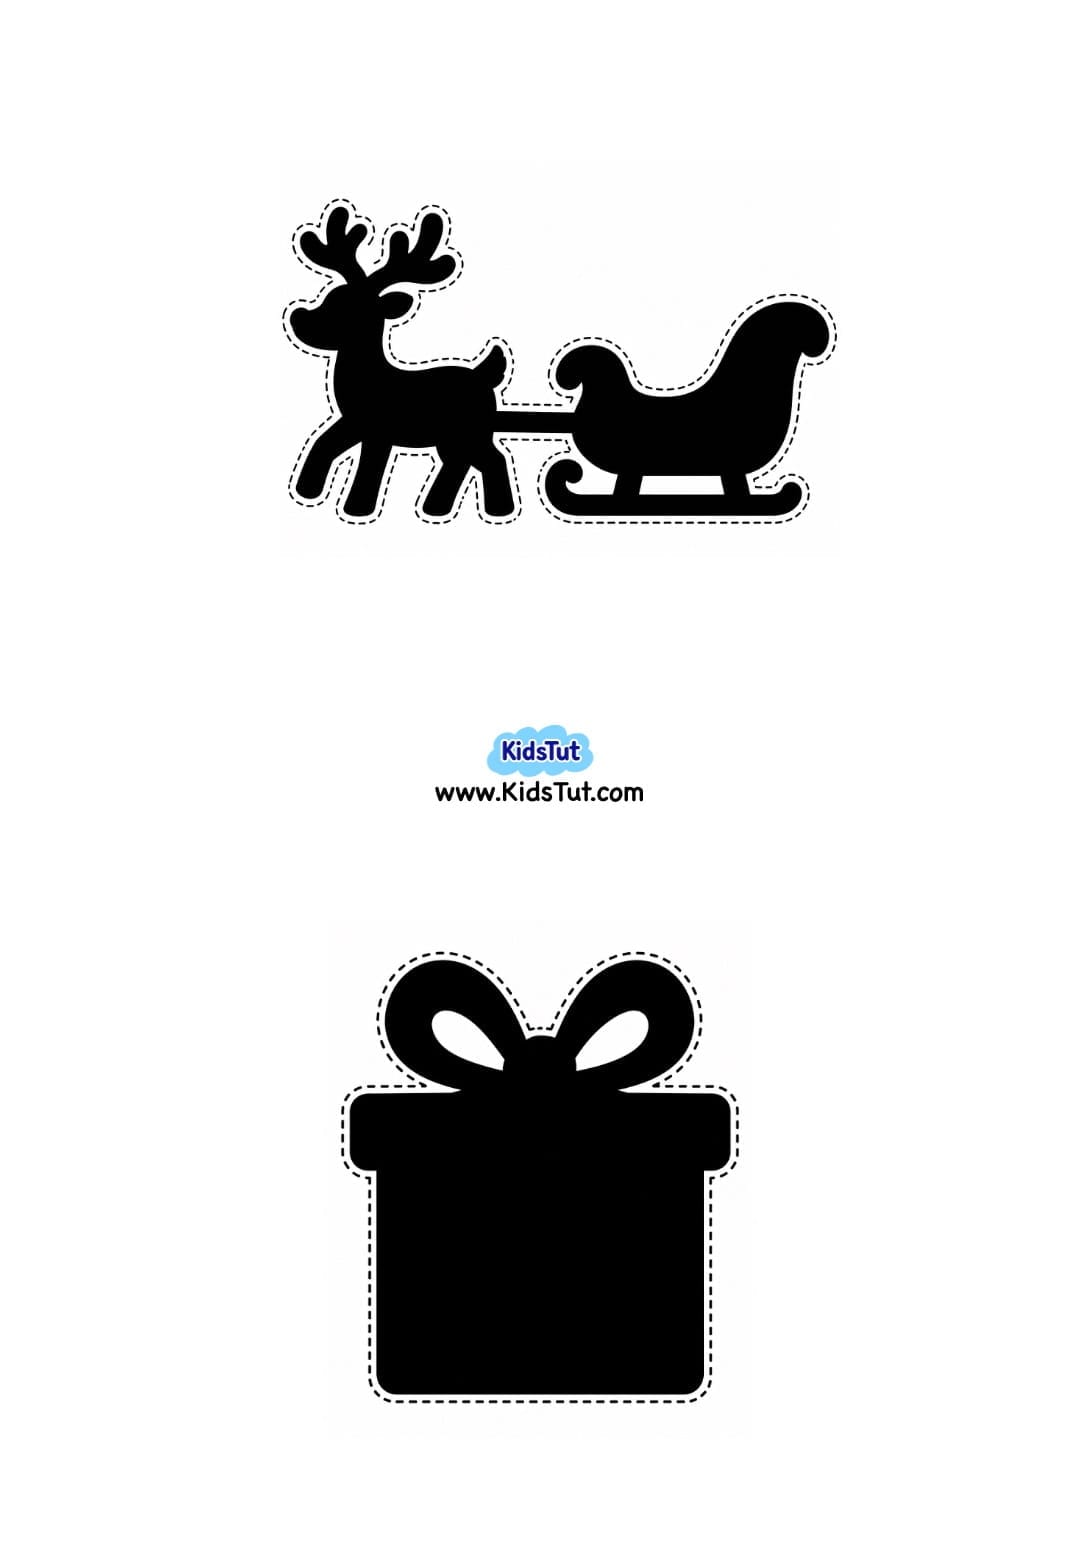
- Choose your favorite Christmas silhouette from the printable templates provided below.
- You can select: Christmas tree silhouette, Christmas candle silhouette, Christmas angel silhouette, Christmas bell silhouette, Christmas hat silhouette, Christmas gift box silhouette, Other Christmas-themed silhouettes
- Print your selected silhouette on white construction paper.
- Then, carefully cut out the black silhouette.
Step 2: Arrange the Silhouette
- Take your prepared rainbow frame and place it on your table with the colorful side facing up.
- Position the black Christmas silhouette in the middle of the rainbow background.
- Check the placement before applying glue.
- Try to keep the silhouette centered so the colorful rainbow strips remain visible around it.
Step 3: Paste the Christmas Silhouette
- Apply a small amount of glue to the back of your Christmas silhouette.
- Carefully paste it onto the rainbow paper background.
- Gently press the silhouette into place.
Tip: Avoid using too much glue because thin tissue paper can tear or become damaged when wet.
- You can also use small pieces of double-sided tape to attach the silhouette.
Step 4: Add a Backing for Extra Strength (Optional)
- If you think the rainbow paper background is too thin or may tear easily, you can add a backing sheet.
- Cut a square piece of cardstock or craft board measuring 5.5 × 5.5 inches, matching the outside size of your frame.
- Apply glue or double-sided tape around the back edges of the frame and attach the square backing.
- This will help protect the colorful paper strips and make your Christmas craft stronger.
If you want to hang your craft in a window and let light pass through the tissue paper, leave the back uncovered or use a clear backing instead.
Step 5: Attach a Hanging Loop
- Take a piece of yarn, string, or ribbon.
- Fold it in half to create a hanging loop.
- Attach both ends of the loop to the back of the frame at the top using strong glue or clear tape.
- Make sure the loop is securely attached.
Step 6: Let It Dry and Display
- Keep your Christmas rainbow silhouette craft aside and let the glue dry completely.
- Now your beautiful Christmas decoration is ready!
- You can hang it on a classroom wall, Christmas tree, window, or holiday display board.
Printable square frame templates:
Printable Christmas silhouette templates
Benefits of Christmas Rainbow Silhouette Crafts for Kids
These easy Christmas paper crafts are not only fun but also help children develop important early learning skills.
- Encourages creativity – Children can choose different rainbow colors, Christmas silhouettes, and paper arrangements.
- Develops fine motor skills – Tearing, cutting, gluing, and arranging paper strips help strengthen little hands and fingers.
- Improves hand-eye coordination – Kids practice placing paper strips and Christmas silhouettes carefully inside the frame.
- Builds cutting skills – Cutting paper strips and silhouette outlines helps children improve their scissor control.
- Teaches color recognition – Children explore rainbow colors while creating colorful paper backgrounds.
- Introduces patterns and sequencing – Arranging rainbow paper strips helps children understand color order and simple patterns.
- Introduces shapes – Kids explore square frames and different Christmas silhouette shapes.
- Develops planning skills – Children learn to arrange paper strips and position silhouettes before gluing them.
- Introduces Christmas themes – Kids become familiar with Christmas trees, candles, angels, and other holiday decorations.
- Encourages teamwork – Children can share colorful paper, templates, and craft supplies during group activities.
- Builds confidence – Kids feel proud when they complete and display their handmade Christmas artwork.
Fun Ways to Display Christmas Rainbow Silhouette Crafts
Once your Christmas crafts are completely dry, you can display them in different ways.
- Christmas Tree Decorations: Make smaller versions and hang them on your Christmas tree.
- Classroom Wall Display: Hang several colorful Christmas silhouette crafts together.
- Window Decorations: Display tissue-paper versions near windows to enjoy the light passing through the colorful paper.
- Christmas Garland: Attach several finished crafts along a long piece of yarn or ribbon to make a festive garland.
- Christmas Bulletin Board: Arrange different silhouette designs on a classroom holiday bulletin board.
- Handmade Christmas Gifts: Give the finished artwork to family members or friends as special handmade holiday decorations.

Click here to get the FREE PDF template: Download ( Printable )