Easy Fall Wind and Leaves Hanging Craft for Kids
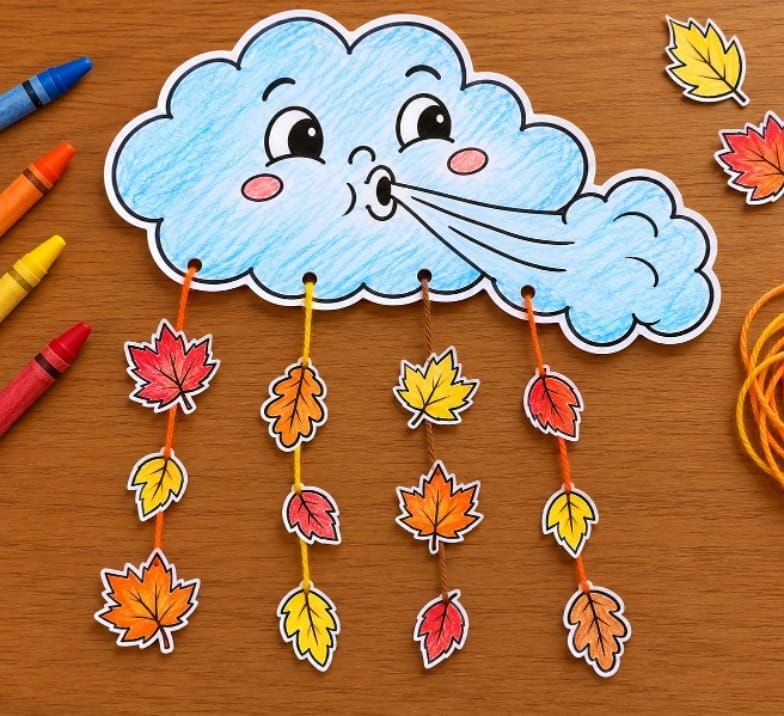
Bring the beauty of a windy autumn day indoors with this Easy Fall Wind and Leaves Hanging Craft for Kids. This cute craft features a blowing cloud with colorful fall leaves hanging underneath, making it a fun way for children to explore the fall season through art.
Kids can color the cloud, prepare colorful autumn leaves, and hang them from pieces of yarn to look like leaves blowing in the wind. This fall craft for kids is perfect for preschool, Pre-K, kindergarten, elementary classrooms, homeschool, or a simple autumn activity at home.
What You Need
- Printable blowing cloud template
- Printable fall leaf templates
- White paper
- Colored paper in red, orange, yellow, and brown
- Cardboard or craft board
- Crayons, oil pastels, or markers
- Yarn or string
- Scissors
- Glue or tape
- Hole punch
How to Make a Fall Wind and Leaves Hanging Craft
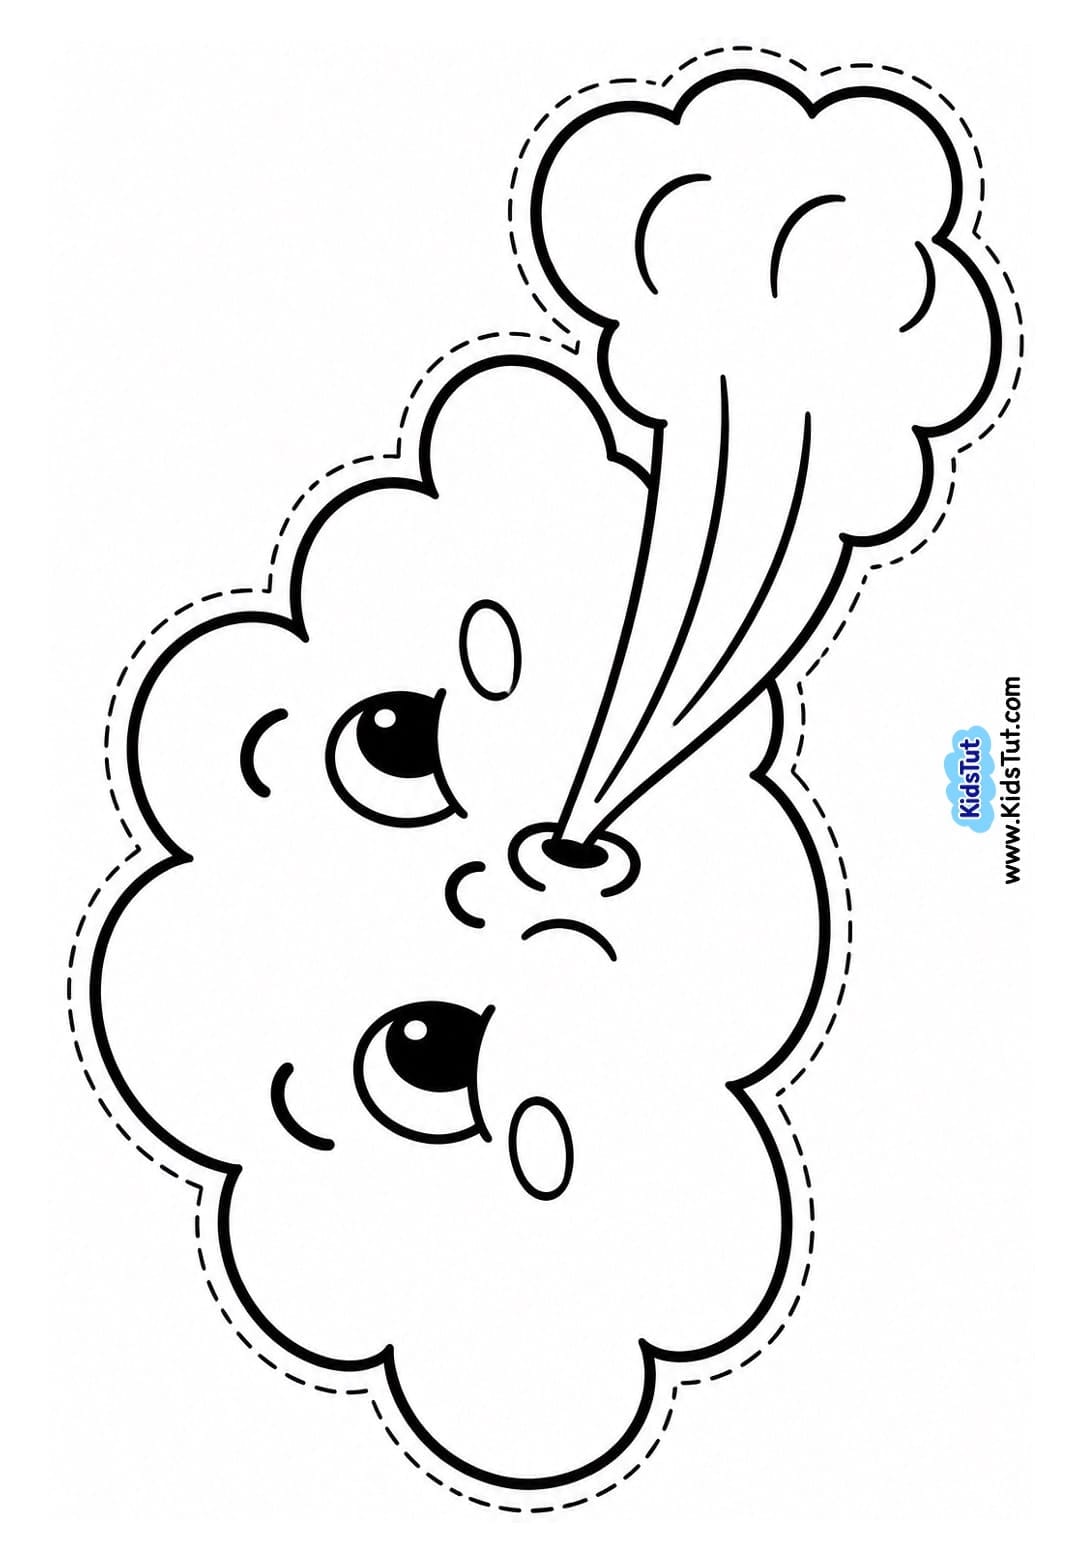
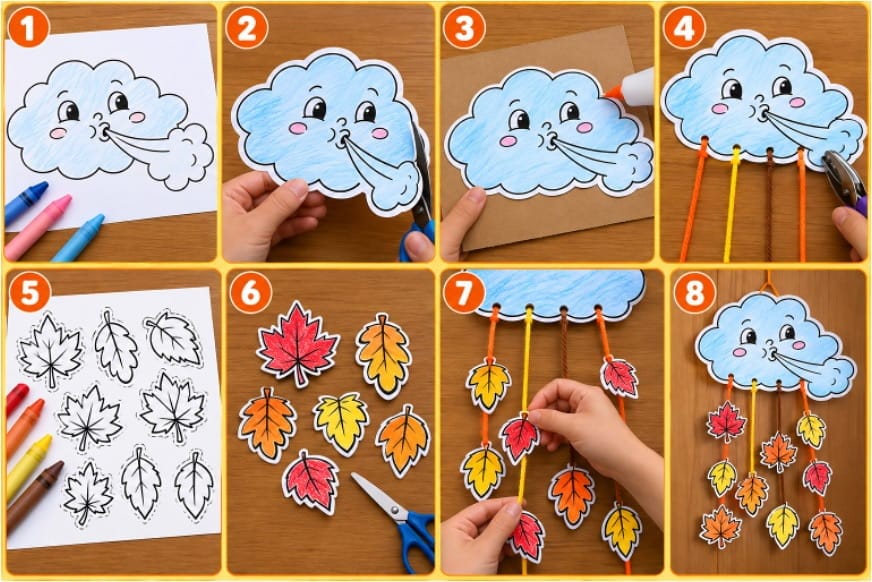
1. Print the Blowing Cloud
- Print the blowing cloud template on a white sheet of paper.
- You can leave the cloud white, or let children color it using crayons, oil pastels, colored pencils, or markers. Light blue is a nice choice for a colorful cloud.
Blowing Cloud Template:
2. Cut Out the Cloud
- Carefully cut around the outside outline of the cloud.
- Try to follow the curved edges closely to keep the cloud shape smooth and neat.
3. Make the Cloud Stronger
- Place the finished paper cloud on a piece of cardboard or craft board and glue it in place.
- Once the glue is dry, carefully cut away the extra board around the outside, following the cloud shape. This creates a stronger base for hanging the leaves.
4. Prepare the Yarn
- Cut several long pieces of yarn or string. You can make them the same length or use different lengths to create a more playful falling-leaves effect.
- Punch holes along the bottom edge of the cloud, leaving an even space between each hole.
- Thread one piece of yarn through each hole and tie it securely.
- Another easy option: Instead of punching holes, use strong tape to attach the yarn pieces to the back of the cloud.
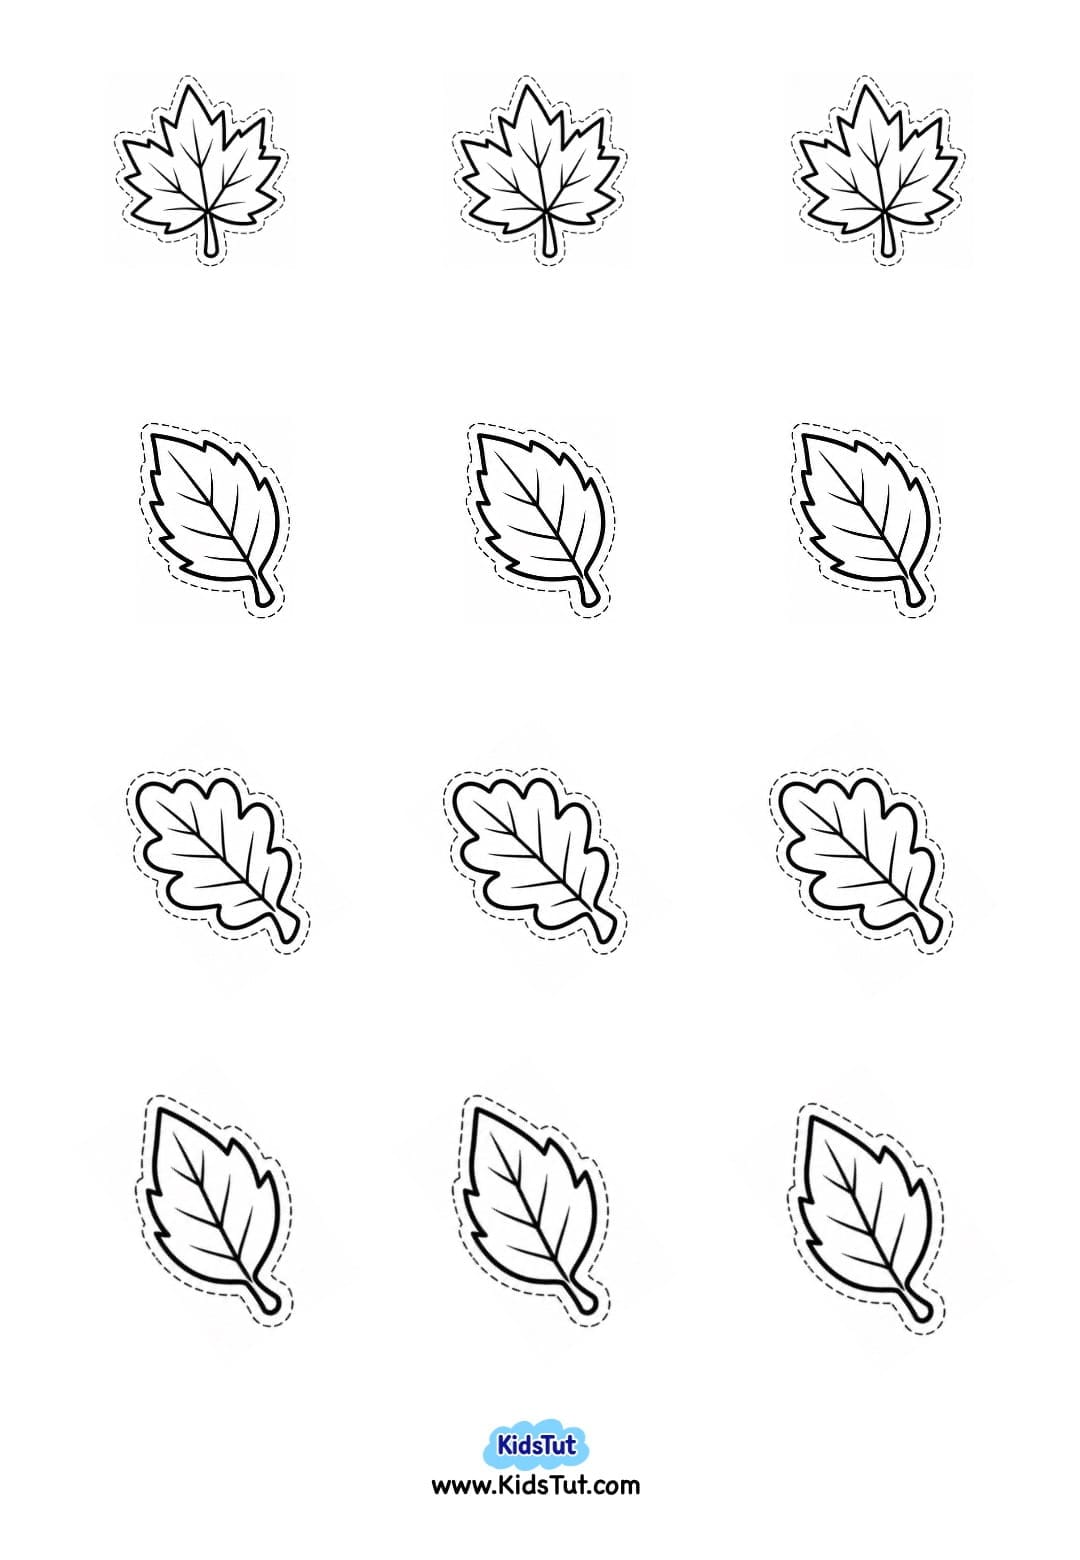
5. Prepare the Fall leaves
- Print the fall leaf templates on colored paper, such as red, orange, yellow, or brown.
- Or, print the leaves on white paper and let children color them using crayons, markers, or oil pastels.
Fall leaf templates:
6. Cut Out the Leaves
- Carefully cut around the outside outline of each leaf.
- Use a mixture of different leaf shapes and fall colors to make the hanging craft bright and colorful.
7. Attach the Leaves to the Yarn
- Arrange the fall leaves along each piece of hanging yarn.
- Attach them using glue or small pieces of tape. Leave some space between the leaves so they look like they are blowing and falling through the air.
- You can also place the leaves at different heights to create a more natural windy fall scene.
8. Let It Dry and Display
- If you used glue, keep the craft aside and let it dry completely.
- Once dry, hang your fall wind and leaves craft on a classroom wall, door, bulletin board, or at home. The hanging leaves can gently move, making the craft look even more like a windy autumn day.
Benefits of This Fall Craft for Kids
- Develops cutting skills – Cutting the cloud and leaves gives children practice following different outlines.
- Strengthens fine motor skills – Coloring, cutting, tying, and gluing exercise little hands and fingers.
- Improves hand-eye coordination – Kids carefully position the leaves along the pieces of yarn.
- Teaches about the fall season – Children can learn how leaves change color and fall from trees during autumn.
- Builds color recognition – Red, orange, yellow, and brown introduce children to common fall colors.
- Encourages creativity – Kids can choose their own colors, leaf patterns, and arrangements.
- Introduces simple hanging crafts – Children learn how yarn and paper pieces can be combined to create moving artwork.
- Makes a beautiful fall decoration – The finished craft is perfect for decorating a classroom or home during autumn.

Click here to get the FREE PDF template: Download ( Printable )