Easy Christmas Cotton Pad Craft Ideas for Kids
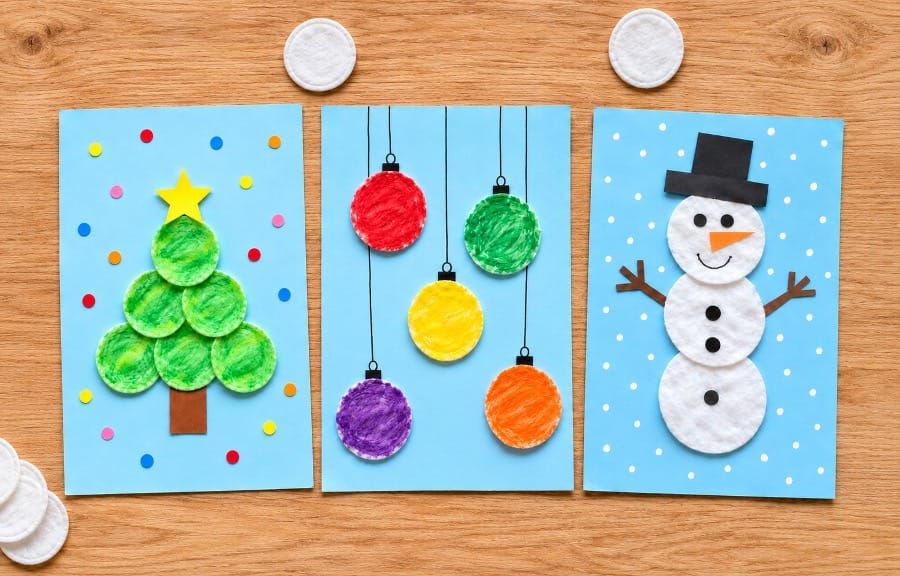
Looking for fun and easy Christmas crafts to make with kids? These Easy Christmas Cotton Pad Craft Ideas for Kids are a wonderful way to enjoy holiday crafting using simple cotton pads, colorful paints, paper, and printable templates.
These Christmas cotton pad crafts for kids are perfect for preschool, kindergarten, elementary school, homeschool, and classroom Christmas activities. They are simple to prepare, fun to make, and a lovely way to help children explore colors, shapes, and creativity during the Christmas season.
I have also provided two types of printable templates, making these activities easy to use for both individual children and classroom groups.
How to Color Cotton Pads for Christmas Crafts:
Before starting these Christmas activities, prepare your colored cotton pads.
One easy way to color cotton pads is by using diluted acrylic paint. This method helps create bright, colorful cotton pads while keeping their soft texture.
What You Need
- Round cotton pads
- Acrylic paints
- A small amount of water
- Mixing palette
- Paintbrushes
- Tray or protected drying surface
Step 1: Prepare the Paint
- Choose the acrylic paint colors you need for your Christmas craft.
- Add a small amount of paint to your mixing palette. Then, mix in a little water to make the paint thinner and easier to spread.
- Avoid adding too much water because cotton pads absorb liquid quickly.
Step 2: Paint the Cotton Pads
- Place the cotton pads on a protected surface.
- Use a paintbrush to gently apply the diluted acrylic paint to the surface of each cotton pad.
- Let the paint spread naturally across the soft cotton surface.
- You can use different colors depending on your craft.
For example:
- Green: Christmas trees
- Red: Christmas wreaths and ornaments
- Brown: Reindeer
- Yellow, blue, purple, and orange: Christmas baubles
- White: Snowmen
- Light pink or peach: Santa Claus faces
Step 3: Let the Cotton Pads Dry
- After painting, carefully place the cotton pads flat on a tray or protected surface.
- Keep them aside until they are completely dry.
- Do not glue wet cotton pads onto your background paper because the paint may spread or damage the paper.
- Once dry, your colorful cotton pads are ready for crafting!
Tip: An adult should supervise paint preparation. Use child-safe paints and avoid soaking the cotton pads with too much water.
How to Use the Christmas Craft Templates:
- I have provided two types of printable Christmas craft templates to make these activities easier for parents, teachers, and children.
- You can choose the template type that works best for your activity.
Template Type 1: All Craft Parts on One Page (Individual Activity)
- This version includes all the parts needed for one Christmas craft on a single page.
- It is perfect for individual children, home activities, and small classroom projects.
- You can use these templates in two different ways.
Method 1: Print, Color, and Cut
- Choose your favorite Christmas craft template.
- Print the template on a white sheet of paper.
- Color the different parts using crayons, markers, or colored pencils.
- Carefully cut along the outside outlines.
- Keep the colored cutouts aside until you are ready to make your Christmas craft.
Method 2: Use the Templates to Trace Shapes
- Print the Christmas craft template on white or colored paper.
- Carefully cut out each part separately.
- Use the cutouts as tracing templates.
- Place each cutout onto the matching colored paper or craft board.
- Draw around the shape using a pencil.
- Cut along the pencil outline to create your colored paper pieces.
- Now your Christmas craft parts are ready to use!
Template Type 2: Separate Parts for Colored Paper (Group Activity)
- This version is especially useful for classroom and group Christmas craft activities.
- Each template page includes one type of craft part, with several copies of the same shape arranged on the page.
- This allows teachers to prepare multiple pieces for a group of children.
How to Use:
- Choose the Christmas craft you want to make.
- Select the separate template pages you need.
- Print each template directly onto matching colored construction paper.
- Carefully cut out the printed shapes along their outside outlines.
- Separate the pieces and give them to the children for crafting.
- This method saves coloring time and makes it easier to prepare materials for several children at once.
Christmas Cotton Pad Craft Ideas for Kids
Once your cotton pads and printable craft pieces are ready, you can start making these fun Christmas decorations!
What You Need
- Painted (different colors) and unpainted cotton pads
- Prepared Christmas craft cutouts (printed, colored, and cut out)
- Light-colored construction paper for backgrounds
- Colored construction paper or craft board
- Crayons, markers, or colored pencils
- Child-safe scissors
- Glue or glue sticks
- Black marker
- Cotton swabs (Q-tips)
- White paint for snow dots
- Colorful dot stickers (optional)
- Star stickers (optional)
1. Christmas Tree Cotton Pad Craft
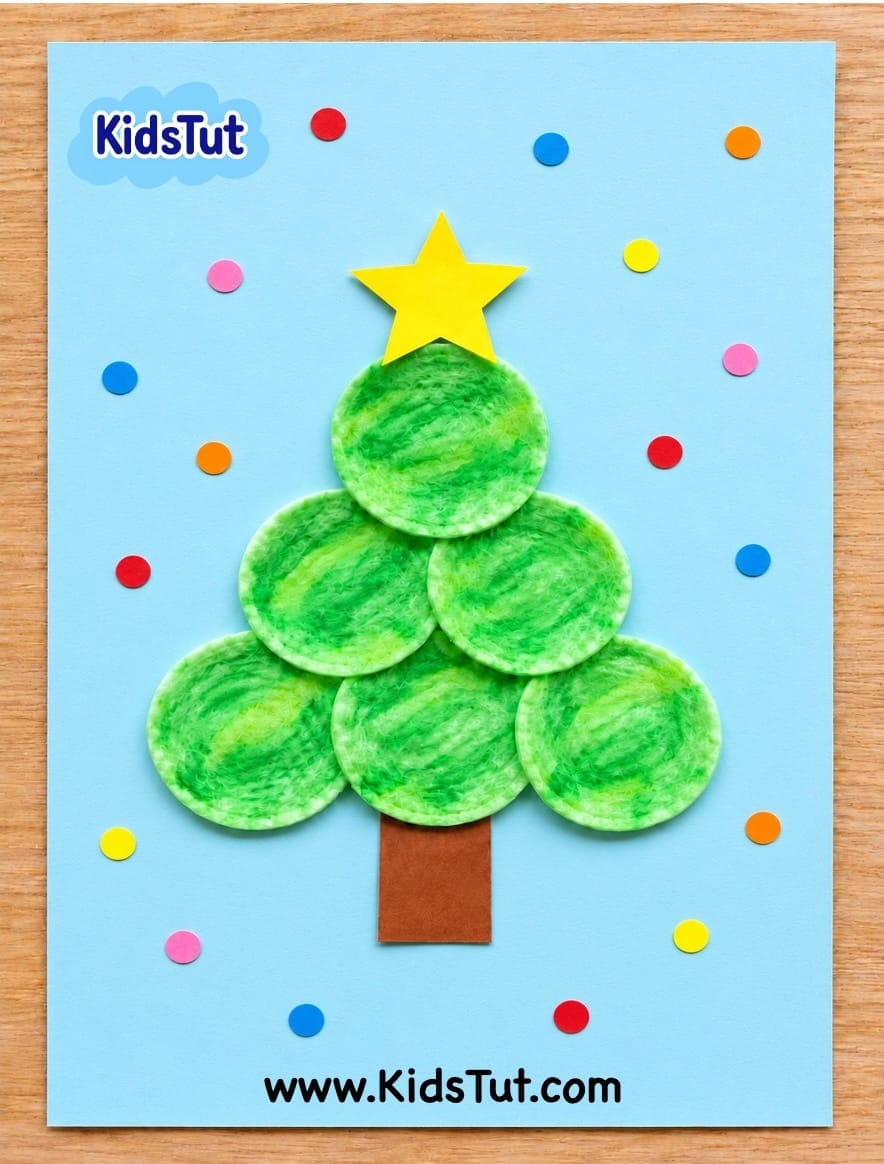
This easy Christmas tree craft uses green cotton pads arranged in a triangle shape to create a beautiful Christmas tree.
How to Make:
- Step 1: Take a light-colored A4 sheet and use it as the background for your Christmas tree craft.
- Step 2: Prepare your green painted cotton pads. Make sure they are completely dry before using them.
- Step 3: Arrange the green cotton pads in the middle of the background sheet to create a triangle-shaped Christmas tree.
- Start with one cotton pad at the top, place two cotton pads below it, and arrange three cotton pads along the bottom.
- Step 4: Once you are happy with the arrangement, apply glue to the back of each cotton pad and paste them onto the background sheet.
- Step 5: Take the brown tree trunk cutout and glue it below the bottom row of cotton pads, in the center of the tree.
- Step 6: Glue the large yellow star cutout to the top of the Christmas tree.
- Step 7: Decorate the background using colorful dot stickers. Peel off the stickers and place them around the Christmas tree.
- You can also add small paper stars or other decorations.
- Step 8: Keep the craft aside and let the glue dry completely.
Template:
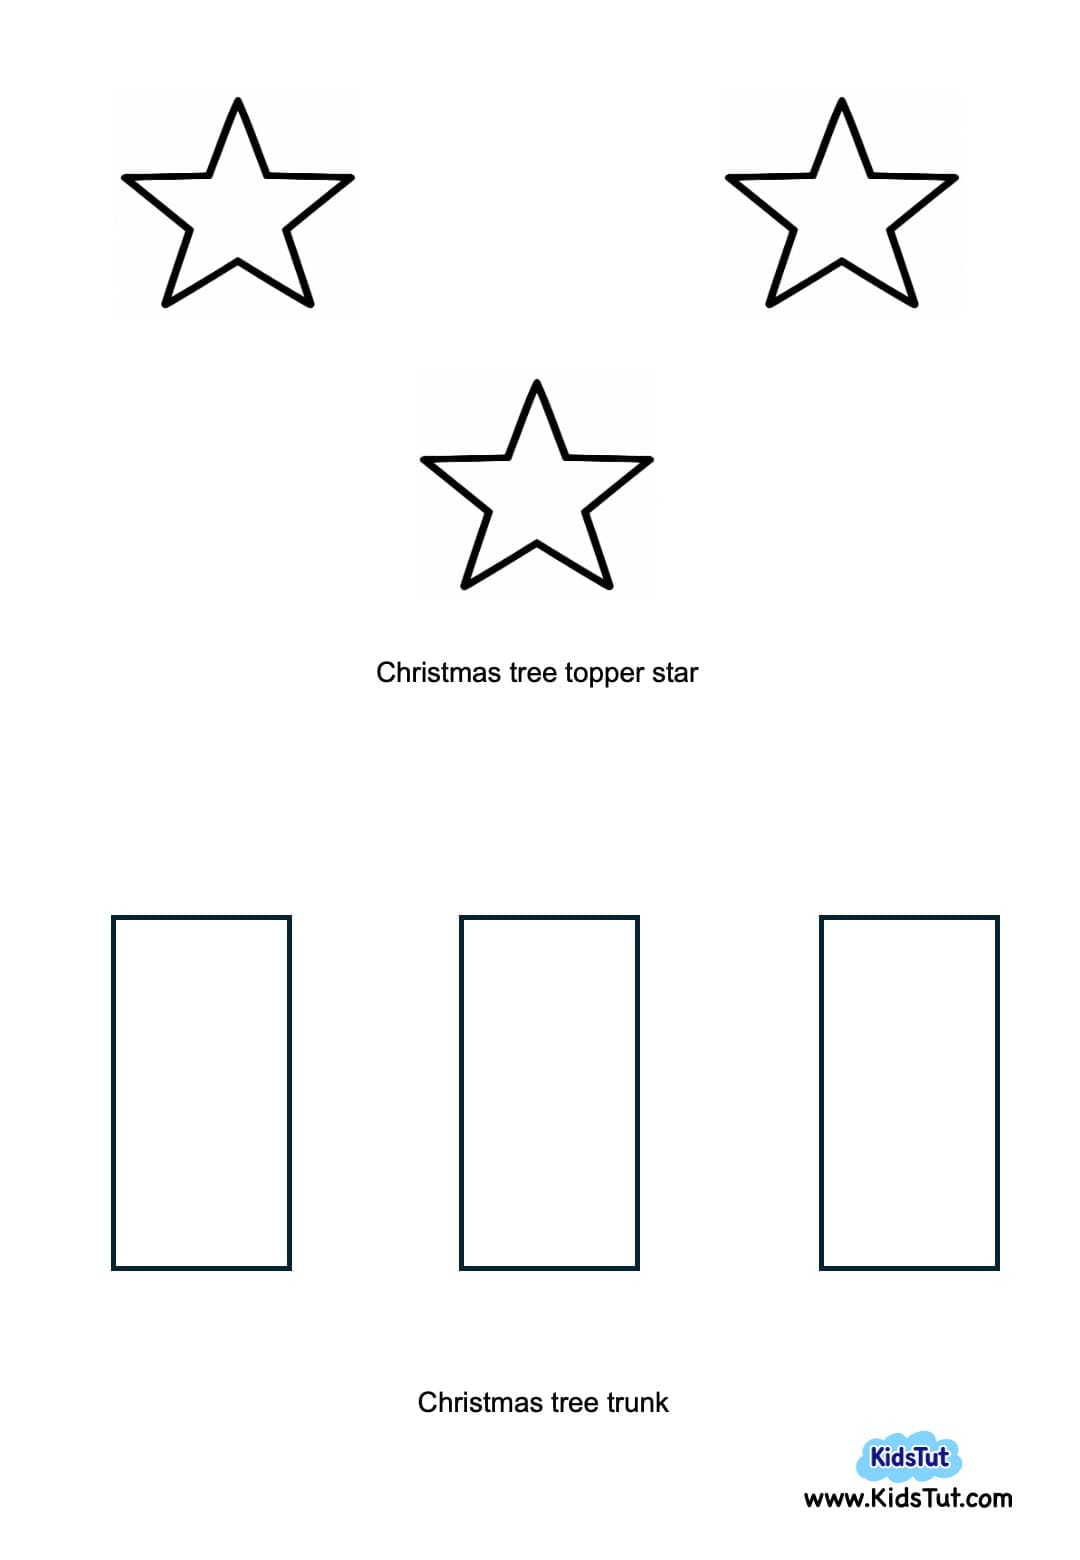
Your beautiful Christmas tree cotton pad craft is ready to display!
2. Snowman Cotton Pad Craft
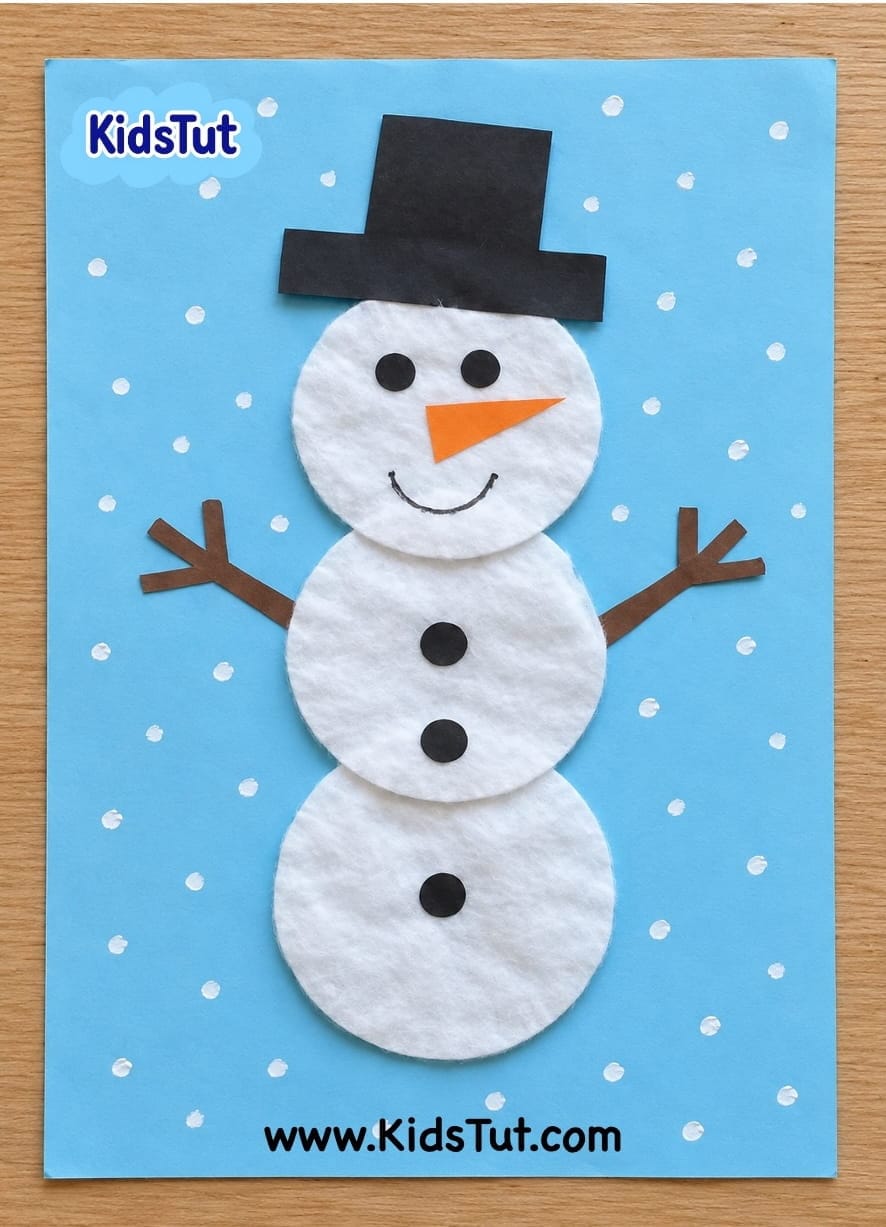
Make a cute snowman using three white cotton pads and simple paper cutouts.
How to Make
- Step 1: Take a light-colored A4 sheet and place it on your table.
- Step 2: Prepare three white cotton pads. You do not need to paint them because their natural white color is perfect for making a snowman.
- Step 3: Arrange the three cotton pads vertically in the middle of the background sheet, placing one below another to create the snowman's head and body.
- Step 4: Apply glue to the back of each cotton pad and paste them onto the paper.
- Step 5: Print the snowman hat, arms, carrot nose, and button templates. Color the pieces if needed, then cut them out.
- Step 6: Glue the hat cutout to the top of the first cotton pad.
- Step 7: Paste the orange carrot nose in the middle of the face.
- Step 8: Use a black marker to draw the snowman's eyes and mouth around the nose. You can also use printable eye cutouts instead.
- Step 9: Draw black buttons on the two lower cotton pads or paste the printed button cutouts.
- Step 10: Attach the brown arm cutouts to both sides of the middle cotton pad.
- Step 11: Dip a cotton swab into white paint and gently make small snow dots around the snowman on the background sheet.
- Step 12: Keep the craft aside and let everything dry completely.
Template:
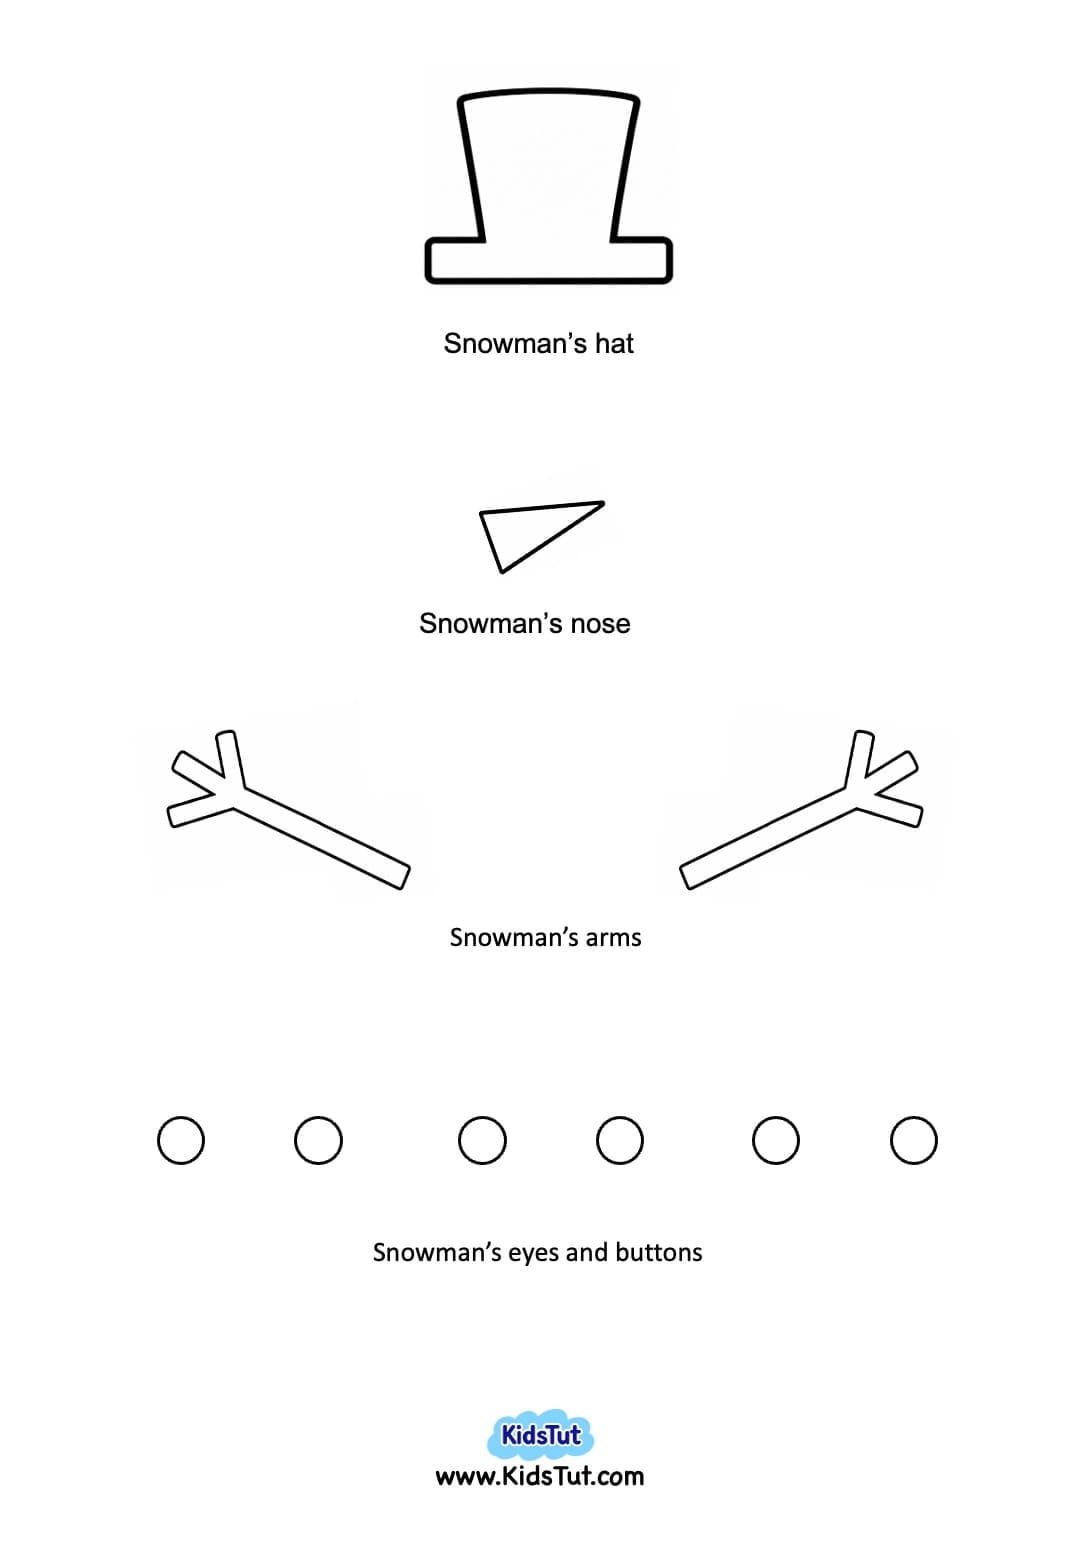
Your adorable snowman cotton pad craft is ready!
3. Christmas Wreath Cotton Pad Craft
This colorful Christmas wreath craft is made by arranging painted cotton pads into a circular shape.
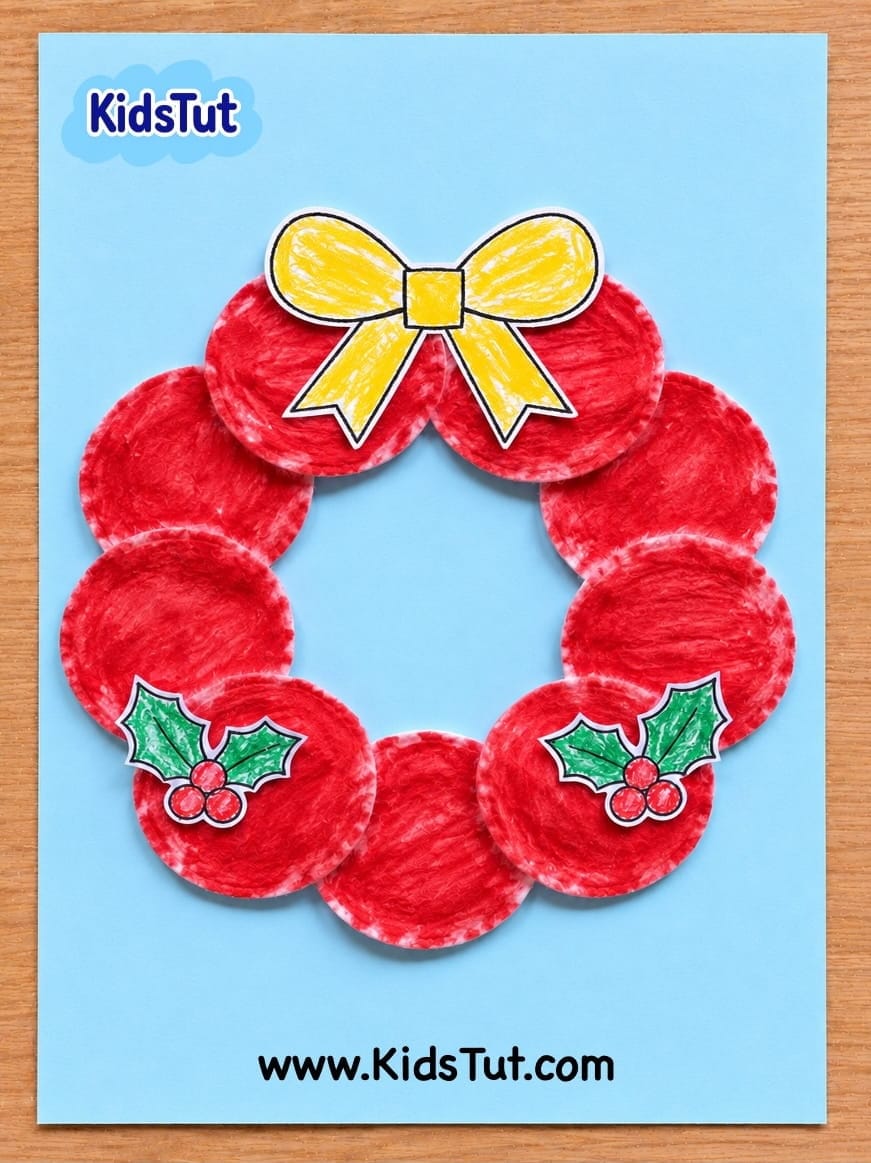
How to Make
- Step 1: Prepare several red painted cotton pads and let them dry completely.
- Step 2: Take a light colored A4 sheet and use it as your background.
- Step 3: Arrange the red cotton pads in a circular shape in the middle of the paper, leaving an empty space in the center to create a wreath.
- Step 4: Once you are happy with the arrangement, glue the cotton pads onto the background sheet.
- Step 5: Print the Christmas bow, holly leaves, and berry templates.
- Step 6: Color the pieces if needed, then carefully cut them out along their outside outlines.
- Step 7: Glue the bow cutout to the top or bottom of the wreath.
- Step 8: Arrange the holly leaves and berries around the wreath and paste them in matching places.
- Step 9: Decorate the background with small paper stars, stickers, or other Christmas decorations if you like.
- Step 10: Let the glue dry completely before displaying your craft.
Template:
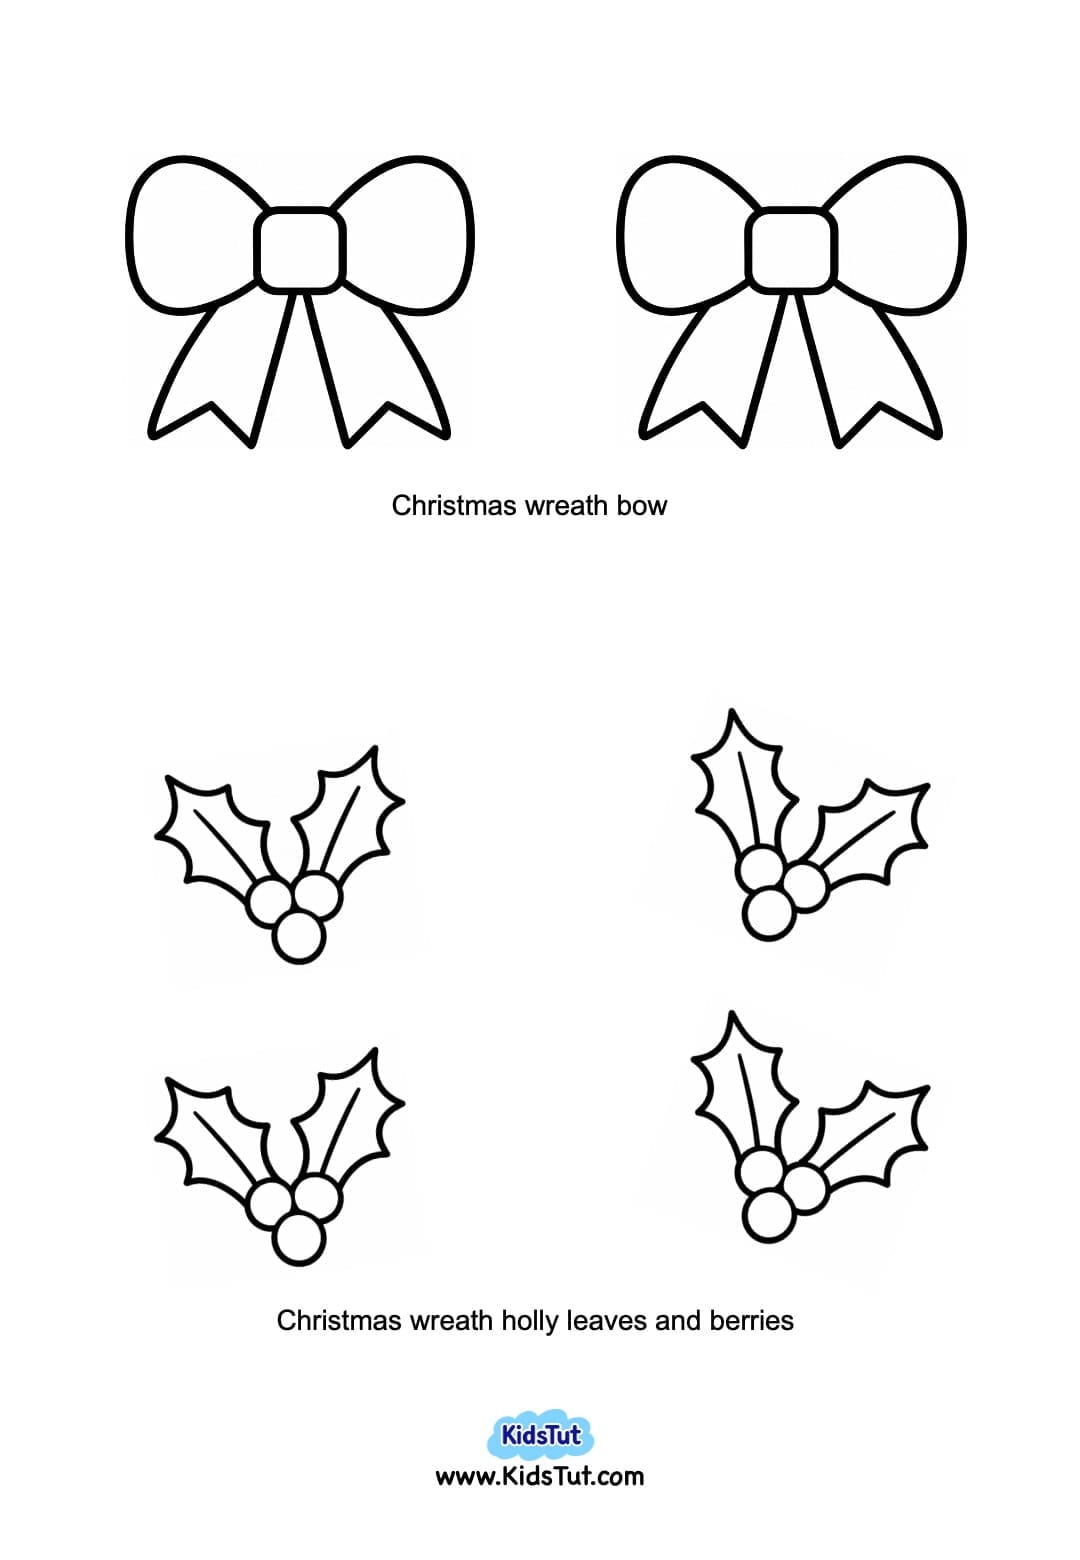
Your beautiful Christmas wreath cotton pad craft is ready!
4. Christmas Bauble Cotton Pad Craft
Create a colorful Christmas ornament scene using painted cotton pads and a simple printable background.
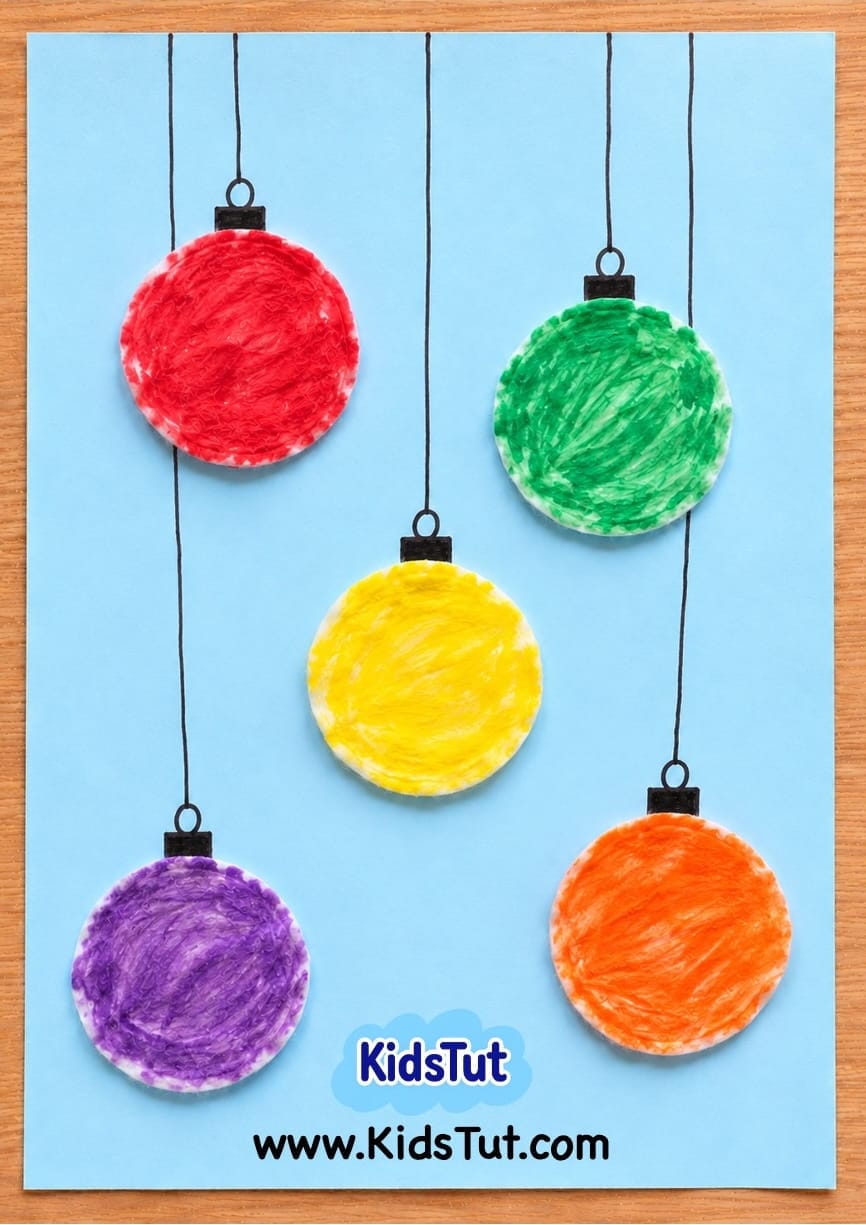
How to Make
- Step 1: Paint several cotton pads using different bright colors, such as red, green, yellow, purple, orange, and blue.
- Step 2: Keep the painted cotton pads aside until they are completely dry.
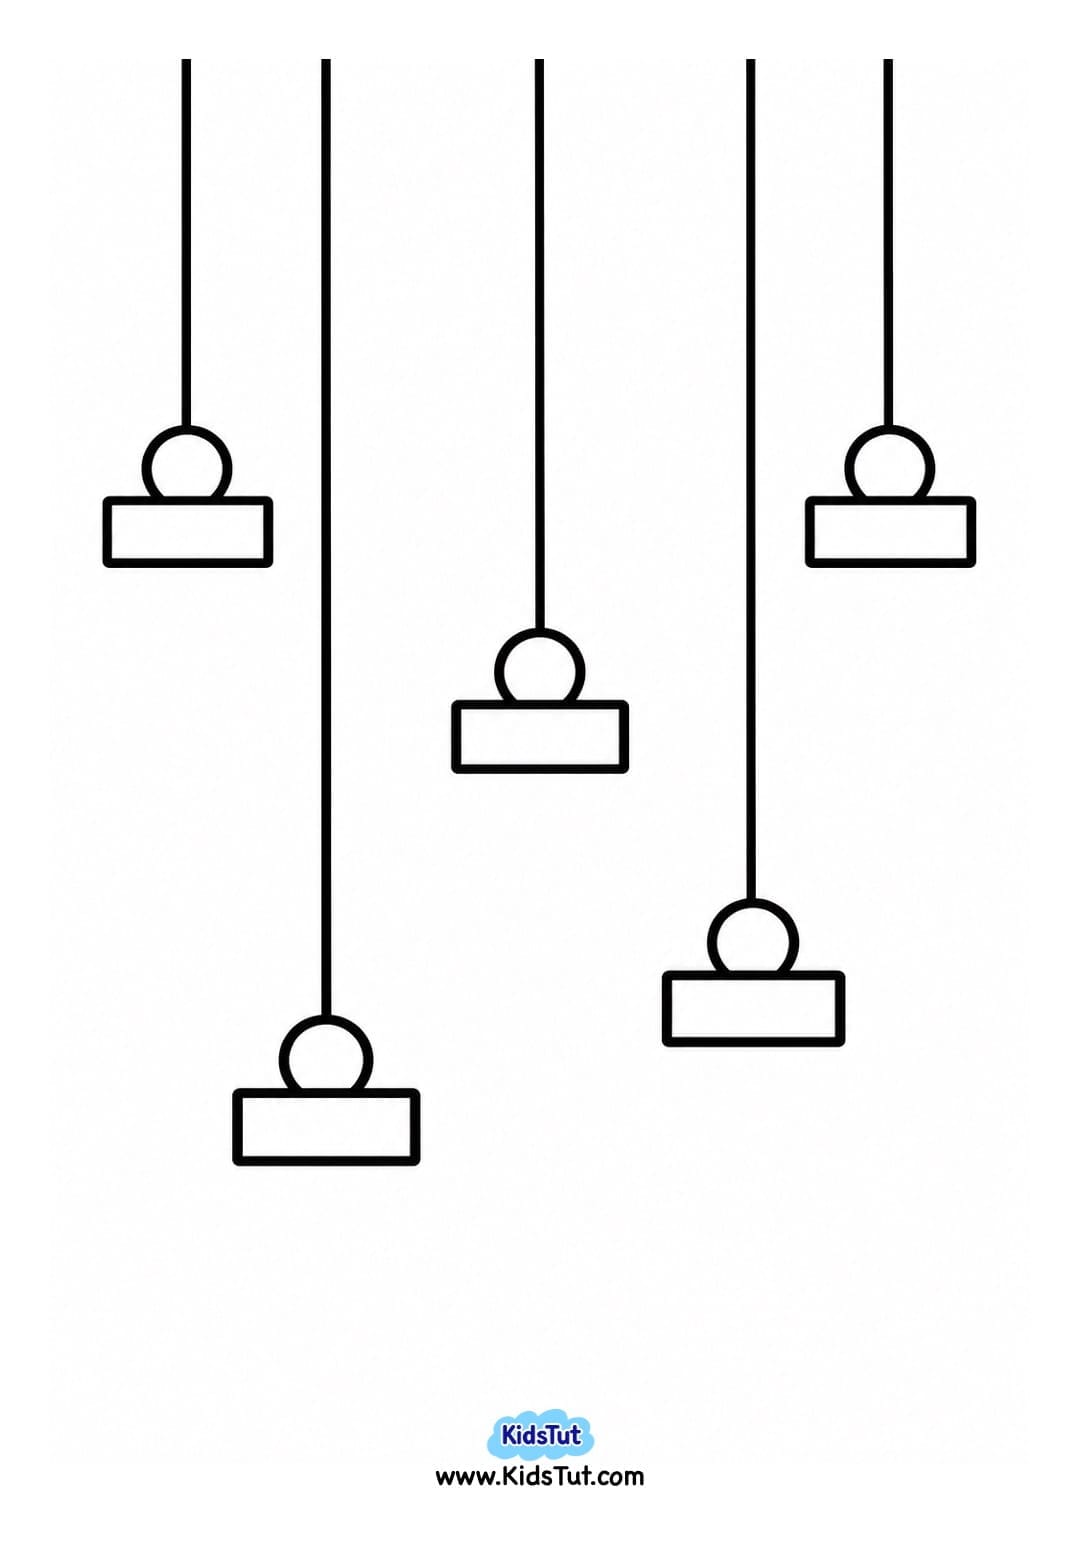
- Step 3: Print the provided Christmas bauble background template onto a light-colored sheet.
- Alternatively, you can use a plain sheet and draw the hanging strings and bauble caps yourself using a black marker.
- Step 4: Take your dry colored cotton pads and arrange them below the hanging bauble caps.
- Step 5: Make sure each cotton pad is placed in the correct position to look like a hanging Christmas ornament.
- Step 6: Apply glue to the back of each cotton pad and paste it onto the background sheet.
- Step 7: Add extra decorations if you like, such as small stars, snow dots, or colorful stickers.
- Step 8: Keep the craft aside and let the glue dry completely.
Template:
Your colorful Christmas bauble cotton pad craft is ready to display!
5. Santa Claus Cotton Pad Craft
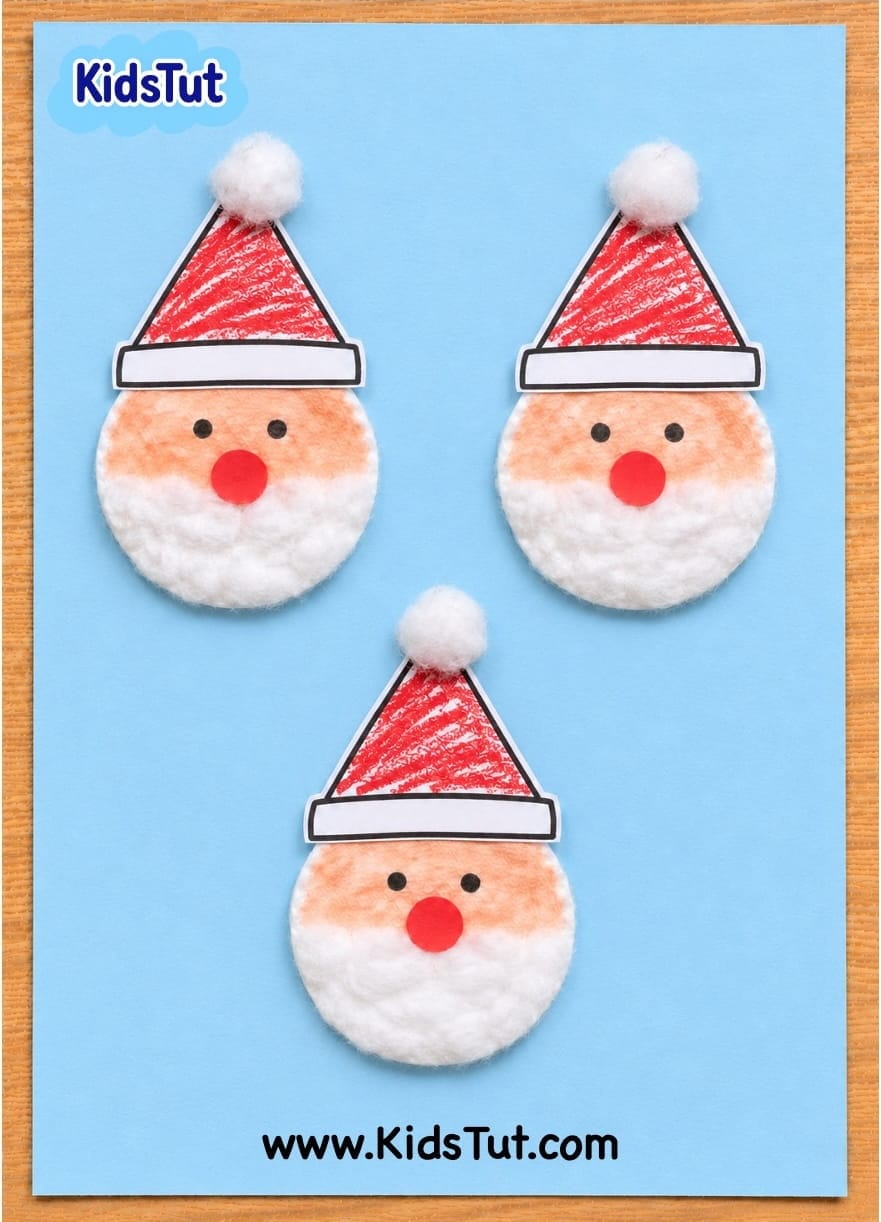
Make three cute Santa Claus faces using cotton pads, paper hats, and simple face details.
How to Make:
- Step 1: Take three white cotton pads.
- Step 2: Use light pink, peach, or light brown paint to color only the upper half of each cotton pad to create Santa's face. Leave the lower half white to make Santa's fluffy beard.
- Step 3: Keep the painted cotton pads aside until they are completely dry.
- Step 4: Take a light-colored A4 sheet and use it as your background.
- Step 5: Arrange the three cotton pads in different places on the sheet, leaving enough space between them.
- Step 6: Glue the cotton pads onto the background sheet.
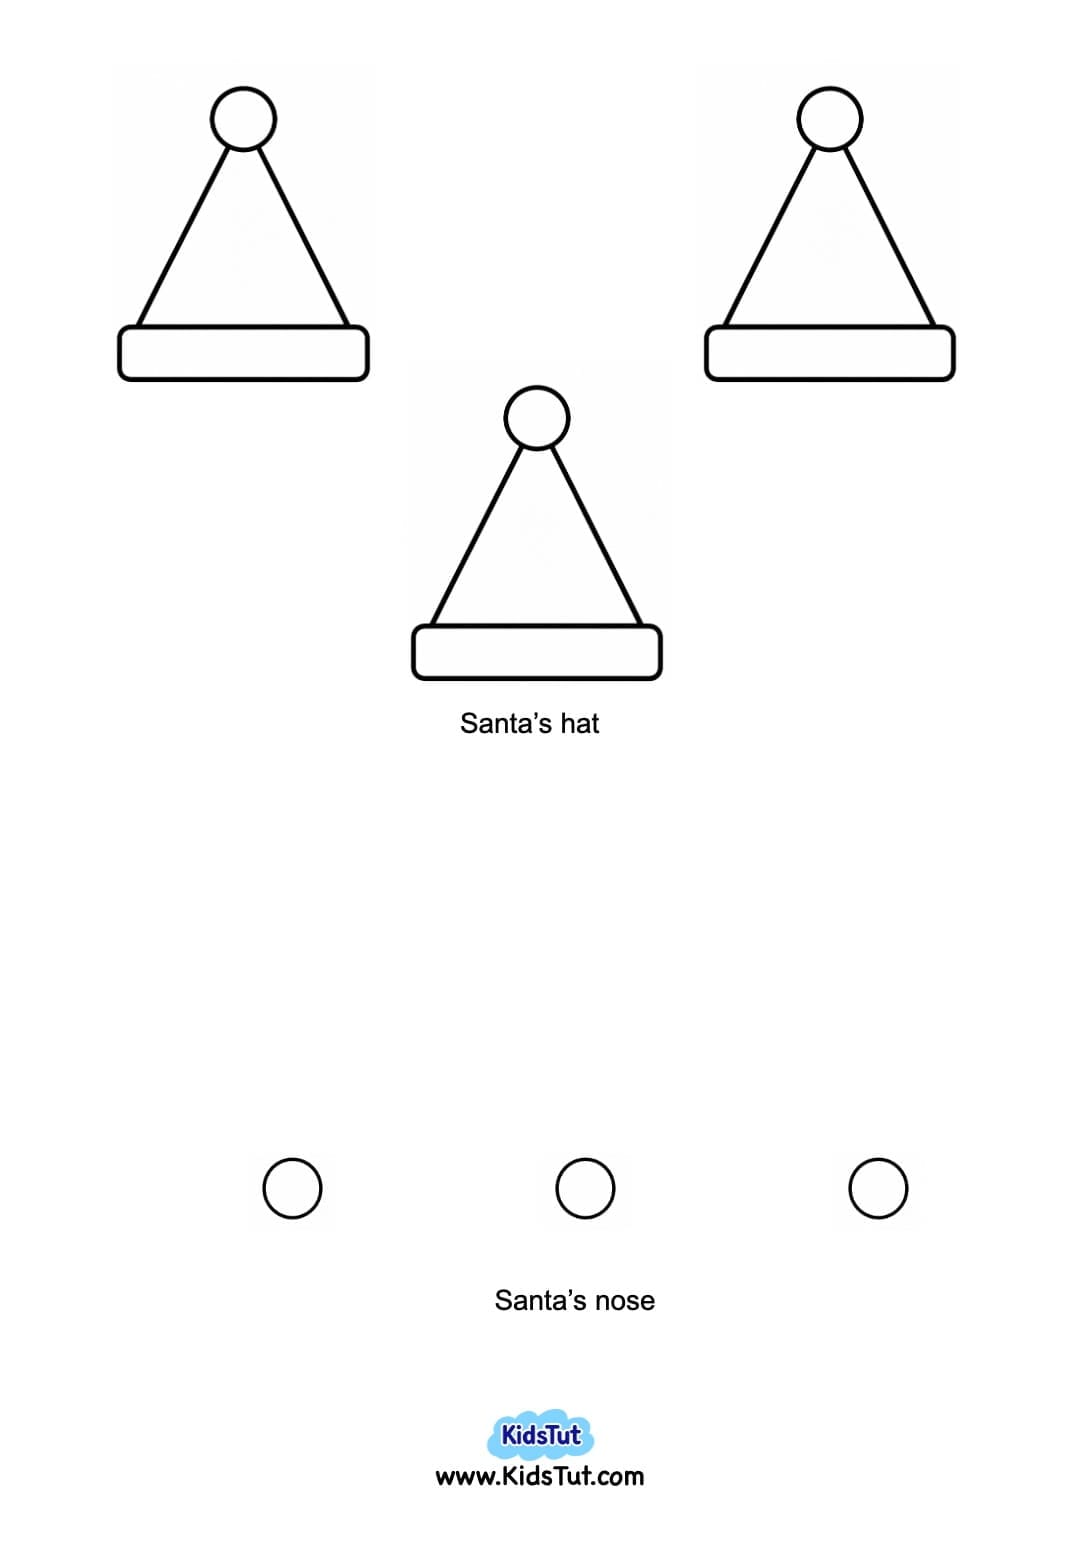
- Step 7: Print the Santa hat and nose templates. Color the pieces if needed, then carefully cut them out.
- Step 8: Glue one Santa hat to the top of each cotton pad.
- Step 9: Attach one nose cutout to the middle of each Santa face, just above the white beard area.
- Step 10: Use a black marker to draw two small eyes on each Santa face.
- Step 11: Add extra Christmas decorations around the Santa faces if you like.
- Step 12: Keep the craft aside and let the glue dry completely.
Template:
Now your three cute Santa Claus cotton pad faces are ready!
6. Reindeer Cotton Pad Craft
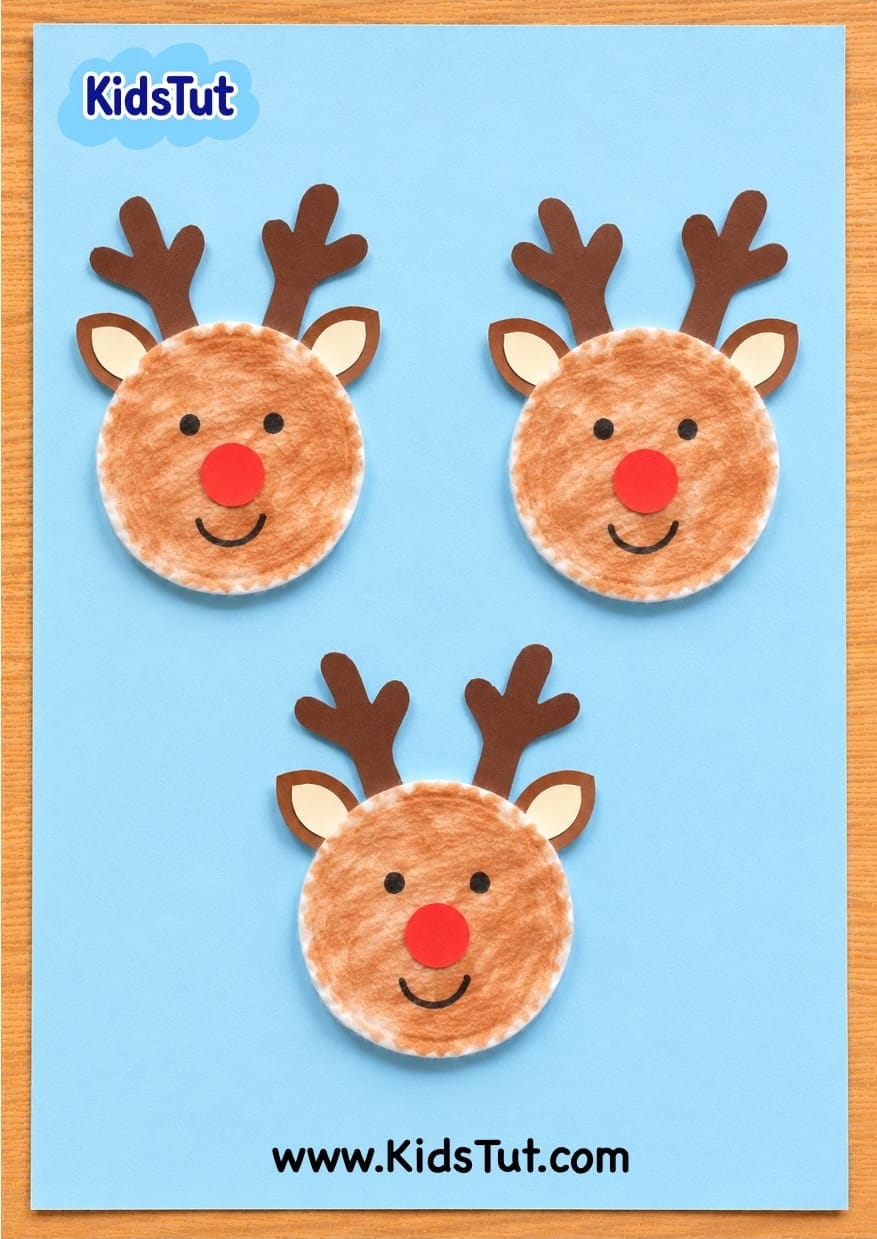
This easy reindeer craft uses brown painted cotton pads and simple printable reindeer face parts.
How to Make
- Step 1: Take three round cotton pads and paint them brown using diluted acrylic paint.
- Step 2: Keep the painted cotton pads aside until they are completely dry.
- Step 3: Take a light-colored A4 sheet and place it on your table.
- Step 4: Arrange the three brown cotton pads in different places on the sheet to create three reindeer faces.
- Step 5: Apply glue to the back of each cotton pad and paste them onto the background.
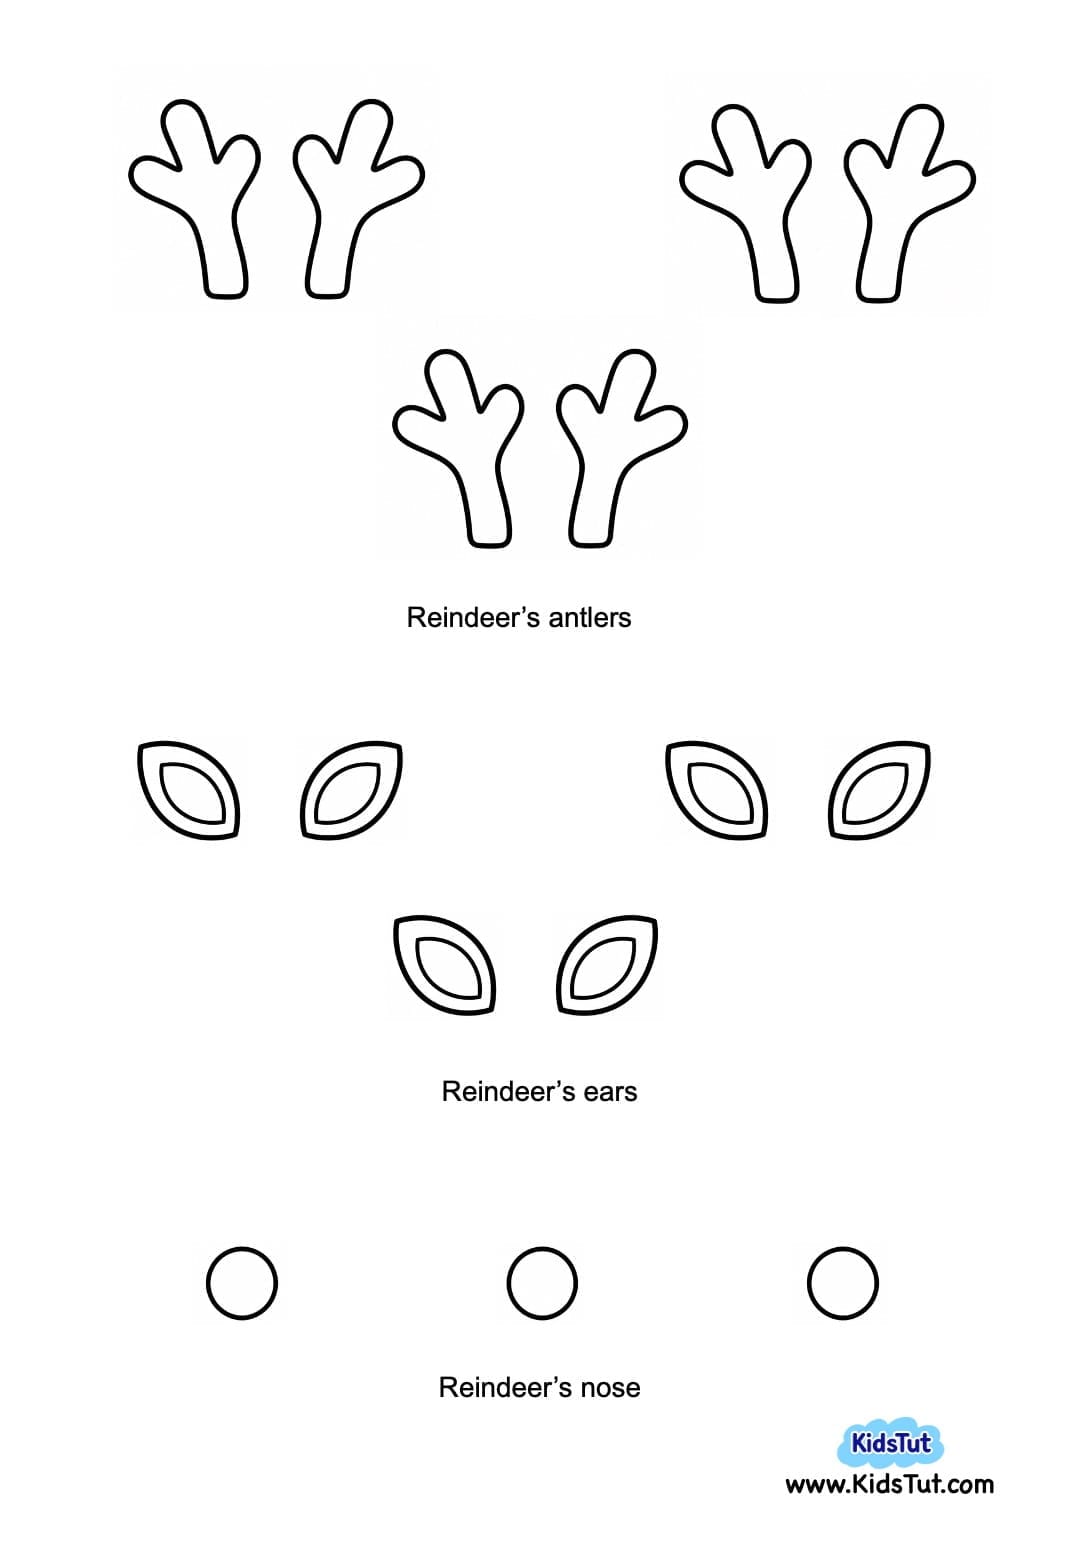
- Step 6: Print the reindeer ears, antlers, and nose templates.
- Step 7: Color the pieces if needed, then carefully cut them out along their outside outlines.
- Step 8: Glue the antlers and ears to the top of each reindeer face.
- Step 9: Attach the nose cutouts to the lower middle part of each cotton pad. You can use red noses for a Rudolph-inspired look or black noses for regular reindeer.
- Step 10: Use a black marker to draw the eyes and mouth on each reindeer.
- Step 11: Decorate the background with colorful stars, snow dots, or other Christmas decorations if you like.
- Step 12: Keep the craft aside and let the glue dry completely.
Template:
Your adorable reindeer cotton pad craft is ready!
Benefits of Christmas Cotton Pad Crafts for Kids
These simple Christmas cotton pad activities are not only fun but also help children develop important early learning skills.
- Encourages creativity – Children can choose different colors, Christmas characters, and decorations to make their own unique crafts.
- Develops fine motor skills – Painting cotton pads, cutting paper shapes, and gluing small pieces help strengthen little hands and fingers.
- Improves hand-eye coordination – Kids practice carefully arranging cotton pads and placing decorations in the correct positions.
- Teaches color recognition – Children explore different colors while painting cotton pads and choosing matching paper cutouts.
- Introduces shapes and patterns – Arranging round cotton pads into trees, wreaths, and snowmen helps children understand shapes and simple patterns.
- Develops planning and problem-solving skills – Children learn how to arrange different craft pieces before gluing them together.
- Improves cutting skills – Cutting printable Christmas templates helps children practice using scissors.
- Encourages sensory exploration – Children can explore the soft texture of cotton pads and see how they absorb paint.
- Introduces Christmas themes – Kids become familiar with Christmas trees, snowmen, wreaths, baubles, Santa Claus, and reindeer.
- Encourages teamwork – These activities are great for group crafting, sharing supplies, and helping friends.
- Builds confidence – Children feel proud when they complete and display their handmade Christmas crafts.
Fun Ways to Display Your Christmas Cotton Pad Crafts
Once the crafts are completely dry, you can display them in different ways.
- Classroom Wall Display: Arrange all the finished Christmas cotton pad crafts together to create a colorful holiday wall.
- Christmas Bulletin Board: Use the crafts to decorate a classroom Christmas bulletin board.
- Holiday Art Gallery: Display different Christmas designs and let children enjoy each other's artwork.
- Christmas Cards: Make smaller versions of the crafts and use them to decorate handmade Christmas greeting cards.
- Home Decorations: Hang the finished artwork on a wall or display it near your Christmas tree.

Click here to get the FREE PDF template: Download (Printable)