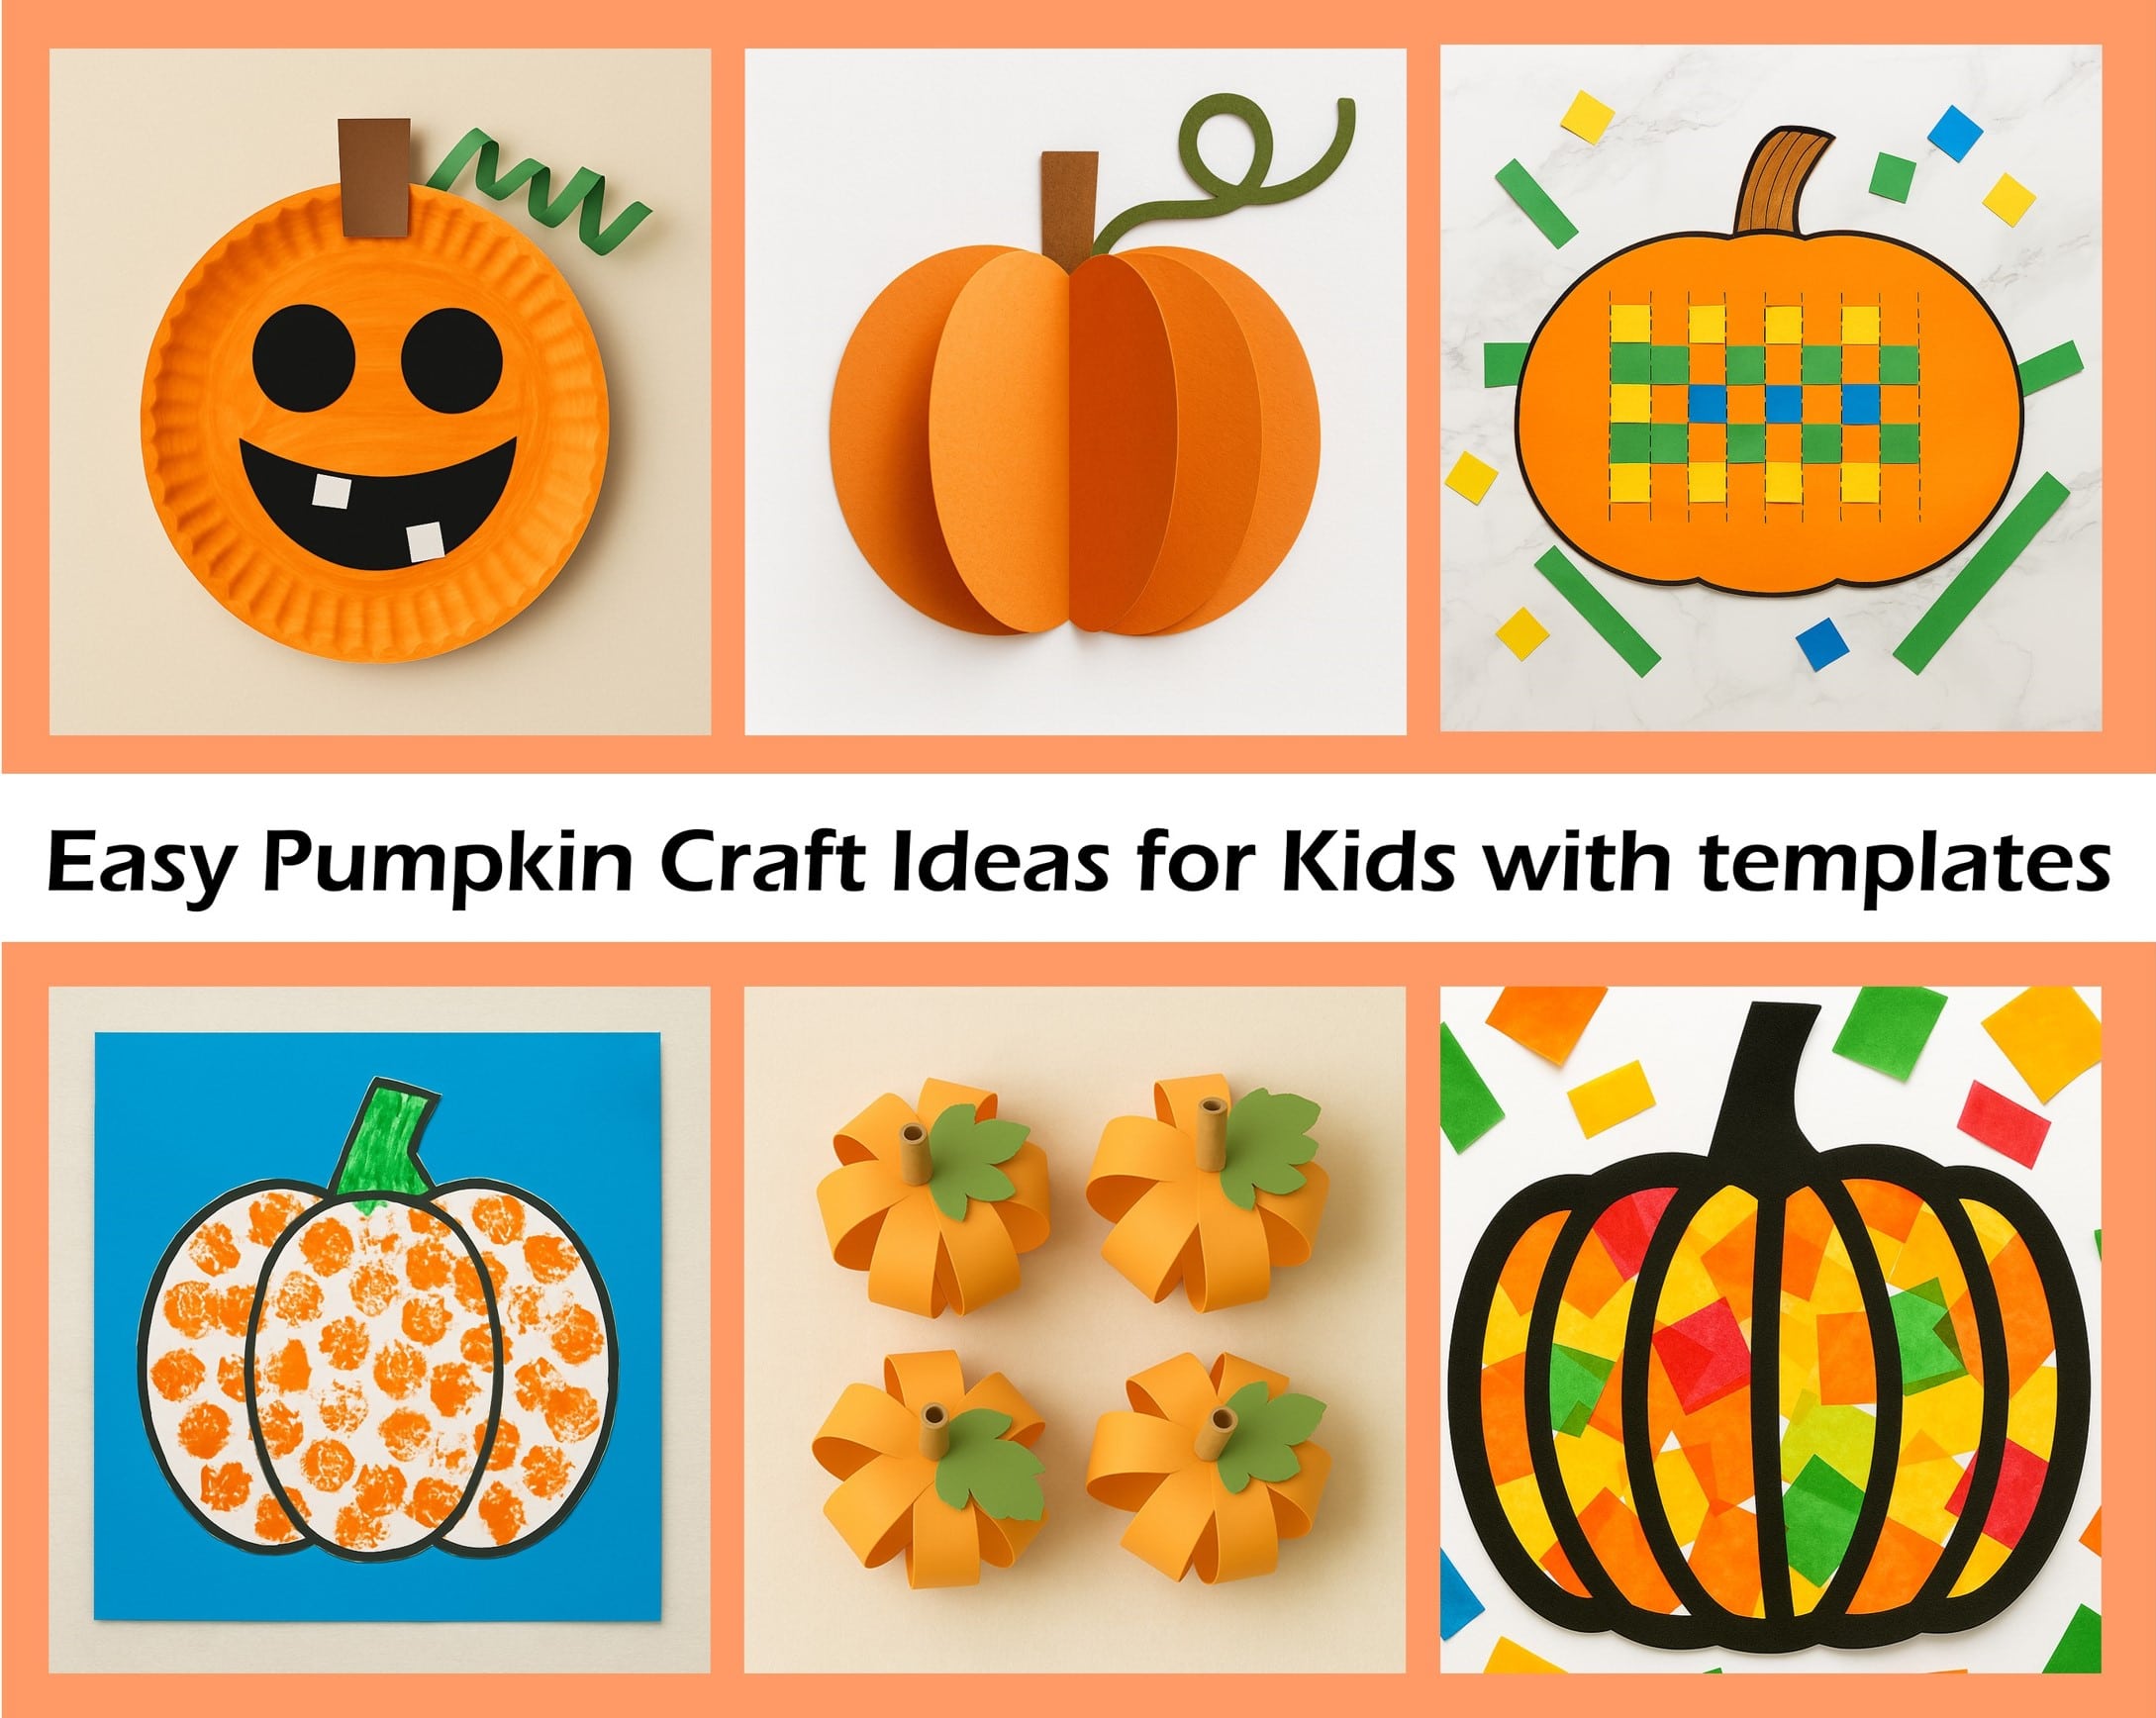
Welcome you all to happy crafting! Let’s have fun with these exciting pumpkin crafts. So you can enjoy this fall season with pumpkin craft ideas. Go through these simple craft ideas that are very easy to make. So, even little kids can have fun with these craft ideas. So let’s do these creations together, one by one.
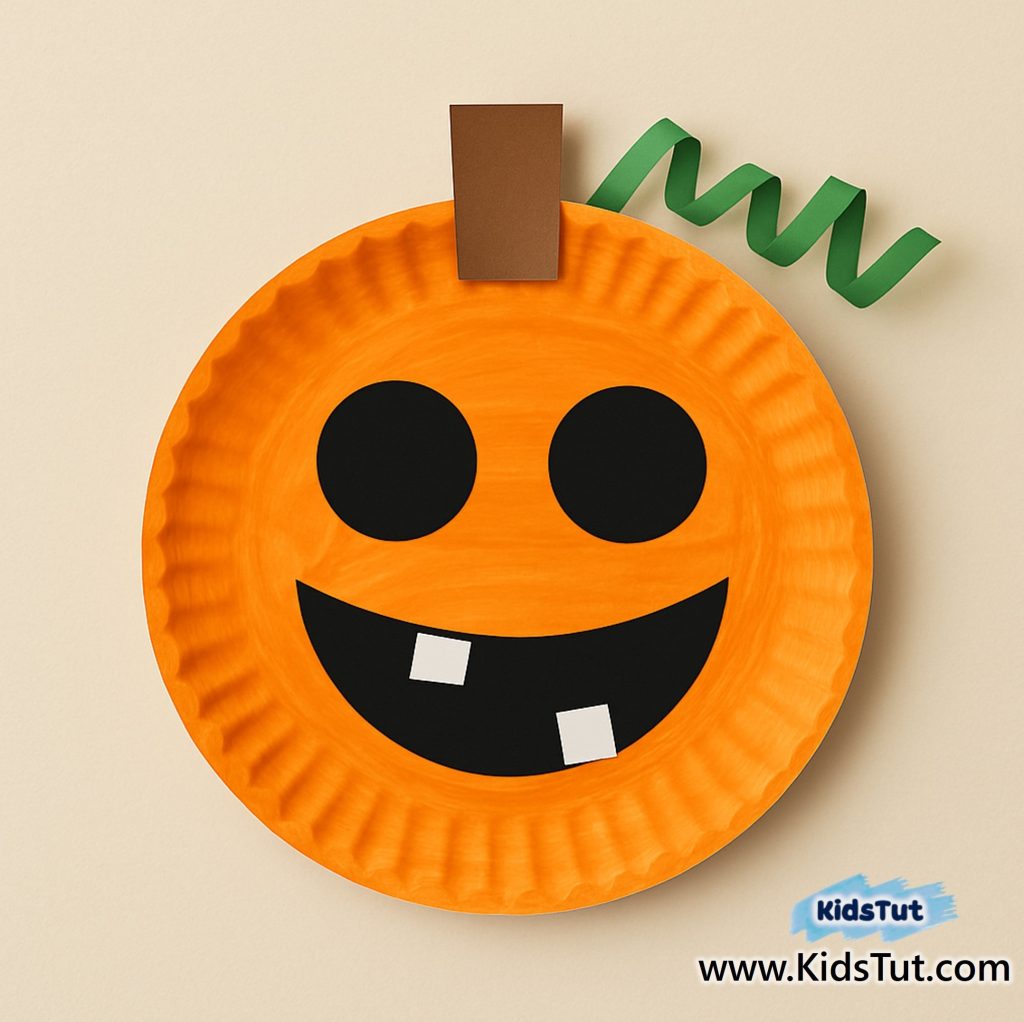
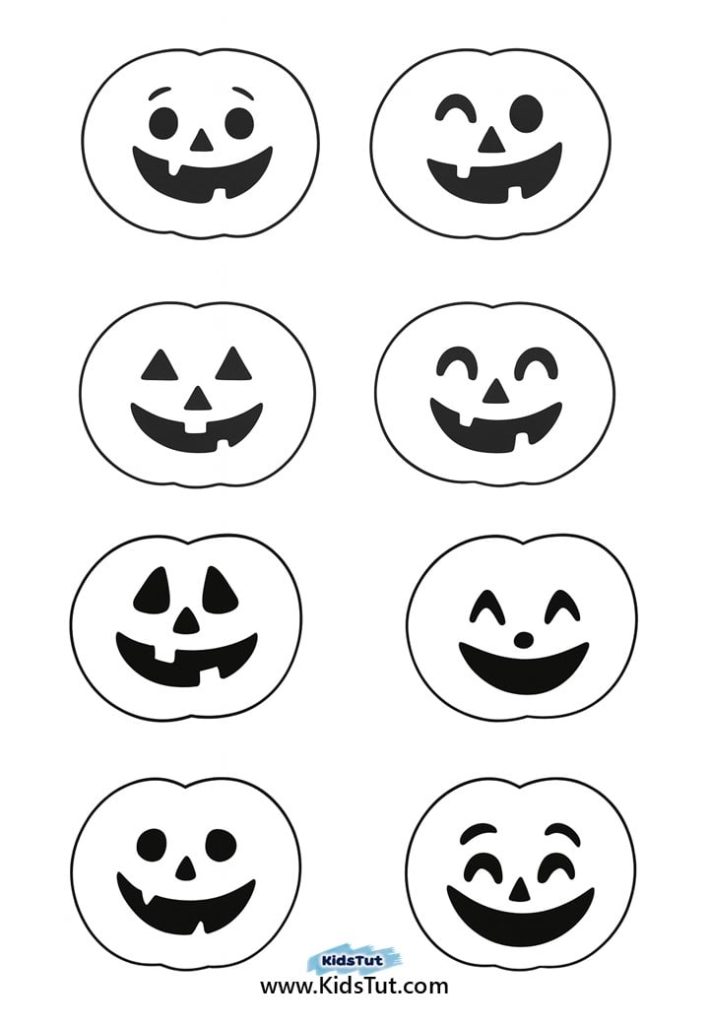
01. Paper Plate Pumpkin Face Craft
What do you need:
Paper plate (orange color / white color)
Orange color paint (for coloring the paper plate)
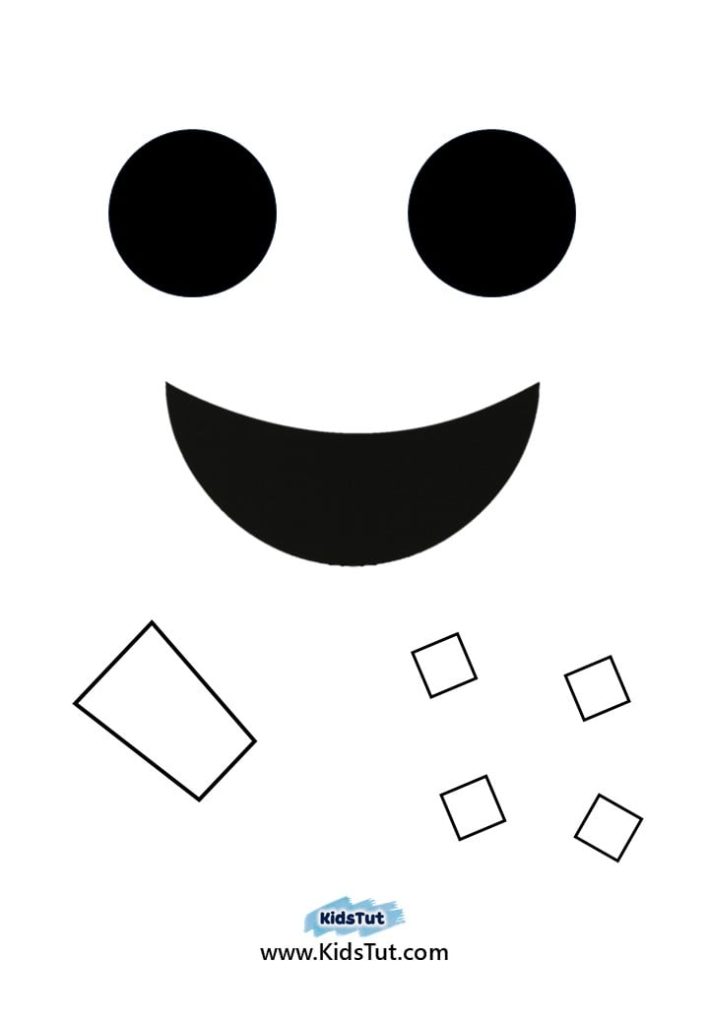
Printed templates (eyes/mouth/teeth and stem)
Brown color marker/crayon (for coloring the stem)
Green colored paper (for cutting the small vine)
Templates:
How to make:
Step 01: Take the paper plate. You can choose an orange-colored one or a white-colored paper plate.
Step 02: If you use the white color paper plate, apply orange paint or crayons to color the entire plate.
Step 03: Print the given templates.
Step 04: Cut out the eyes, mouth, teeth, and stem separately from the template.
Step 05: Color the stem image with brown and paste it on top of the paper plate.
Step 06: Then paste the eyes, mouth, and teeth on the paper plate.
Step 07: Take green-colored paper and cut a strip. Curl it by wrapping it around a pencil. Next, paste this curled vine behind the stem.
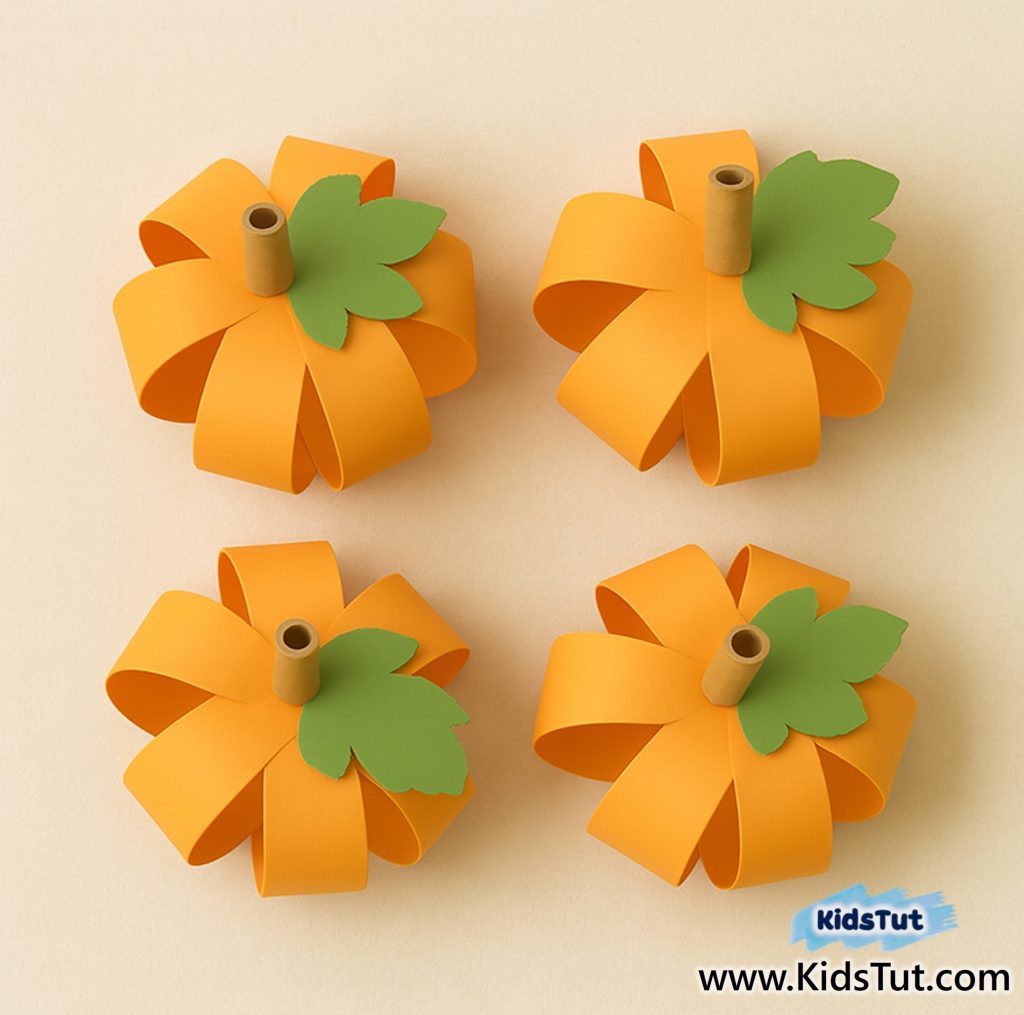
02. Paper Strip Pumpkin Craft
What do you need:
Orange, green, and brown colored papers
Glue
Scissors
Templates:
How to make:
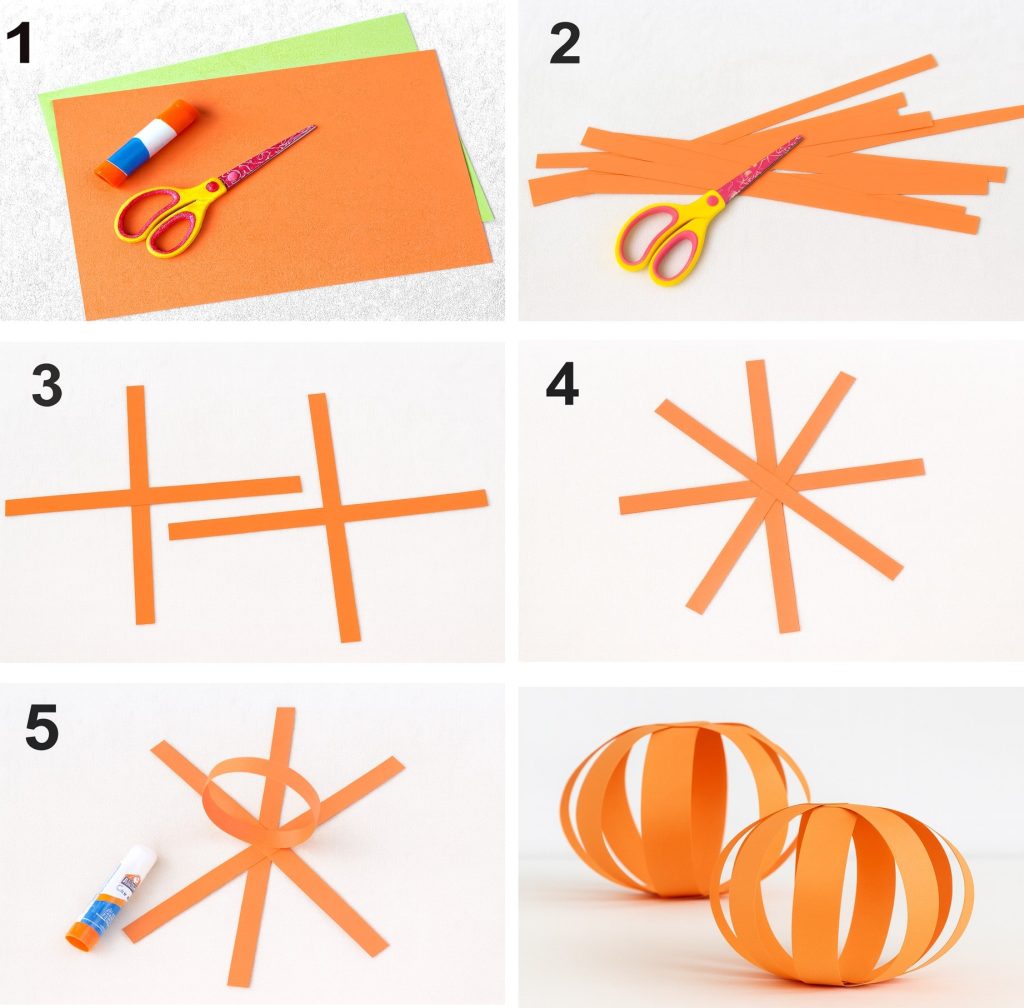
Step 01: Take the printed template on the orange colored sheet.
Step 02: Cut out the paper strips given there separately.
Step 03: Take one strip and keep it horizontally on the table. Next, get another strip and keep it vertically on the other strip. Now glue them at the touched middle point.
Step 04: Now take the other strips, keep them together like a star shape, and apply glue on the middle point.
Step 05: Now take the free strip areas up and glue them to make a ball shape.
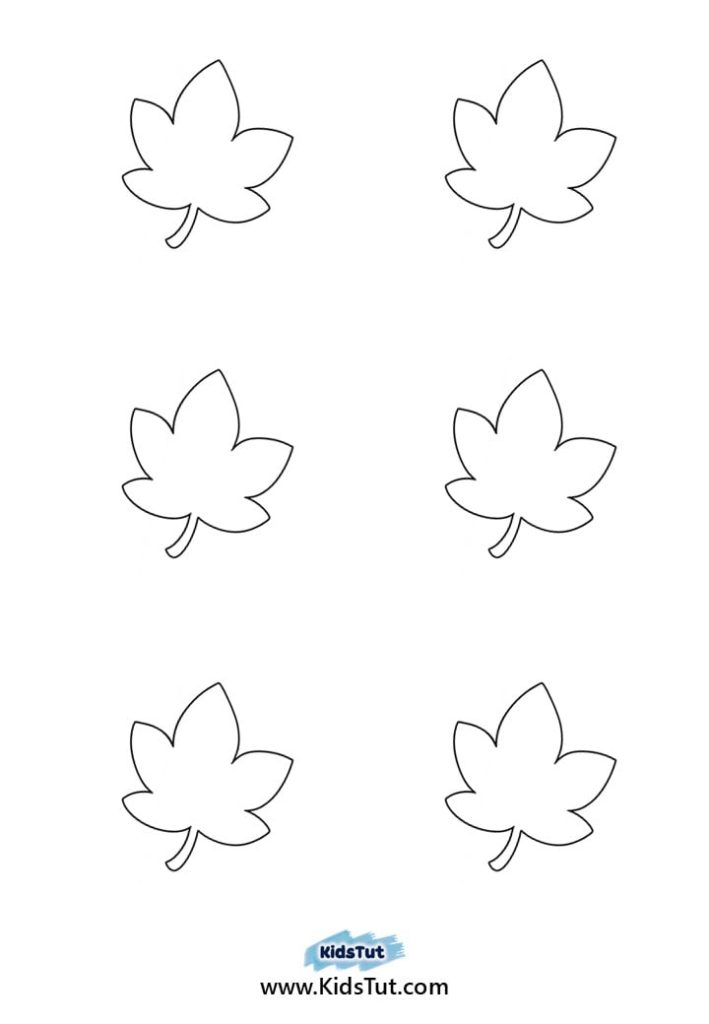
Step 06: Finish this pumpkin image by attaching the stem and leaf. Use rolled brown paper for the stem and print and color the leaf for the pumpkin leaf.
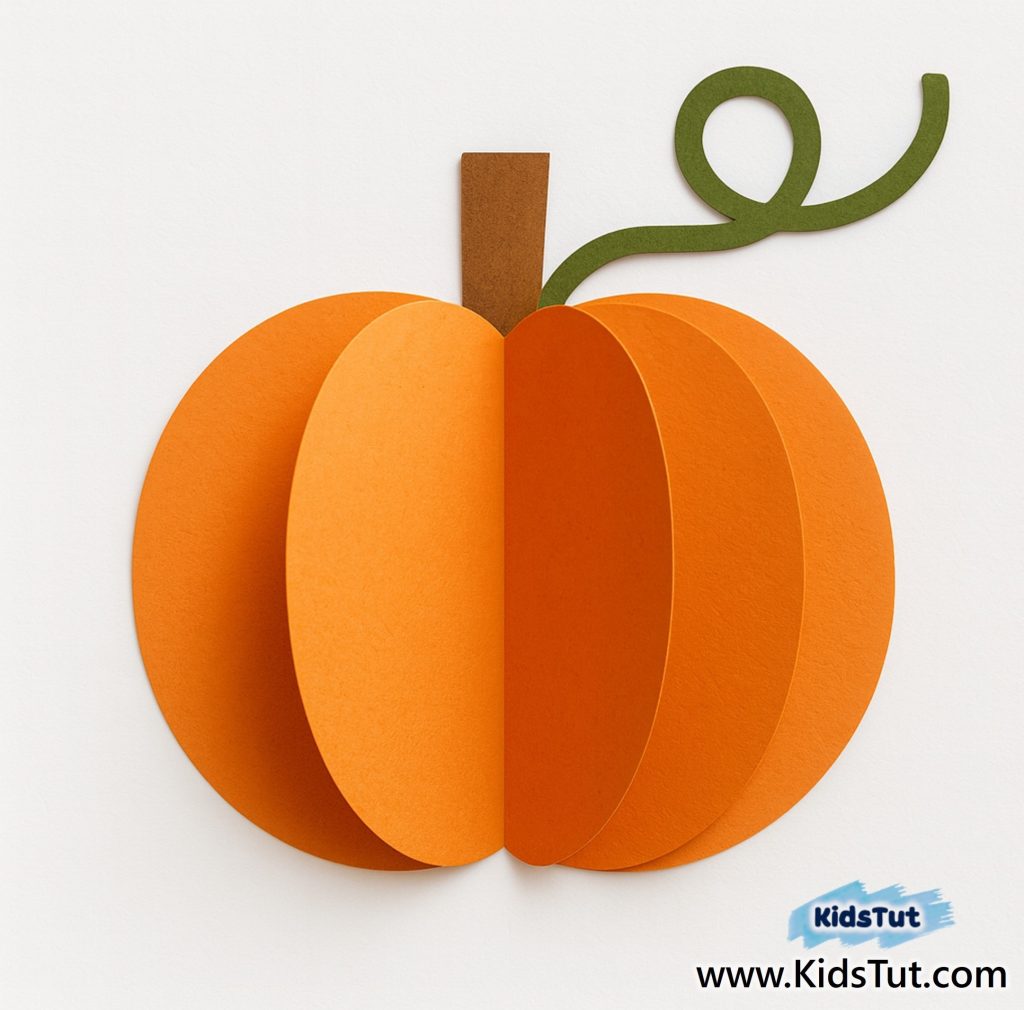
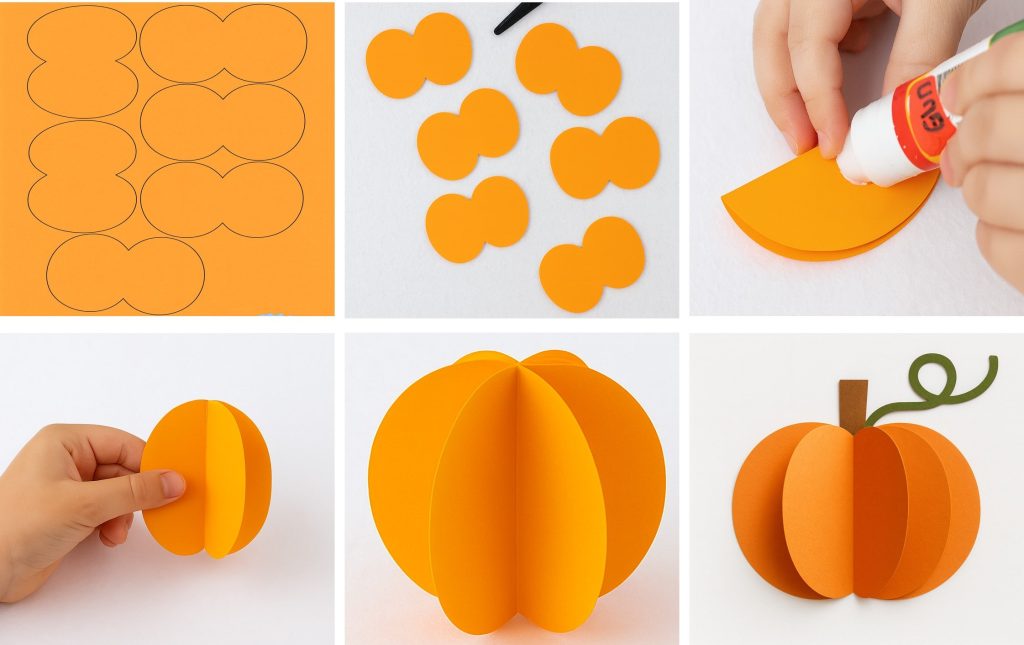
03. Layered Paper Segment Pumpkin Craft
What do you need:
Orange, green, and brown colored papers
Glue
Scissors
Templates:
How to make:
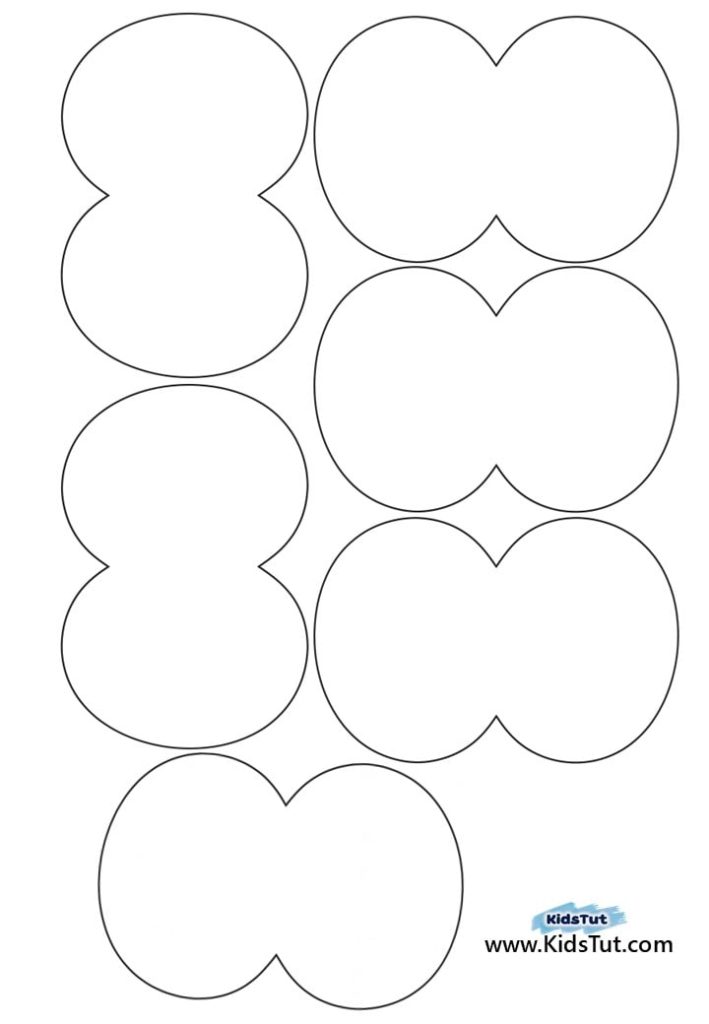
Step 01: Print the given template on an orange sheet.
Step 02: Cut out the given 6 shapes separately.
Step 03: Now fold all 6 shapes vertically and symmetrically.
Step 04: Then get one folded shape and apply glue on one side. Next, get another folded piece and glue one half side to the other one.
Step 05: Get all six shapes and paste them together to make this 3D pumpkin.
Step 06: Finally, cut out the stem in brown color paper and the vine in green color shape.
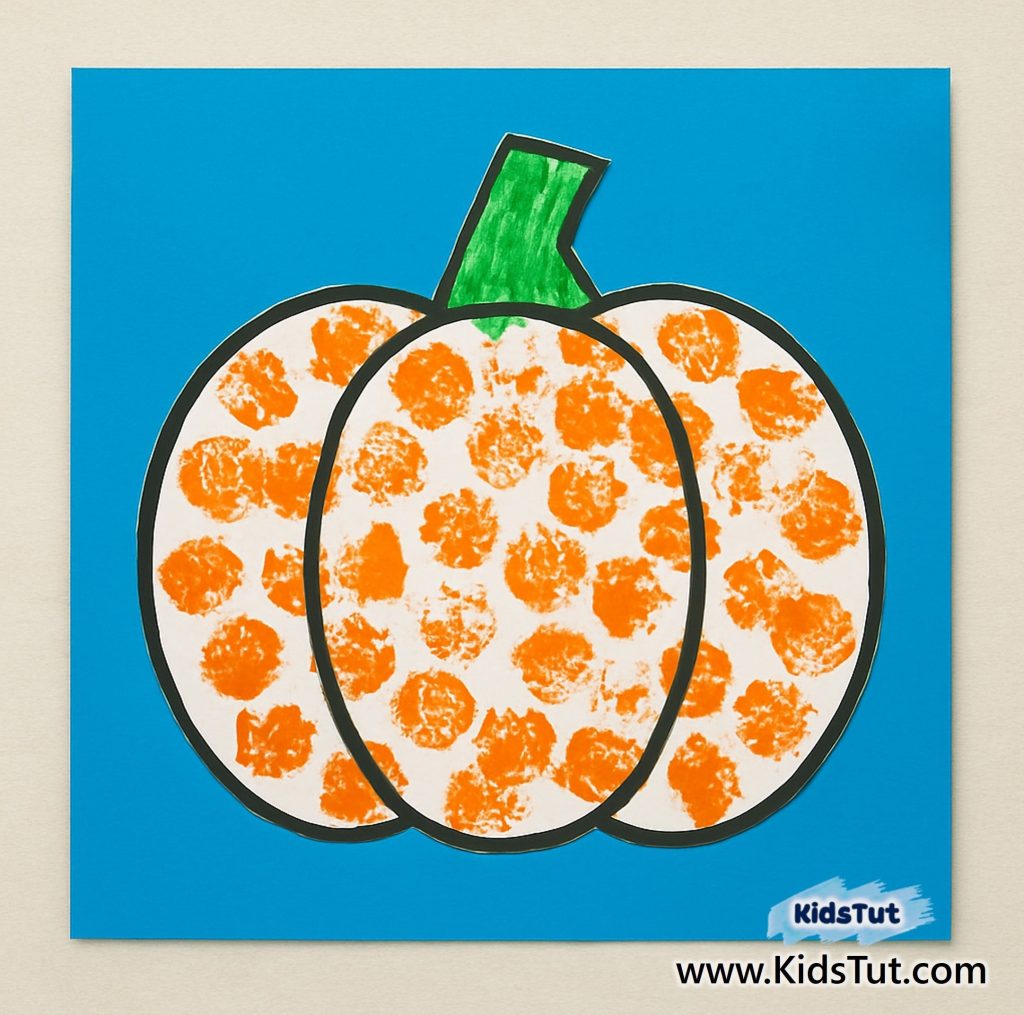
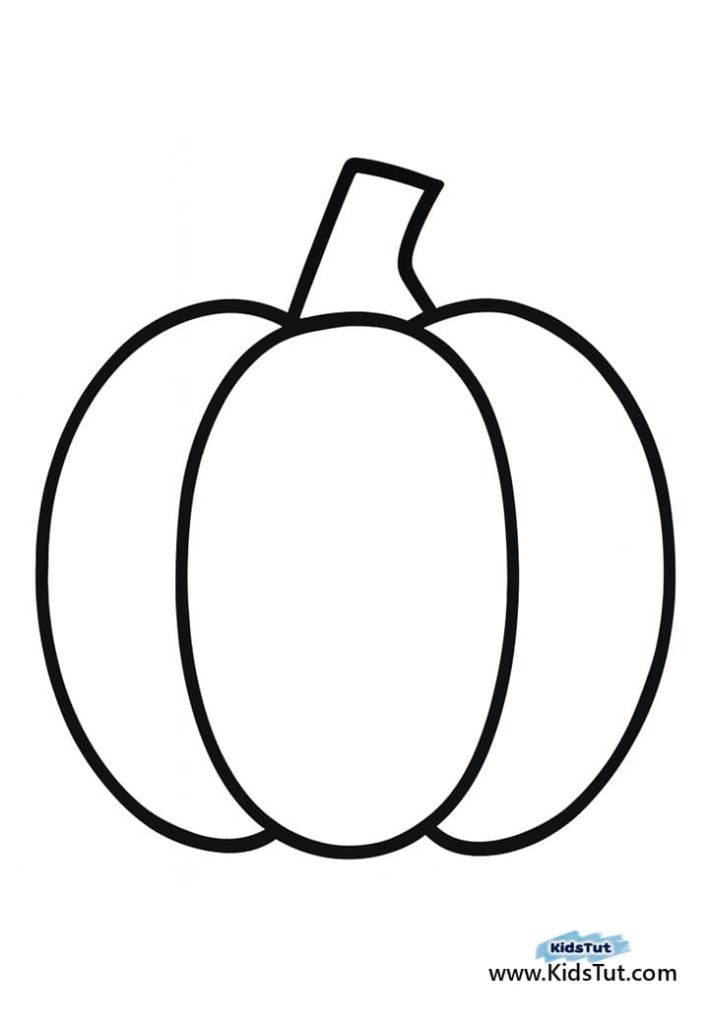
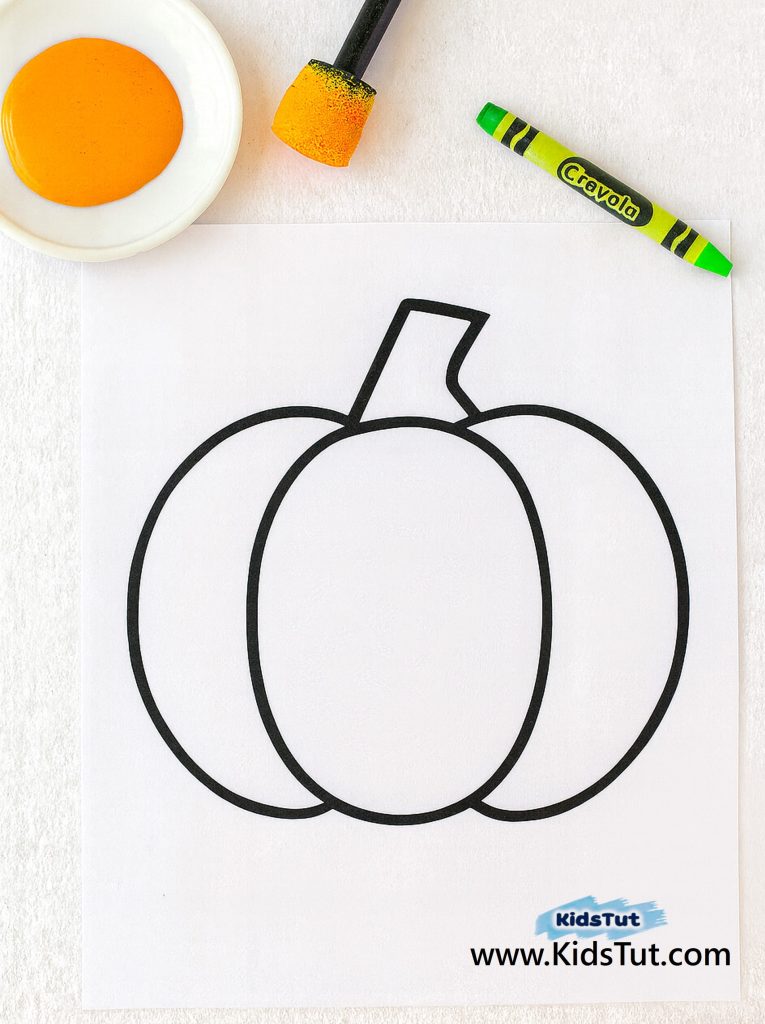
04. Stamped Oval Pumpkin Craft
What do you need:
Printed templates
Orange color paint
Ponge brush/ cotton swab or any kid-friendly stamped material t
Green crayon or marker
Scissors
Templates:
How to make:
Step 01: Print the given template on a white sheet. If you want, you can cut it out and paste it on colored paper.
Step 02: Next, color the Stem with green color.
Step 03: now take the orange color paint and the tool to put a stamp, like a cotton swab or sponge.
Step 04: Then dip the tool into paint and put the orange stamp on the pumpkin shape.
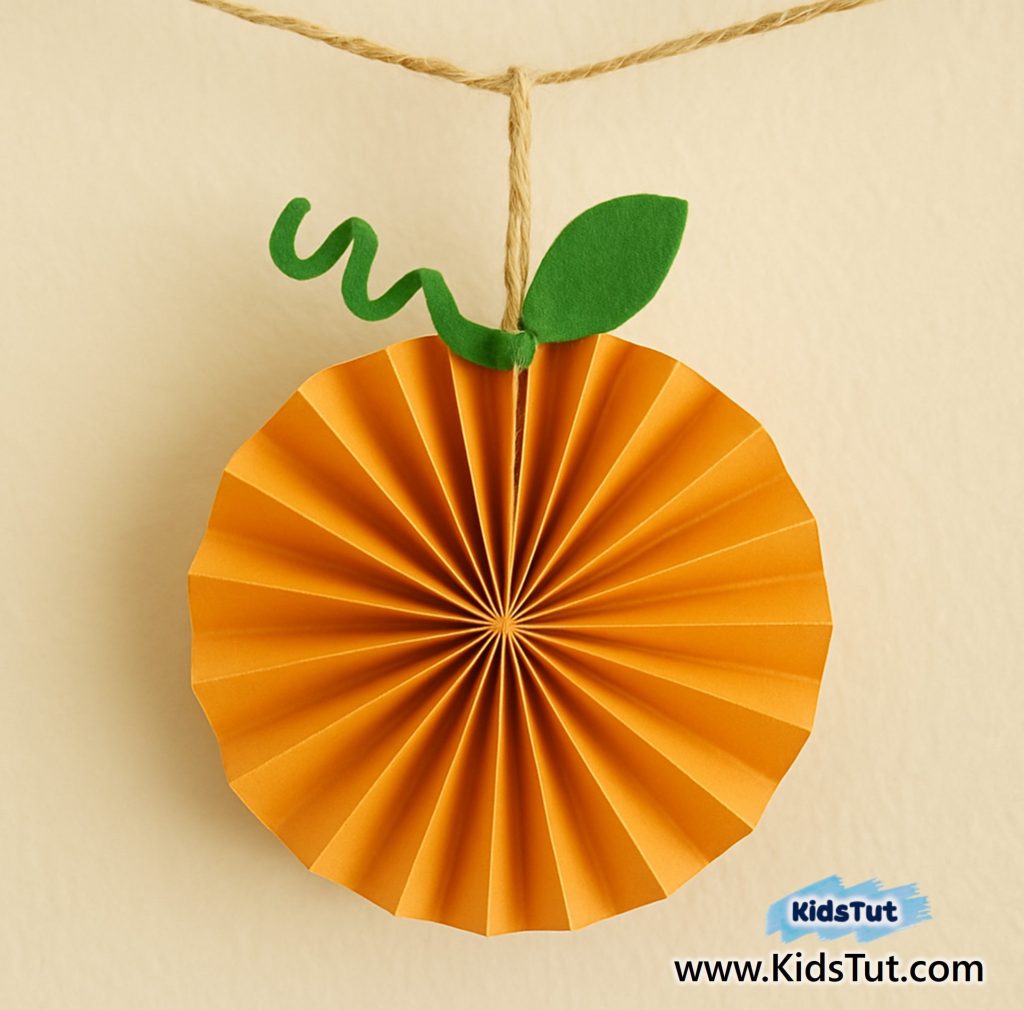
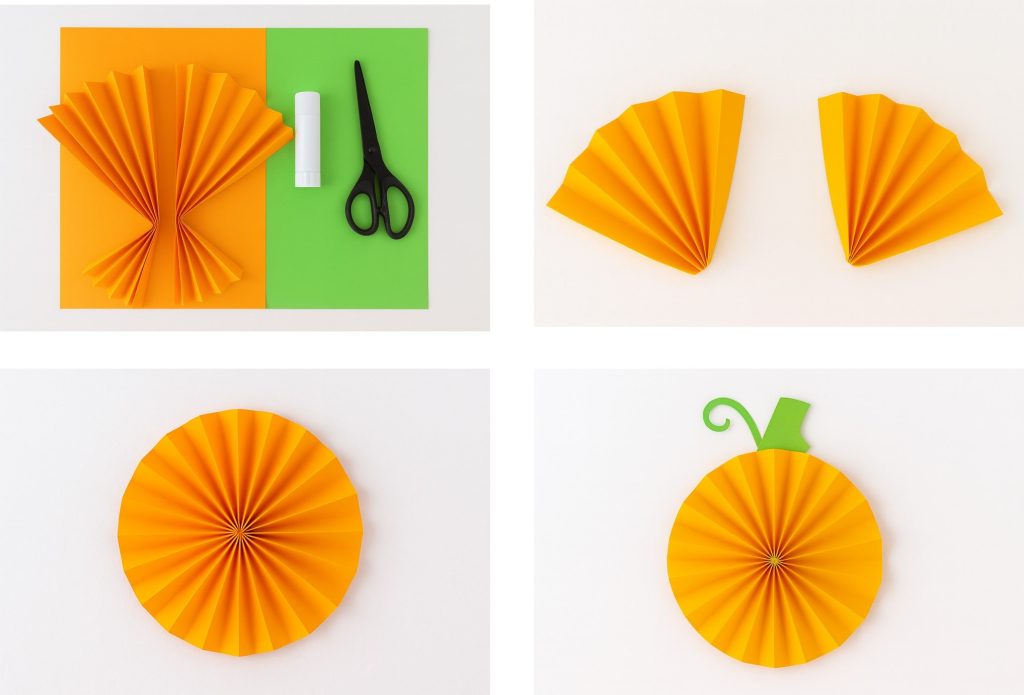
05. Accordion Fold Paper Pumpkin
What do you need:
Orange color paper
Green color paper
Yarn or string
Glue
Scissors
How to make:
Step 01: Take two orange colored papers and fold them like an accordion.
Step 02: Then paste them together to make a circle shape.
Step 03: Take the green colored paper and cut out the vine and leaf.
Step 04: Paste them on top of the created orange paper circle.
Step 05: Finally, you can attach it to yarn or string for display.
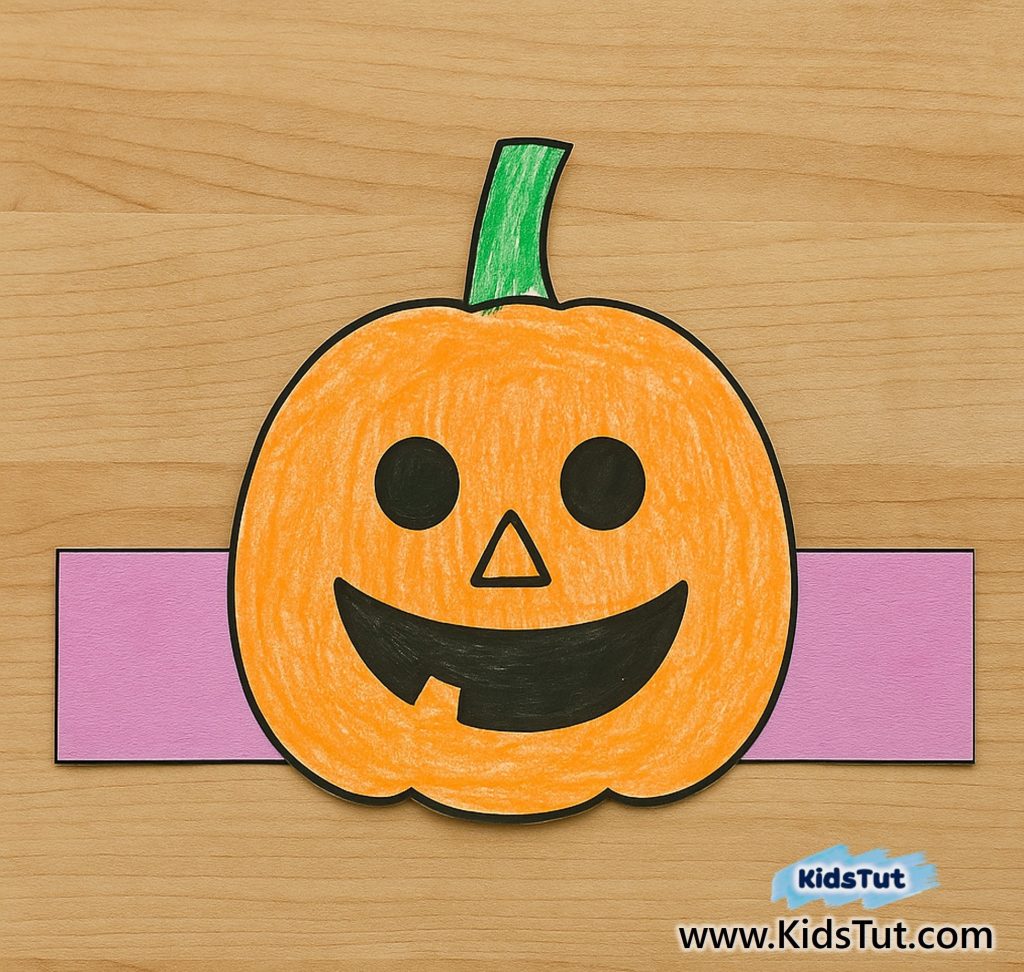
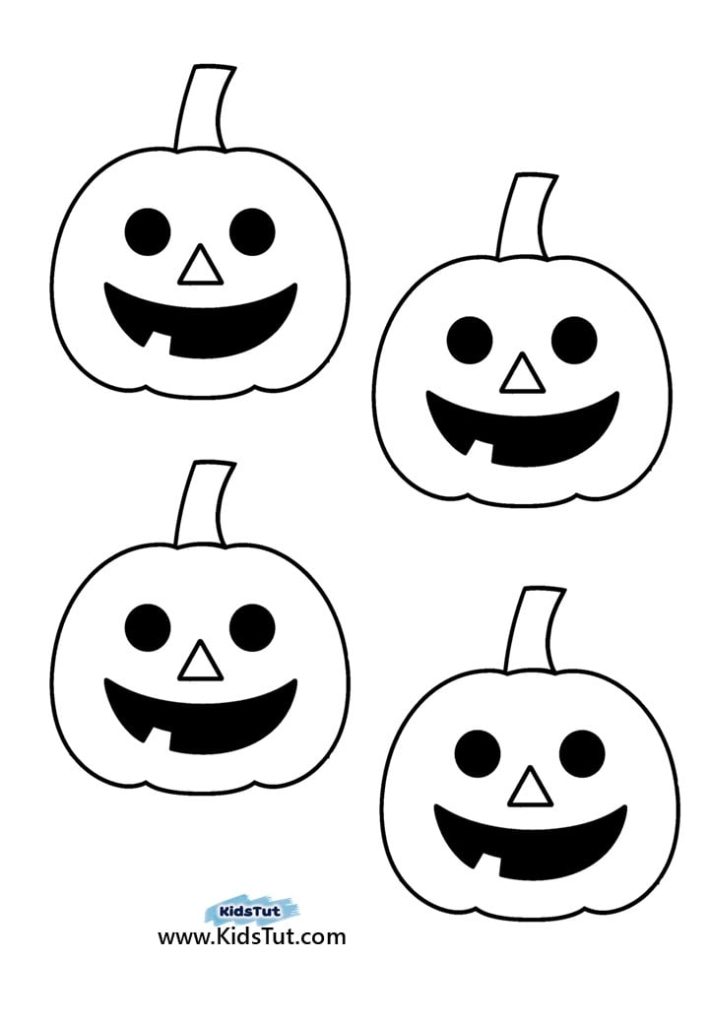
06. Pumpkin Headband Craft
What do you need:
Printed templates
Cardstock
Crayons/markers / colored pencils
Glue
Scissors
Templates:
How to make:
Step 01: Print out the given templates.
Step 02: If you print them on white paper, color them. Use orange and green for the pumpkin and use any color for the strip.
Step 03: Next, take the cardstock and paste the colored template on it. After that, cut them out separately and carefully.
Step 04: Then take the cut-out strip and paste the pumpkin image in the center of this band.
Step 05: Now put it on the kid’s head and glue or pin both sides to make a band.
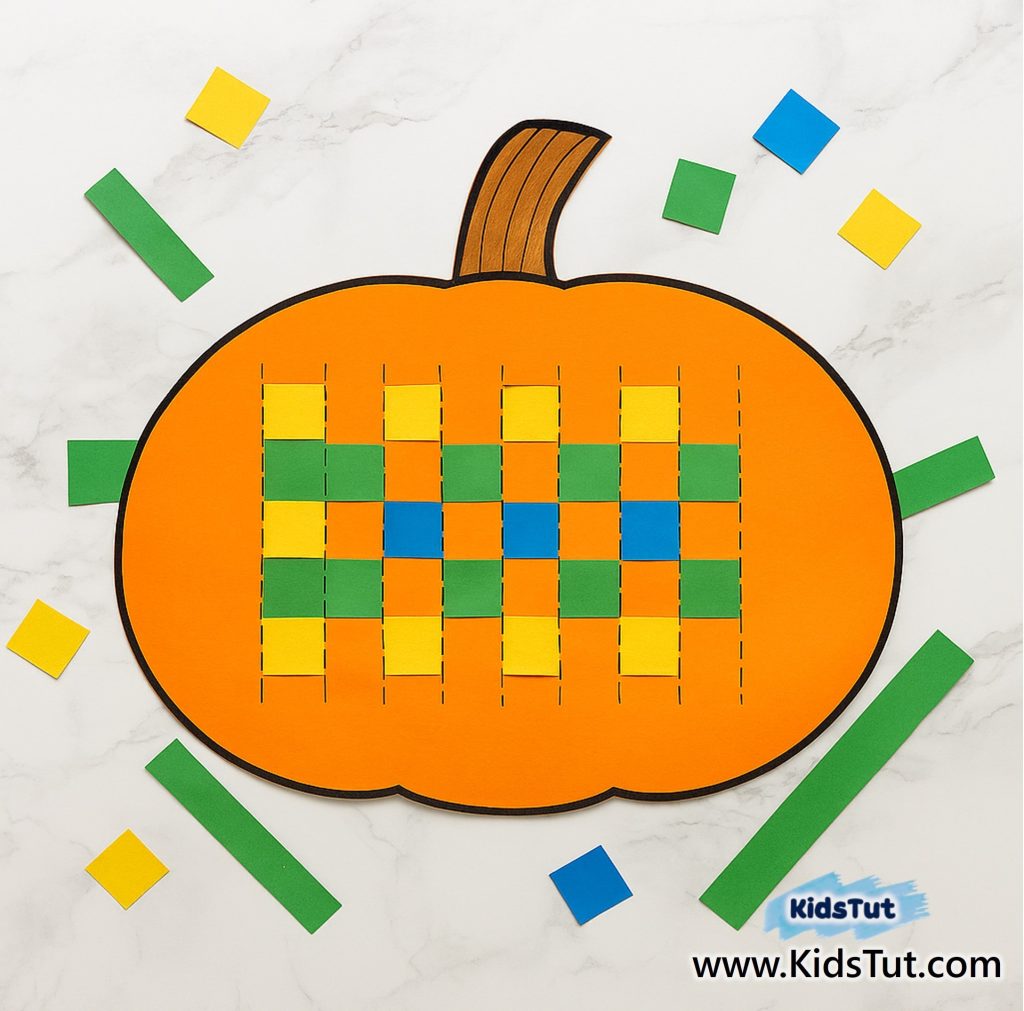
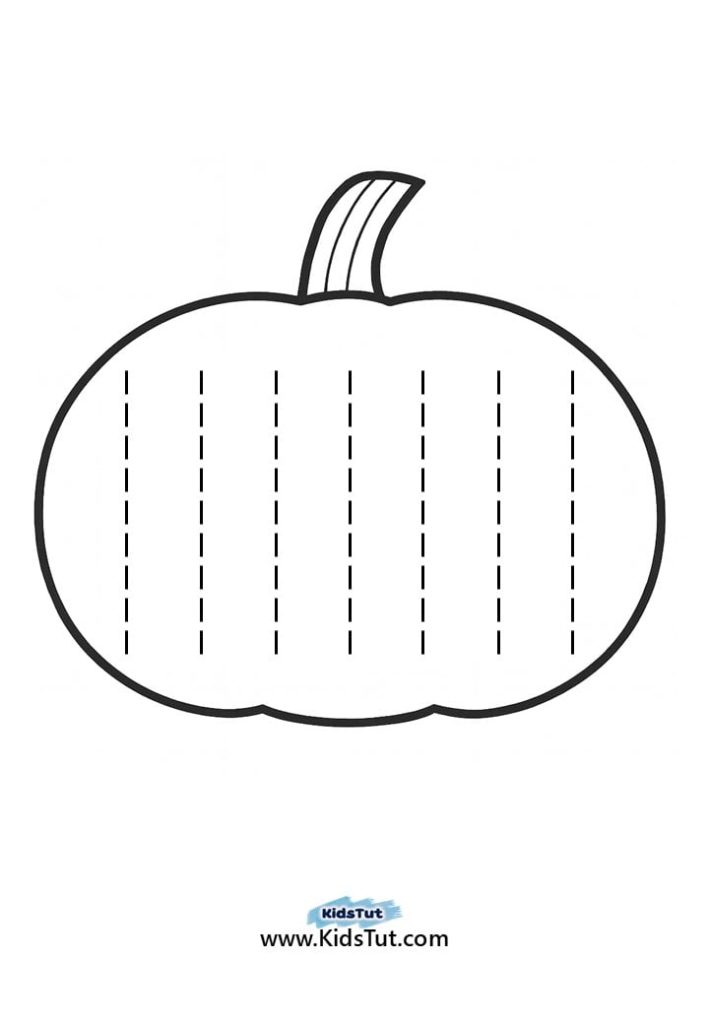
07. Woven Paper Pumpkin Craft
What do you need:
Printed pumpkin template
Colored paper strips
Crayons/markers / colored pencils
Scissors
Glue
Templates:
How to make:
Step 01: Print out the given pumpkin templates.
Step 02: Next, color and cut out the pumpkin and cut along the dashed line marks inside the pumpkin template.
Step 03: Take the colored papers and cut out the paper strips to the same size.
Step 04: Then take the colorful paper strips and insert them through the pumpkin’s inside cutouts, like weaving.
Step 05: Finally, cut out the rest of the pieces and glue the ends of the strips to the pumpkin.
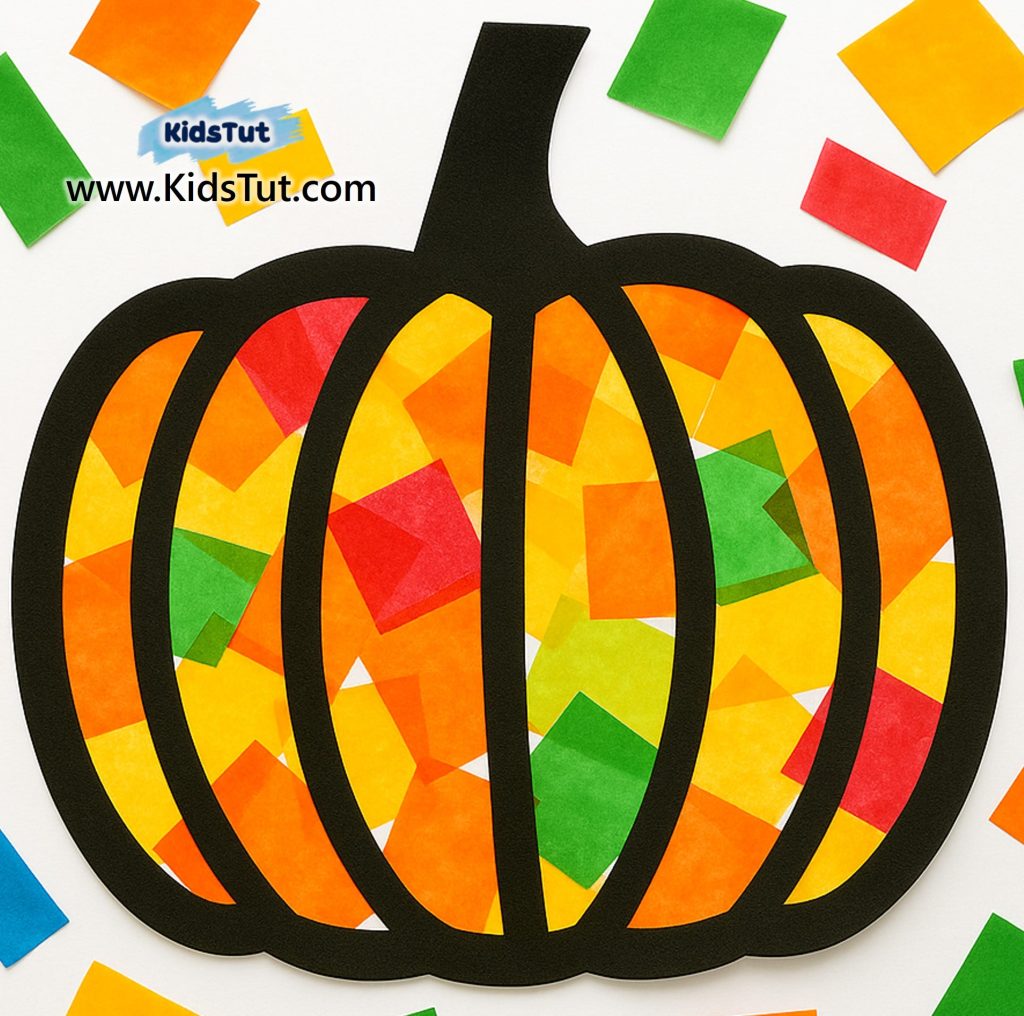
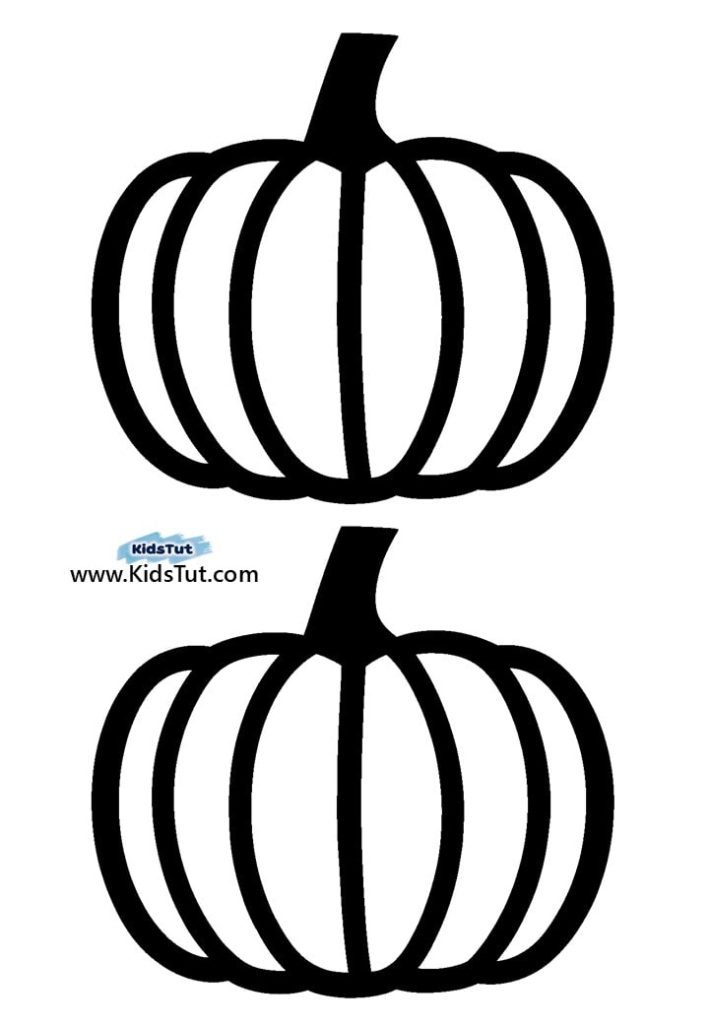
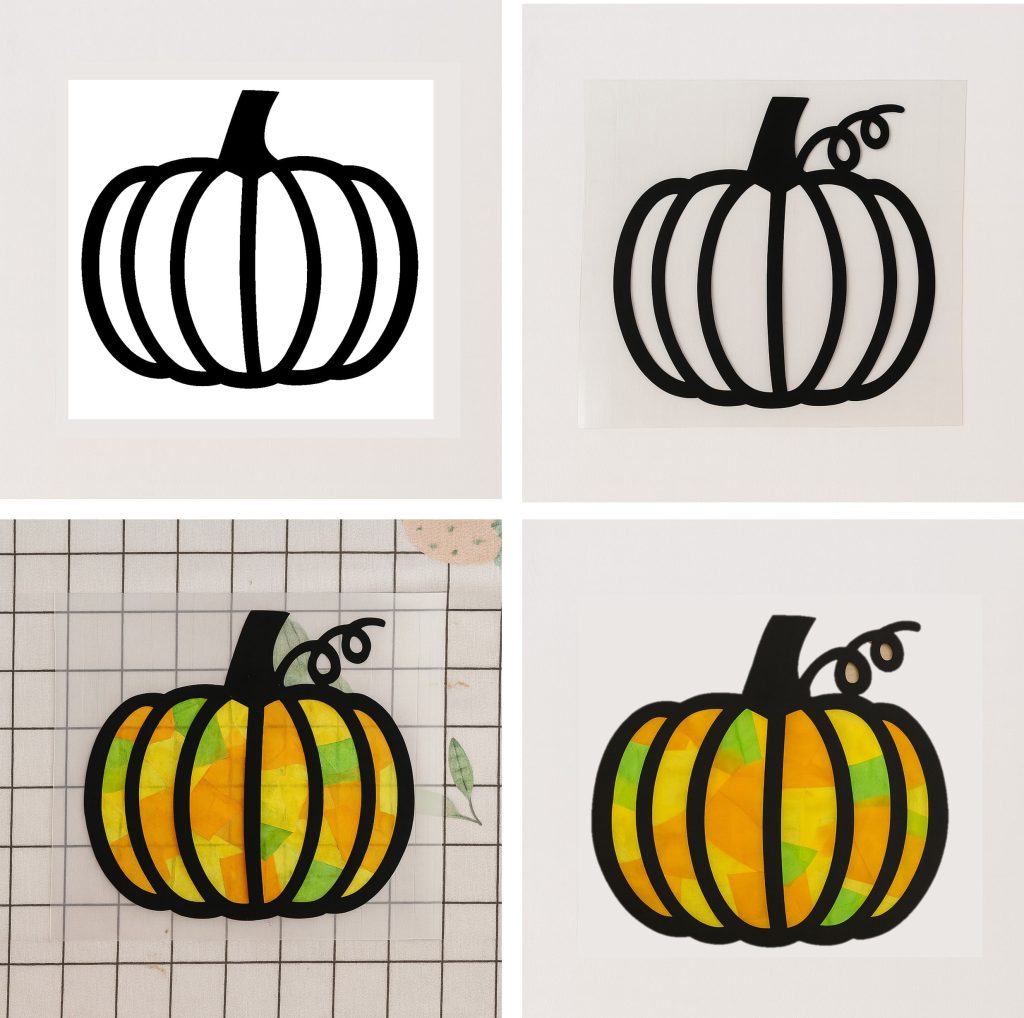
08. Stained Glass Pumpkin Craft
What do you need:
Printed pumpkin template
Colored tissue paper squares
Clear contact paper
Scissors
Glue
Templates:
How to make:
Step 01: Print out the given pumpkin template and cut it out from paper. Then cut out the pumpkin middle white spaces and keep only the black areas.
Step 02: Next, take the clear contact paper and paste the pumpkin shape on it. (Paste the pumpkin on the sticky side.)
Step 03: Then take the colored tissue squares and paste them on it.
Step 04: Now get another contact paper and cover the pumpkin and seal it.
Step 05: Cut out the rest area and hang it on the window as a suncatcher.
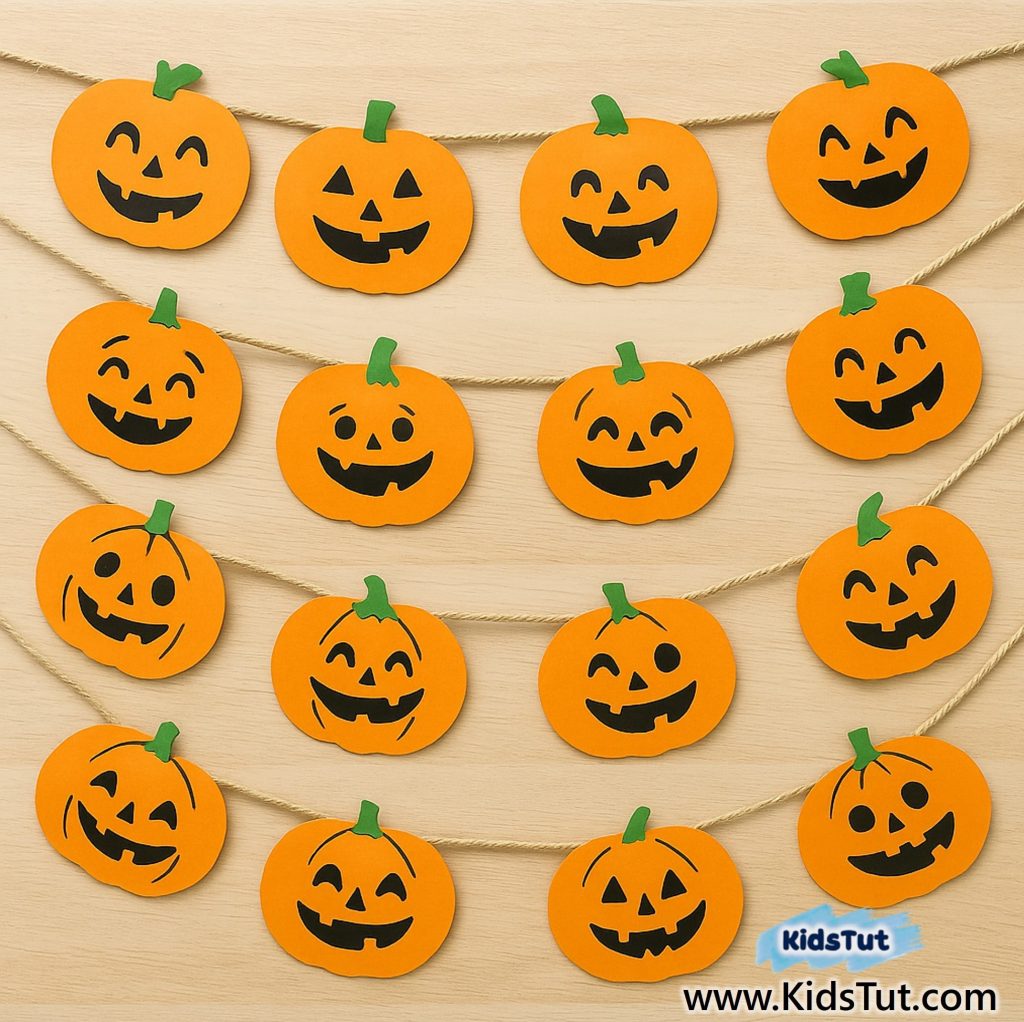
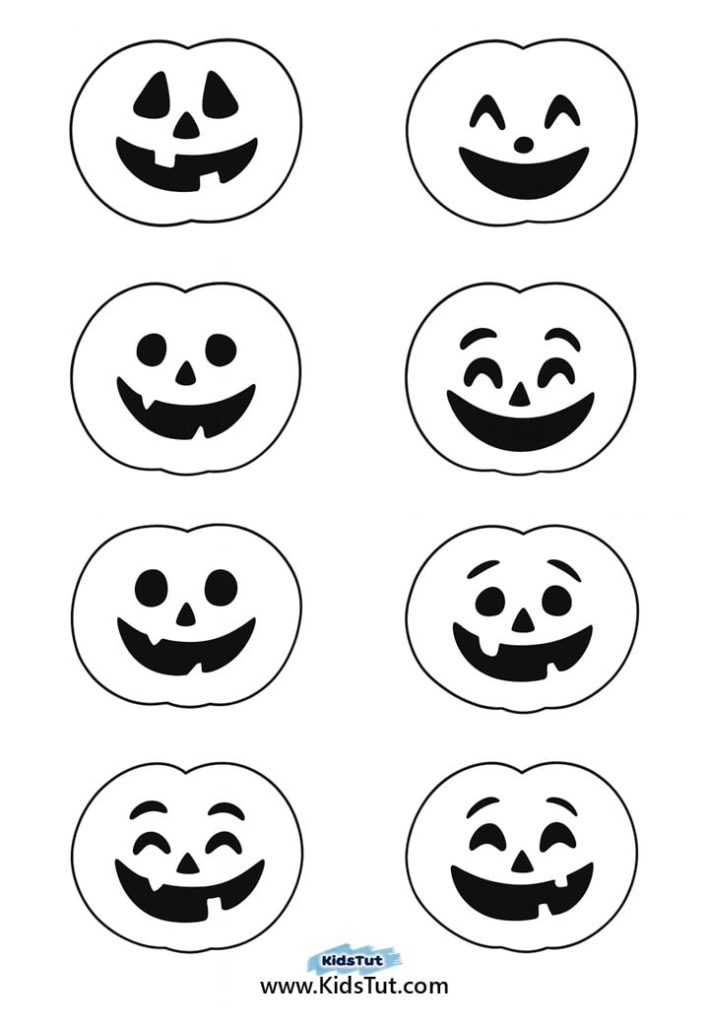
09. Pumpkin Garland Craft
What do you need:
Printed templates
Orange colored papers (for printing out the pumpkin faces)
Green paper (for stem and leaves)
Glue
Scissors
Yarn/strings
Templates:
How to make:
Step 01: Print out the given pumpkin face templates on orange paper and cut them out carefully.
Step 02: Then, cut the stems and leaves from green paper and attach them on top of the pumpkin faces.
Step 03: Take the yarn or a string and tie it in the classroom. Step 04: Finally, take the created pumpkins and glue or tie them with yarn to make a garland.
**** Click here to get the free PDF template:Download