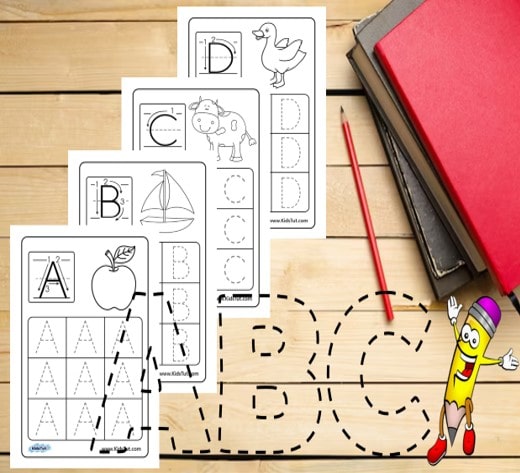
As children take their first steps into the world of literacy, introducing them to the captivating dance of uppercase letters becomes a pivotal chapter in their learning odyssey. In addition, our uppercase letter tracing worksheets are a guiding light, weaving together the realms of education and play. Through the tactile exploration of tracing these bold characters, children not only nurture their fine motor skills but also lay the cornerstone for a lifelong love affair with language. Therefore, join us on this educational escapade, as we unravel the wonders of uppercase letters and set the stage for a brilliant literary future. So, enjoy fun learning with these letter tracing worksheets!


*** You have the option to download the PDF file from this location.- Download
Explore more amazing Letter Tracing worksheets for Kids!
Letter tracing worksheets for kids in lowercase – See More
*****
Letter Tracing Worksheets: Introduction to Writing Letters
Initially, children first learn to write the letters of the alphabet after developing their pre-writing skills. So, they practice by tracing the letters along dashed lines. As a result, this helps them quickly adapt to writing the letters independently.
Letter Tracing Worksheets: Practice with Dashed Lines
This assignment page allows your child to practice writing the letters of the alphabet along the dashed lines. Firstly, we know very well that there are 26 letters in the English alphabet, and those 26 letters have two separate forms: uppercase and lowercase. Then, this learning page helps children practice and become familiar with writing uppercase or capital letters. Finally, let’s examine the 26 letters one by one to understand how to write them properly.
Letter Tracing Worksheets: Exploring Each Letter
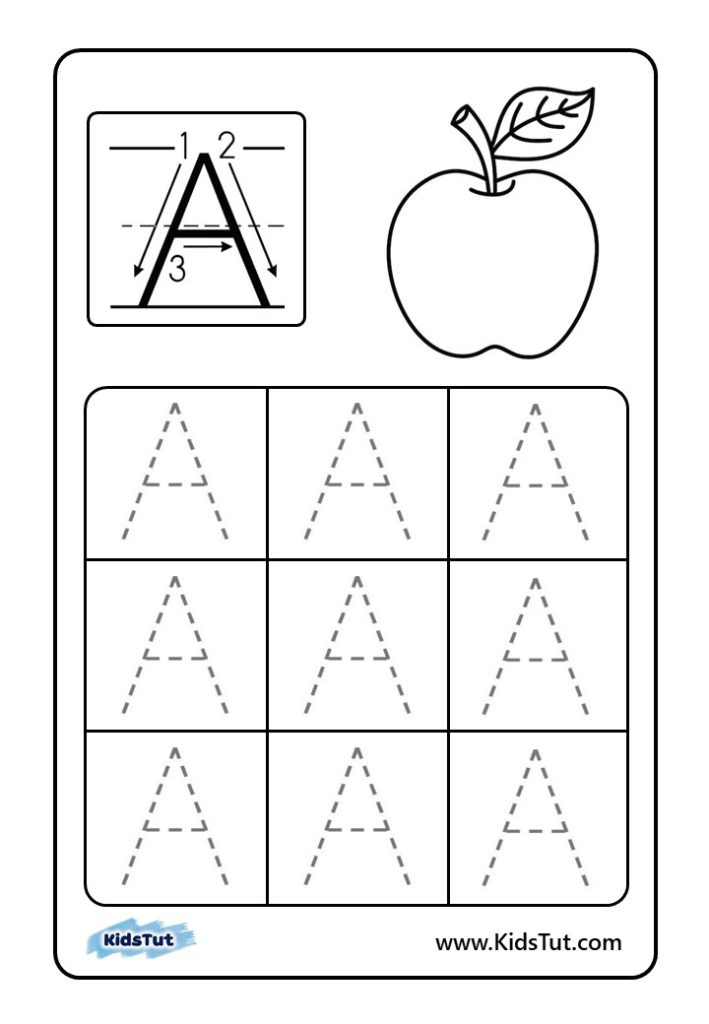
Letter A
The letter “A” is the first letter of the alphabet. Also, the children were given a picture of an apple and a word beginning with that letter. So, let’s see how to write capital letters correctly. First, draw a right-to-left diagonal line from the top ruler to the bottom ruler. Second, draw another diagonal line to the left from where the first line started. Finally, you can draw a horizontal line connecting the two diagonal lines in the middle ruler. Also, write the dashed letter A in the boxes like this.
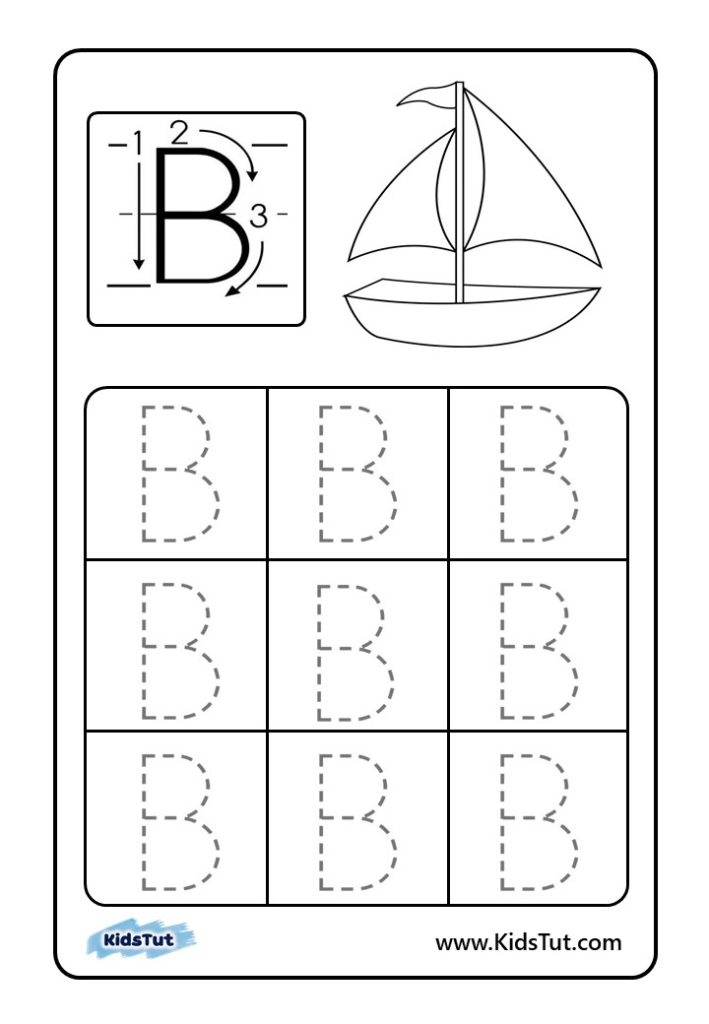
Letter B
The next letter is “B”. To write the letter “B”, first draw a vertical line from the upper ruler to the lower ruler. Secondly, draw a semicircle from the upper ruler to the middle ruler. Thirdly, draw another half circle from the middle ruler to the lower ruler until the straight line ends. Here, the first half circle should be slightly smaller than the second one. Practice writing the letter “B” like this. Color the boat from the letter “B”.
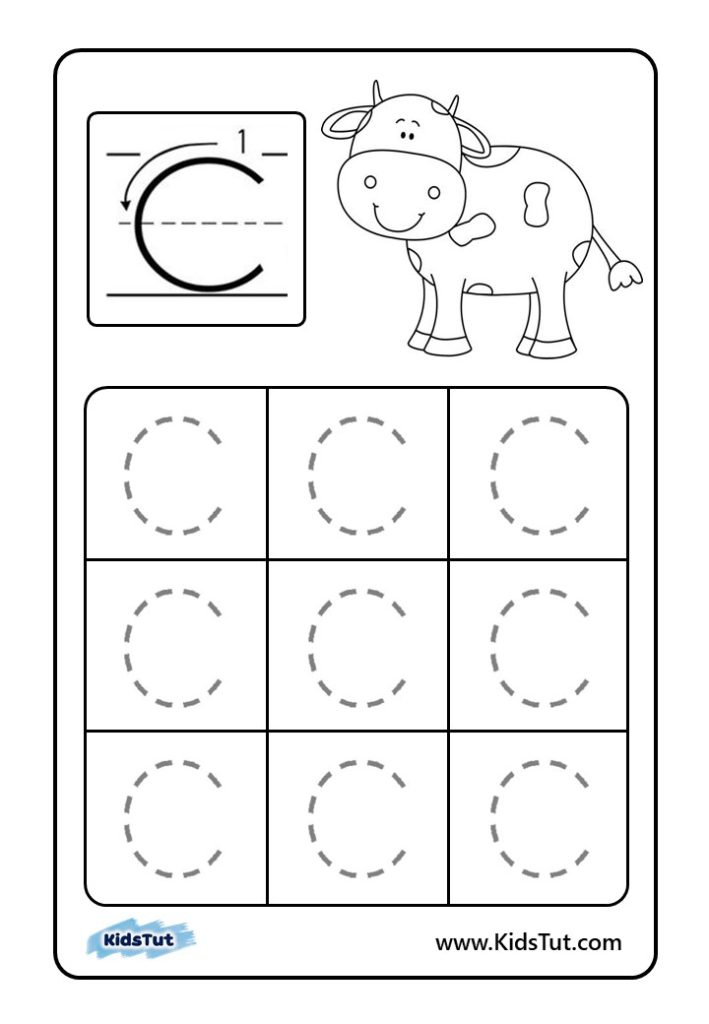
Letter C
The third letter of the alphabet is the letter “C”. The capital letter “C” is a half curve written from the upper ruler to the lower ruler. Color the cow from the letter “C”. Practice writing the letter “C” along the dashed lines.
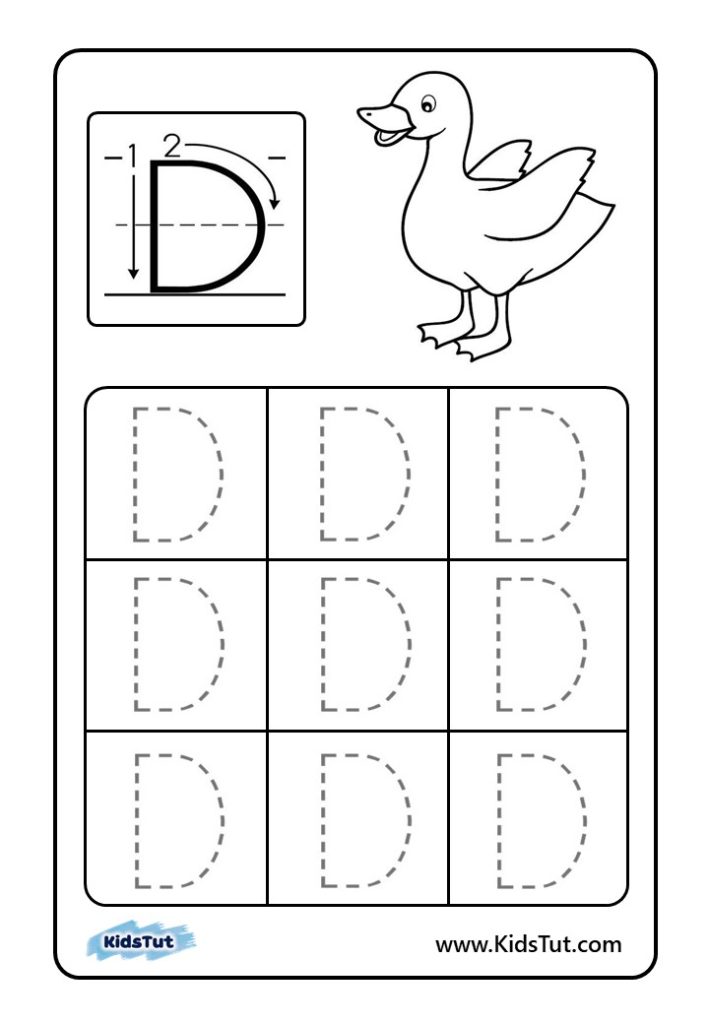
Letter D
Next, let’s look at the fourth letter “D”. To write the capital letter “D”, first draw a straight vertical line from the top ruler to the bottom ruler. Second, draw a half curve from the top ruler to the bottom ruler from where the line starts to where it ends. Write the capital letter “D” correctly like this. Color the duck from the letter “D”.
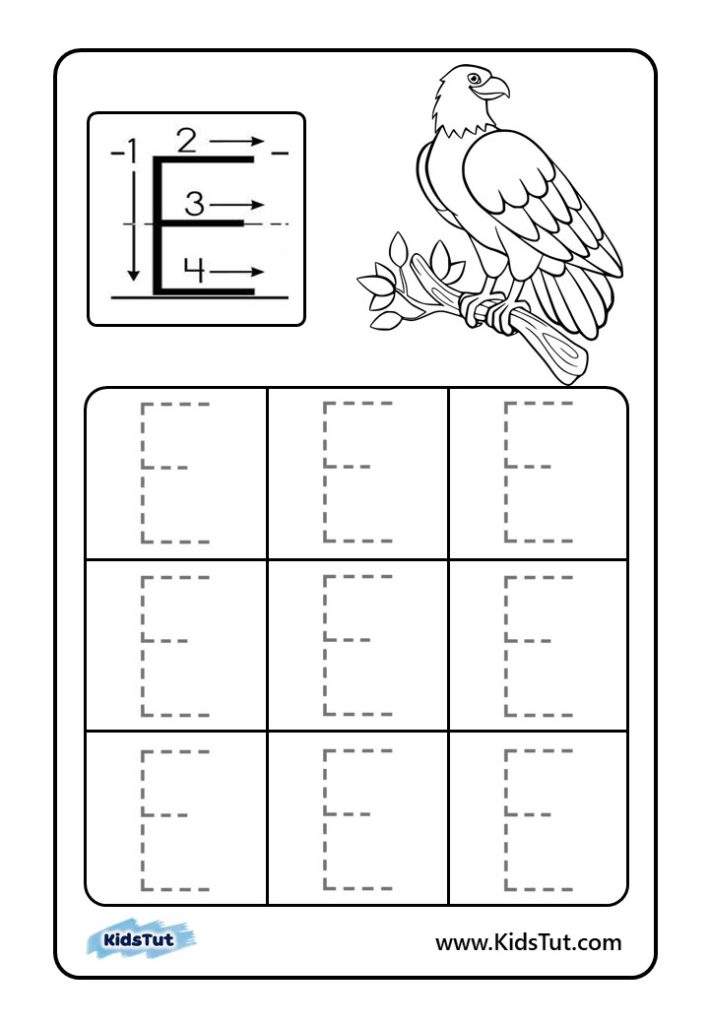
Letter E
Let’s refer to the fifth letter of the alphabet. Color the eagle from the letter “E”. Write the capital letter “E” correctly on the lines. To write the capital letter “E”, first draw a vertical line from the upper ruler to the lower ruler. Draw a line along the upper ruler from where the line starts. Then, in the same way, draw horizontal lines along the middle ruler and the bottom ruler. Write the letter E as given.
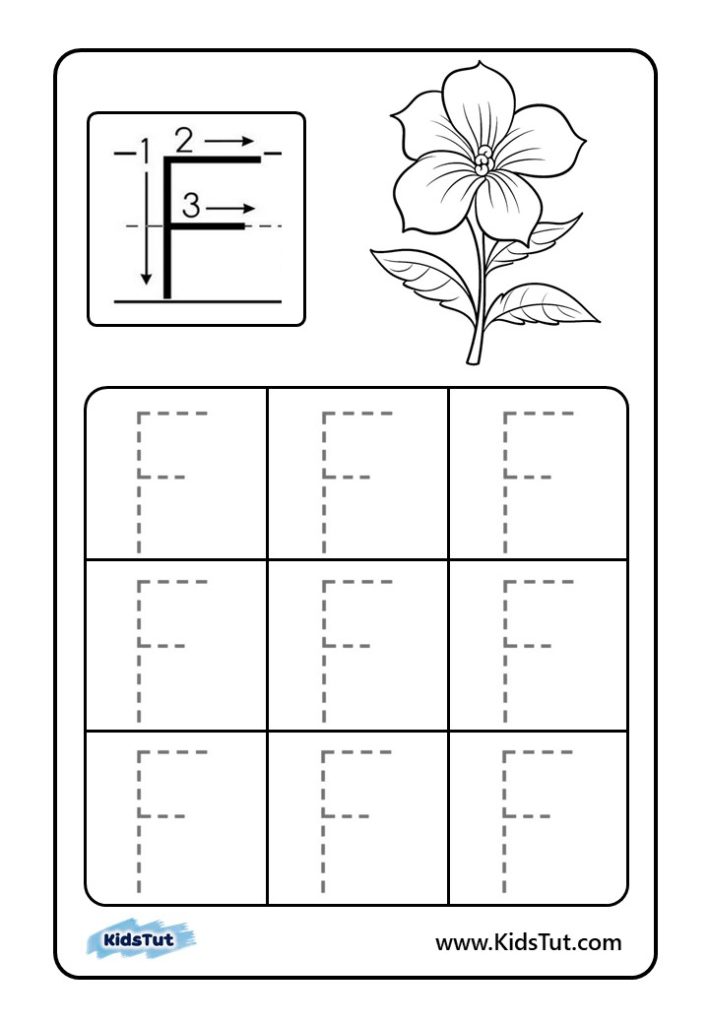
Letter F
The letter “F” is the next letter to get used to writing. This letter is also written from the upper rule to the lower rule as before. Draw a vertical line from the top ruler to the bottom ruler. Then draw a horizontal line across the ruler from where the line starts. Finally, draw a horizontal line along the middle ruler in the same way. Write the letter “F” on the lines given in this way.
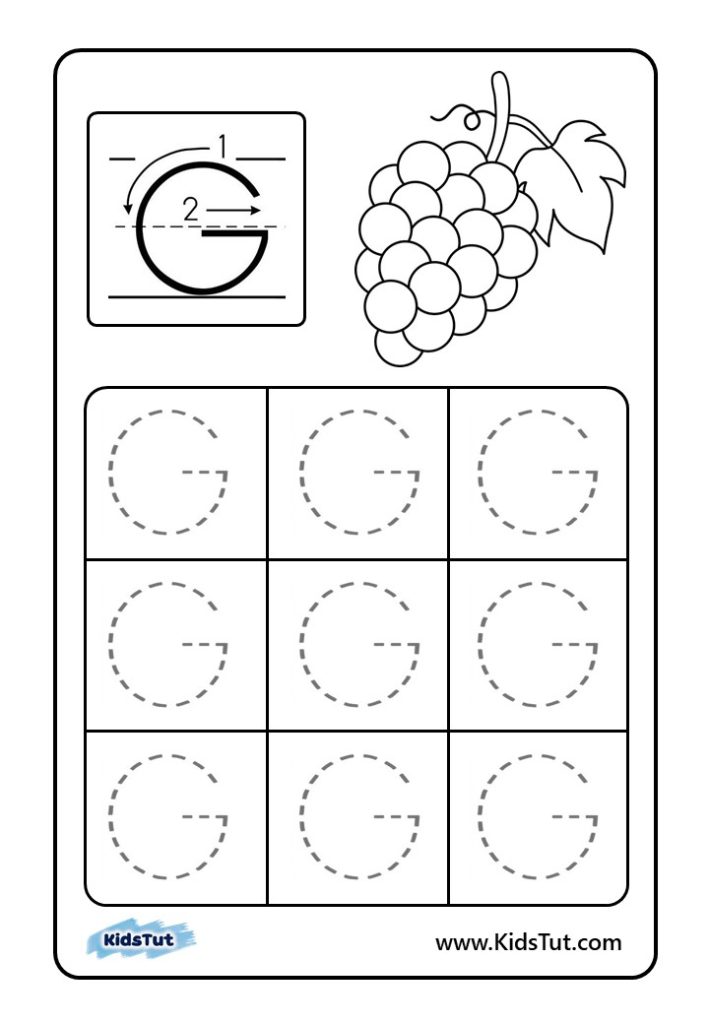
Letter G
Let’s see how to write the next letter “G”. The letter “G” is a half curve that goes from the upper rule to the lower rule and comes to the middle rule. Then draw a horizontal line to the left along the center ruler from where the curve ends. You wrote that with a capital “G”.
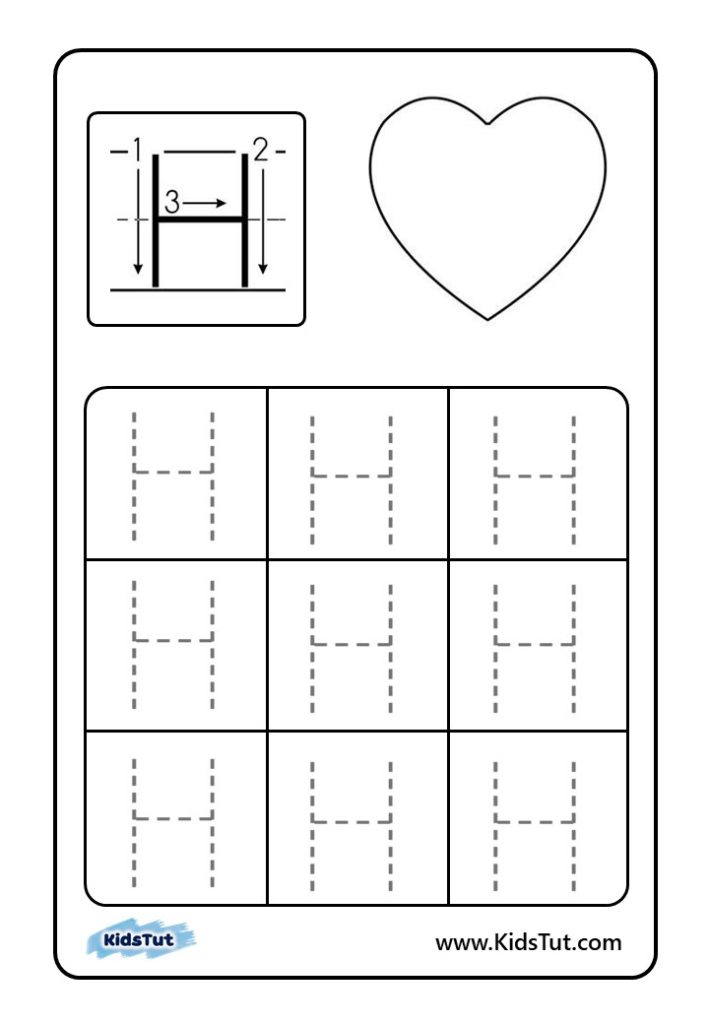
Letter H
The eighth letter of the alphabet is the letter “H”. Here you can see the letter “H” on the eighth page. From the upper ruler to the lower ruler, two vertical lines parallel to each other and a horizontal line going along the middle line connecting the two vertical lines write the letter capital “H”.
Letter I
The letter “H” is followed by the letter “I”. Capital “I” can also be written by drawing a vertical line from the top rule to the bottom rule and by drawing a horizontal line along the top and bottom rules. Practice writing the capital “I” along the dashes.
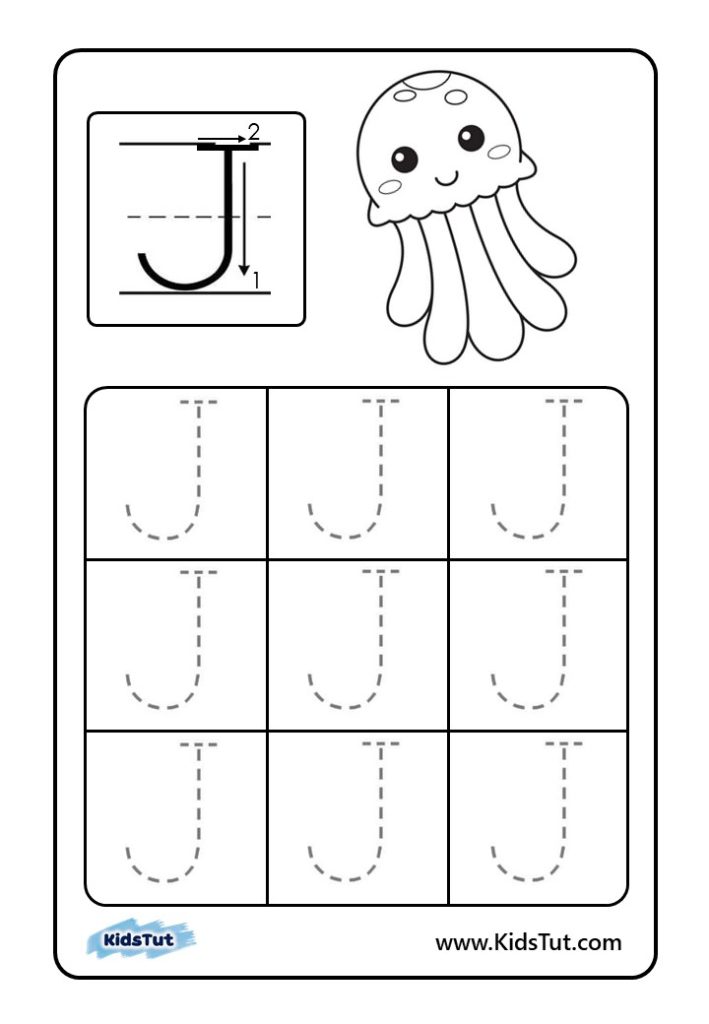
Letter J
The tenth letter of the alphabet is the letter “J”. Color the jellyfish from this letter. Let’s see how the capital letter “J” is written. In the same way, write the letter “J” on the dashes. The capital “J” is written in the shape of a hook from the top to the bottom. Then draw a horizontal line on the upper ruler.
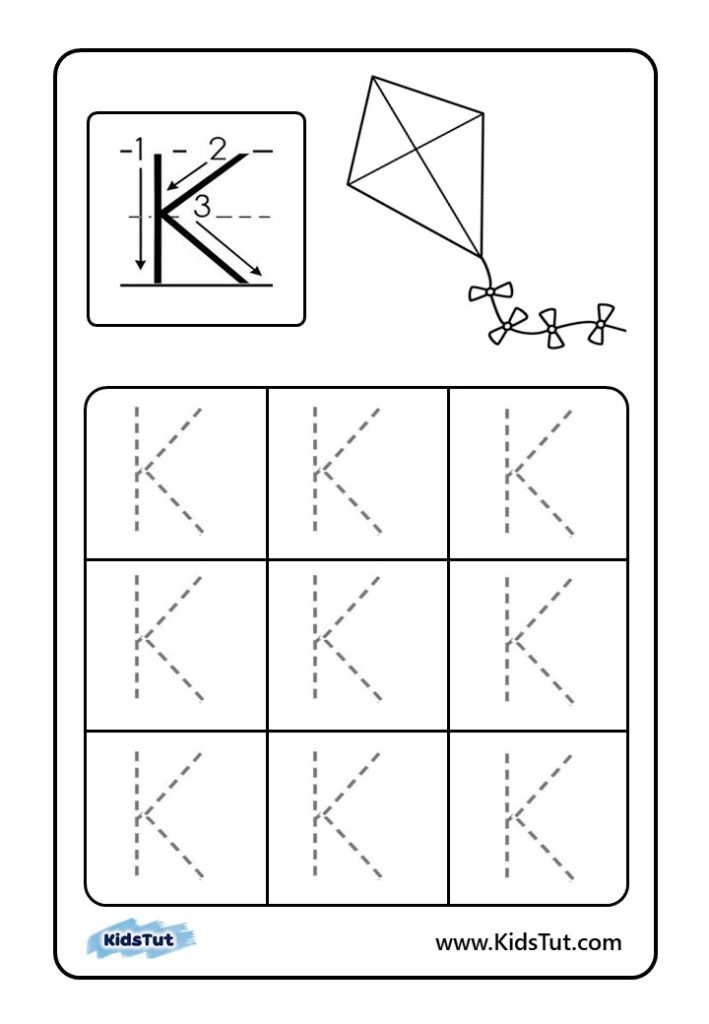
Letter K
Now let’s see how to write the letter “K”. Capital “K” is also written from top to bottom. First, draw a vertical line connecting the top and bottom rules, then draw two diagonal lines starting from the middle rule to the top and bottom rules. Step by step, write the letter “K” along the lines.
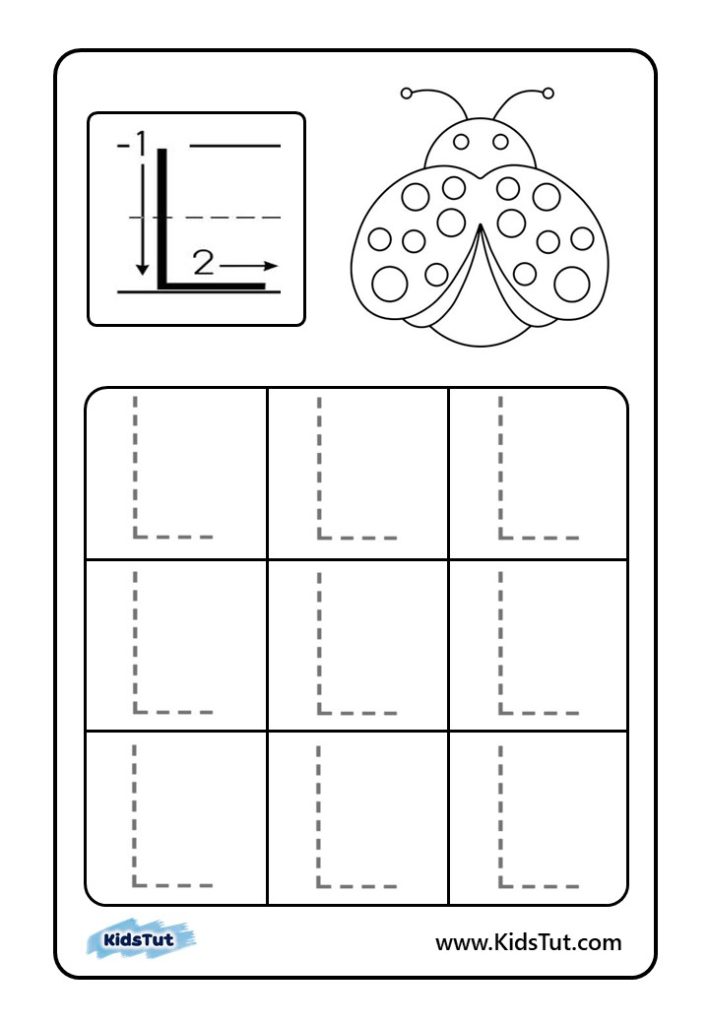
Letter L
The letter “L” is next. Color the ladybug with the letter “L”. To write the capital “L”, draw a vertical line from the upper ruler to the lower ruler, then draw a horizontal line along the lower ruler, starting from where the vertical line ends on the lower ruler. So, in this way, write the letter “L” in the boxes.
Letter M
Later, the letter “M” is found after the letter “L”. The letter “M” is also a letter with lines written from the upper rule to the lower rule. So, from the third page, you can see how to write that letter. Also, write the letter “M” along the lines in that order.
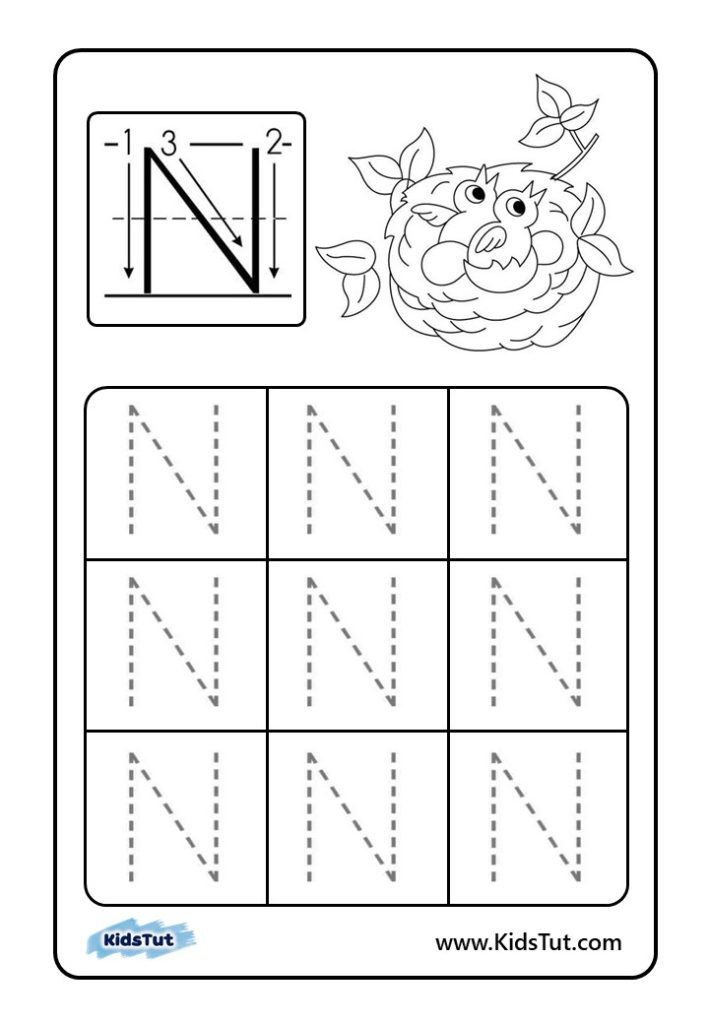
Letter N
On the fourteenth page, you can see the letter “N”, the fourteenth letter of the alphabet. Additionally, it provides how to write the letter “N”, color the nest from the letter “N”, and practice writing the letter “N” along the dashes.
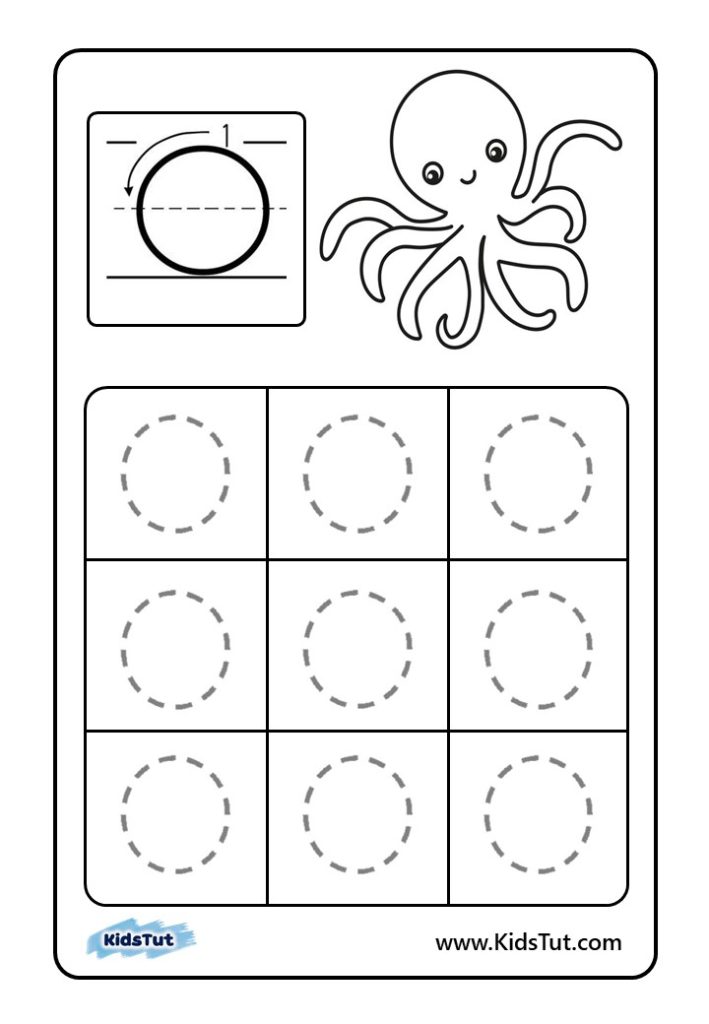
Letter O
Next is the letter “O”. Also, it is very easy to write. The circular shape written from the top to the bottom ruler is the capital letter “O”. So, you can practice writing the letter “O” from the fifteenth page.
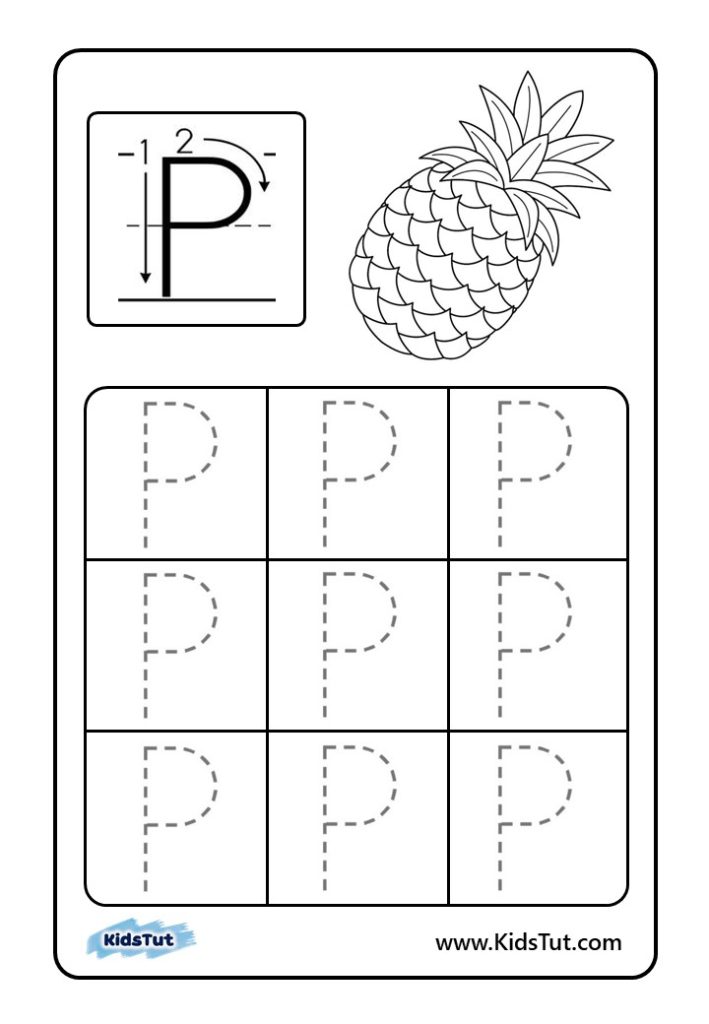
Letter P
Page 16 with the letter “P” shows the correct way to write a capital “P”. Firstly, write the letter capital “P” with a vertical line going from the upper rule to the lower rule and a half curve drawn from the upper rule to the middle rule. And also, you can learn to color and write.
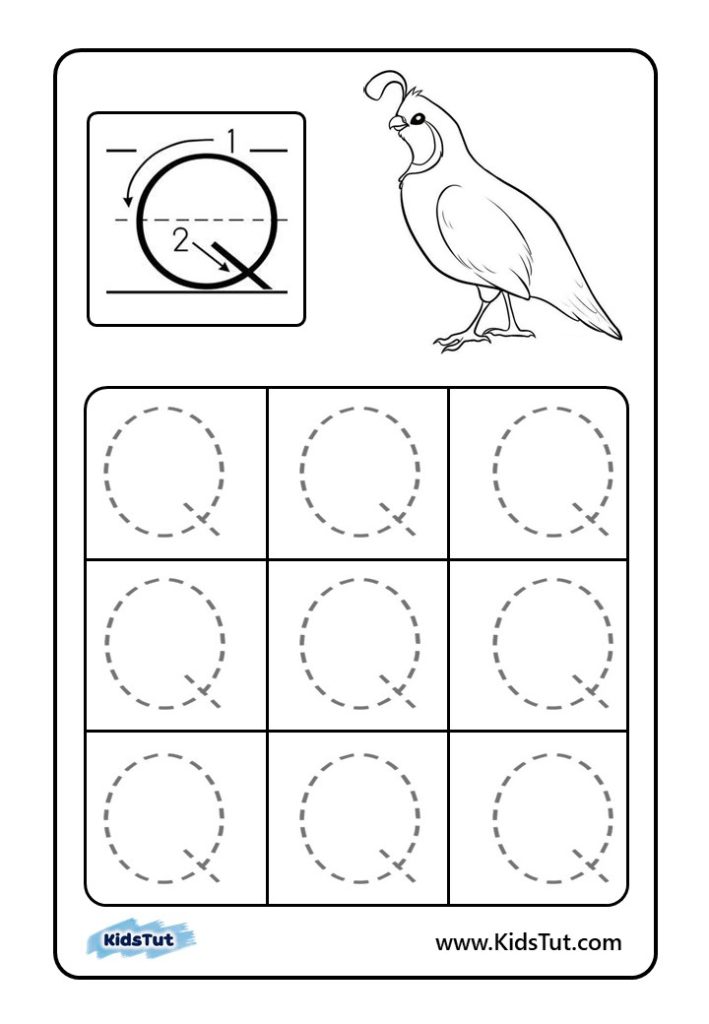
Letter Q
Next, we turn to the capital letter “Q”. The capital “Q” letter has a circle drawn from the upper ruler to the lower ruler, and a small line drawn intersecting the circle between the middle ruler and the lower ruler. So, draw along the dashed lines and practice writing the letter “Q”.
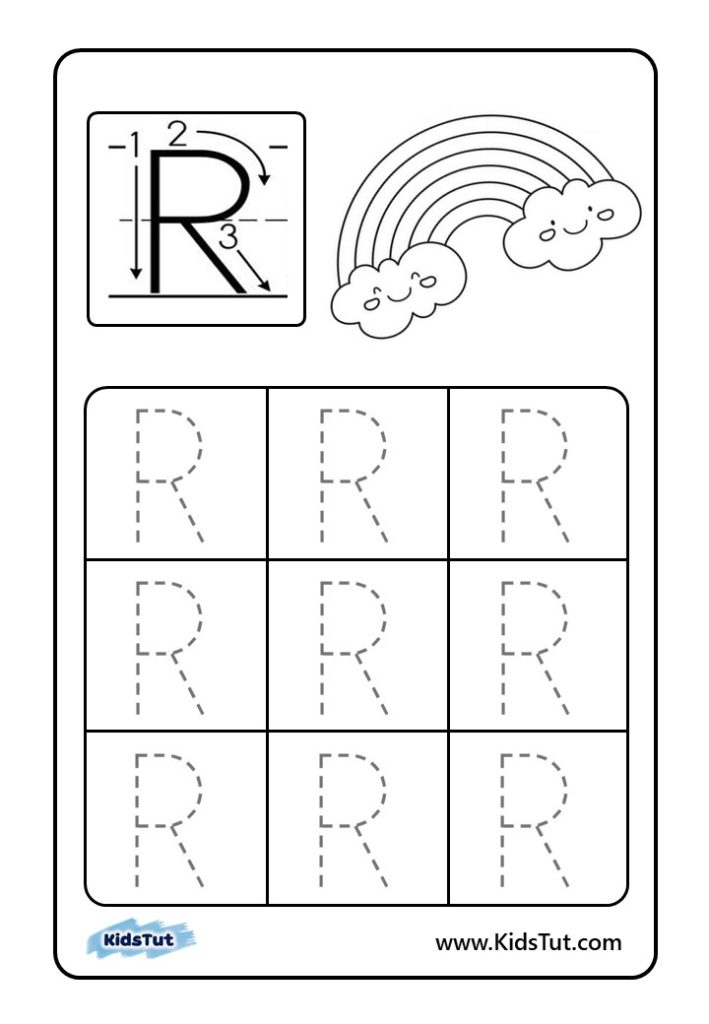
Letter R
“R” is the 18th letter of the alphabet. You can practice writing the letter “R” from page 18. Also, you can learn how to color and write the letter “R” correctly from that page.
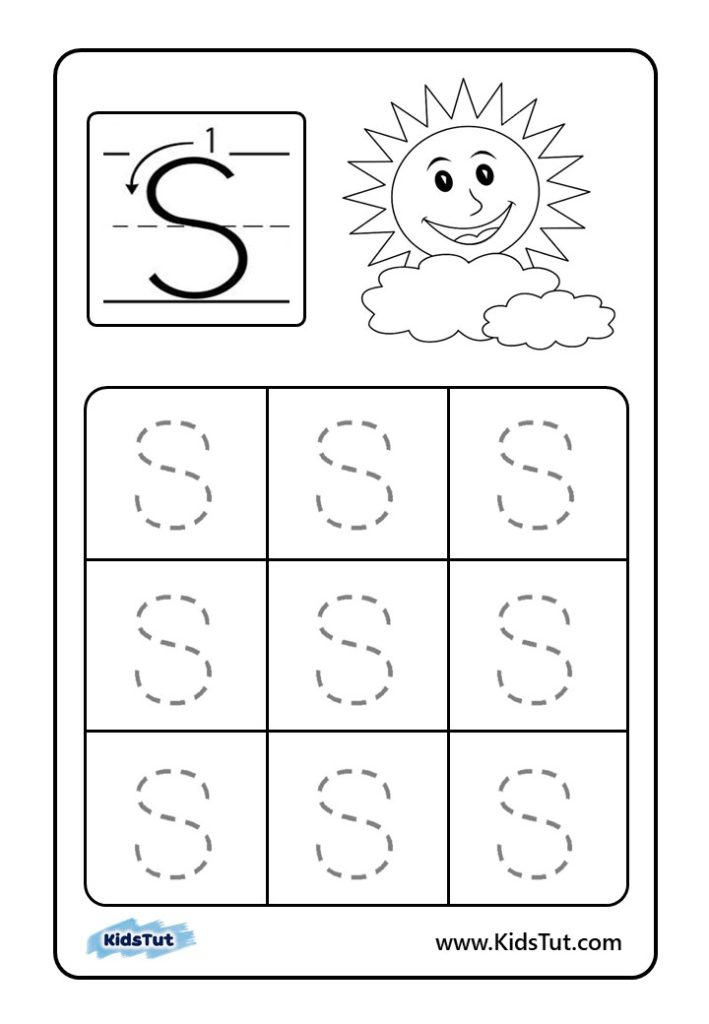
Letter S
Another, you can see the capital “S” on page 19. Also, look for the correct way of writing capital “S” between the rules and write along the dashed lines.
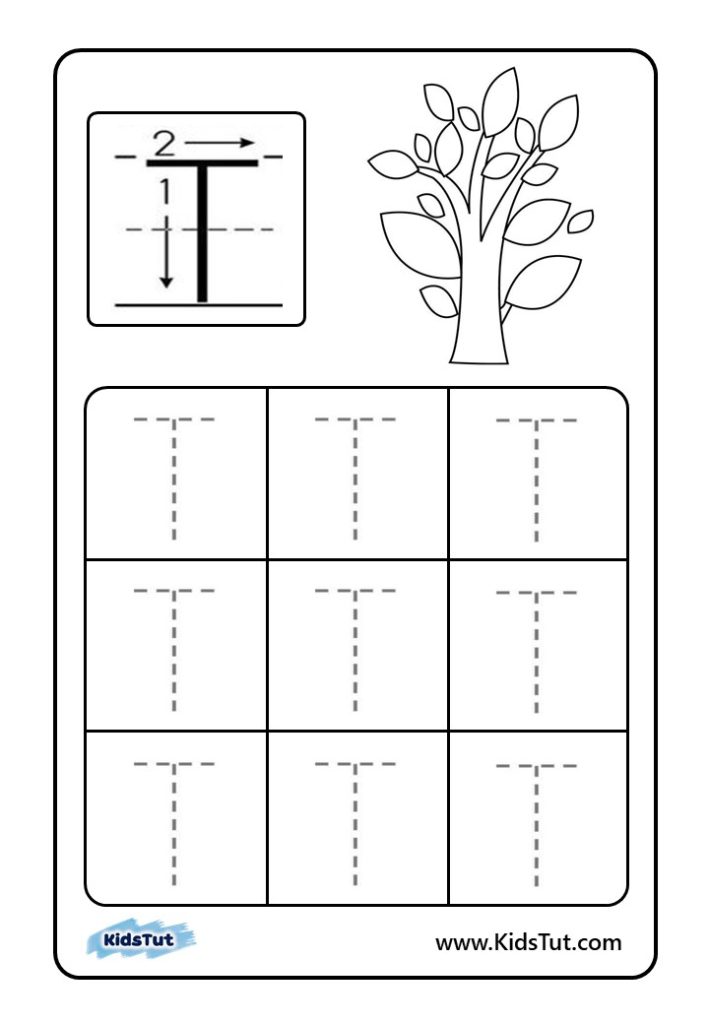
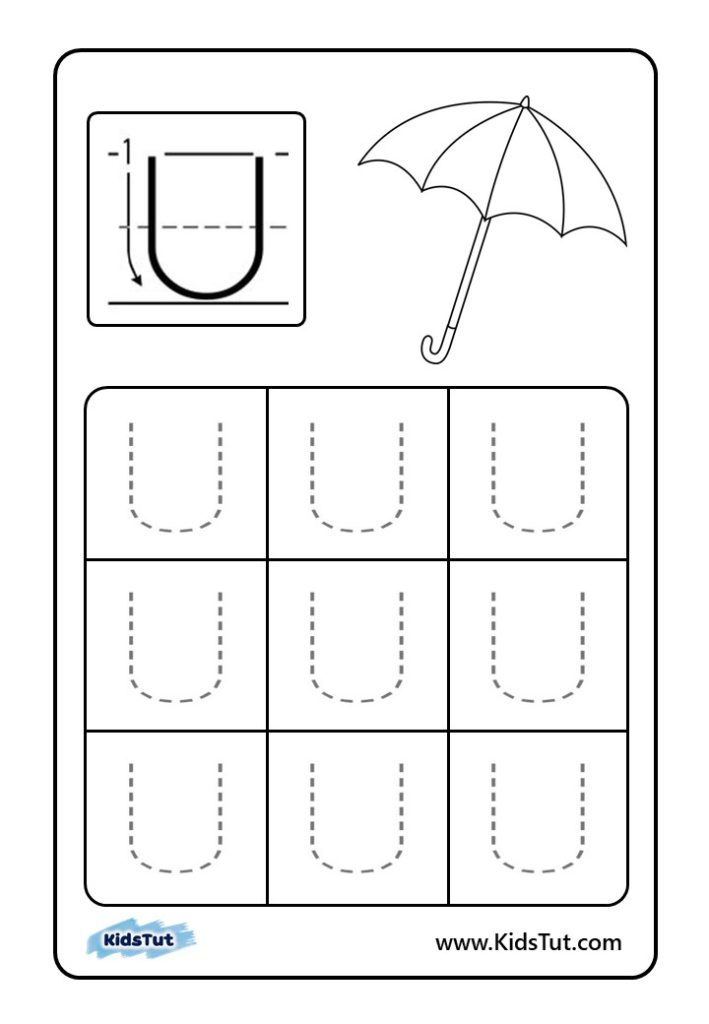
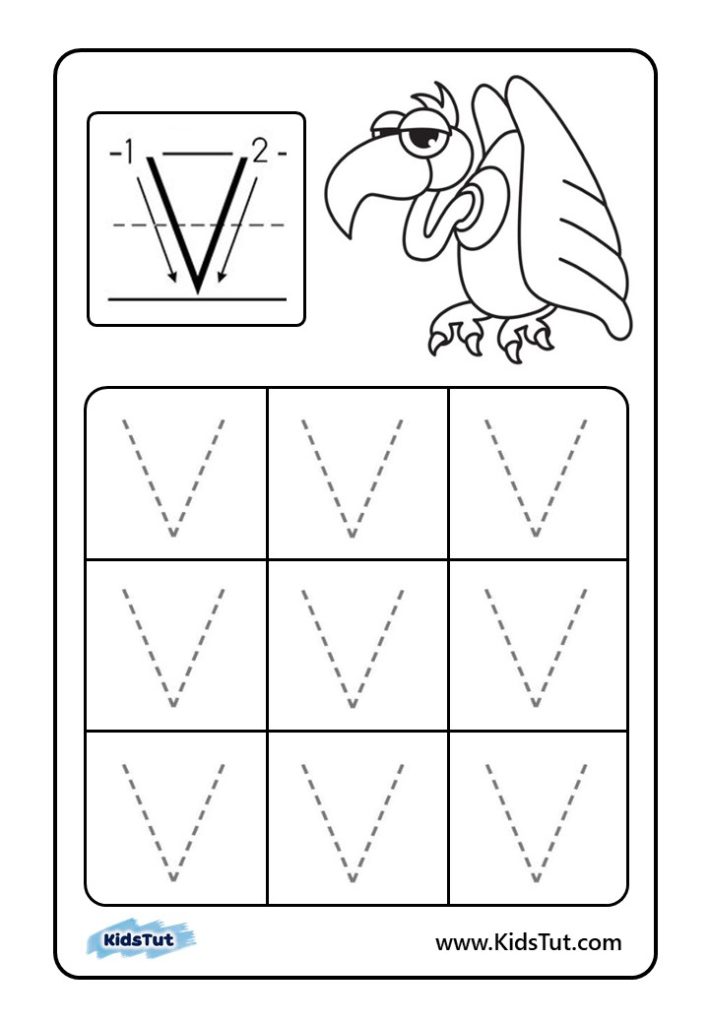
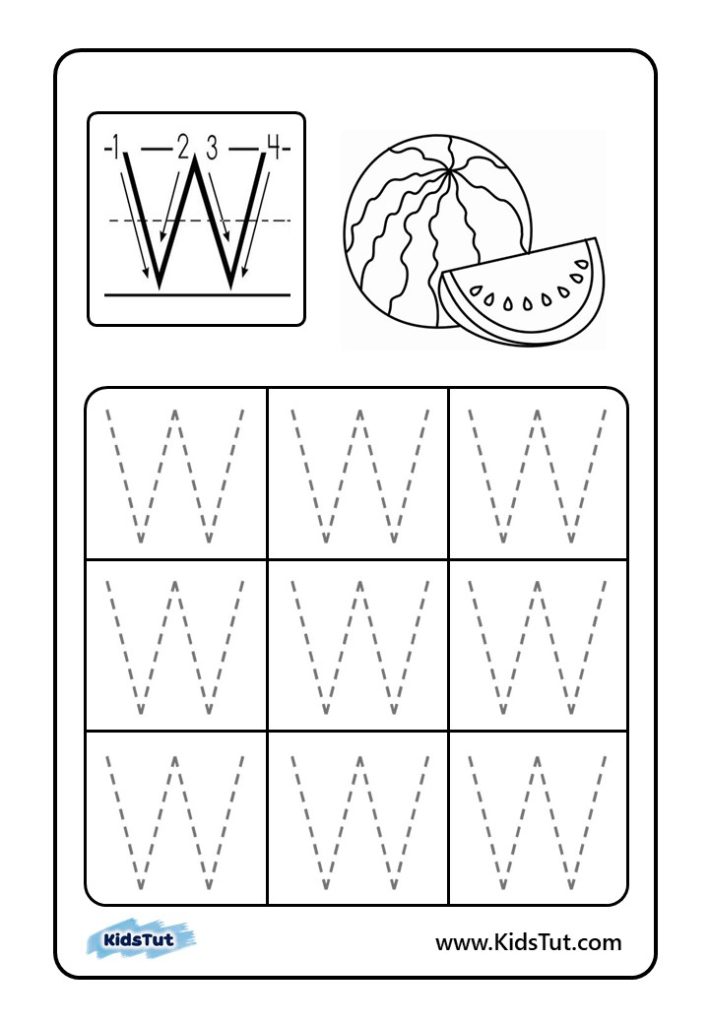
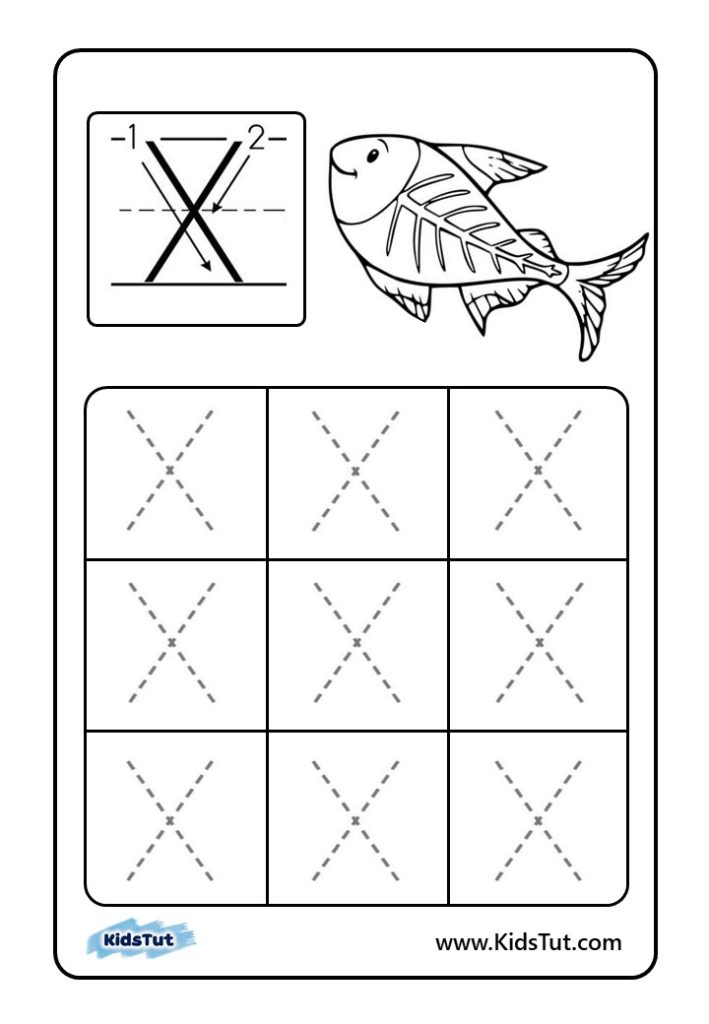
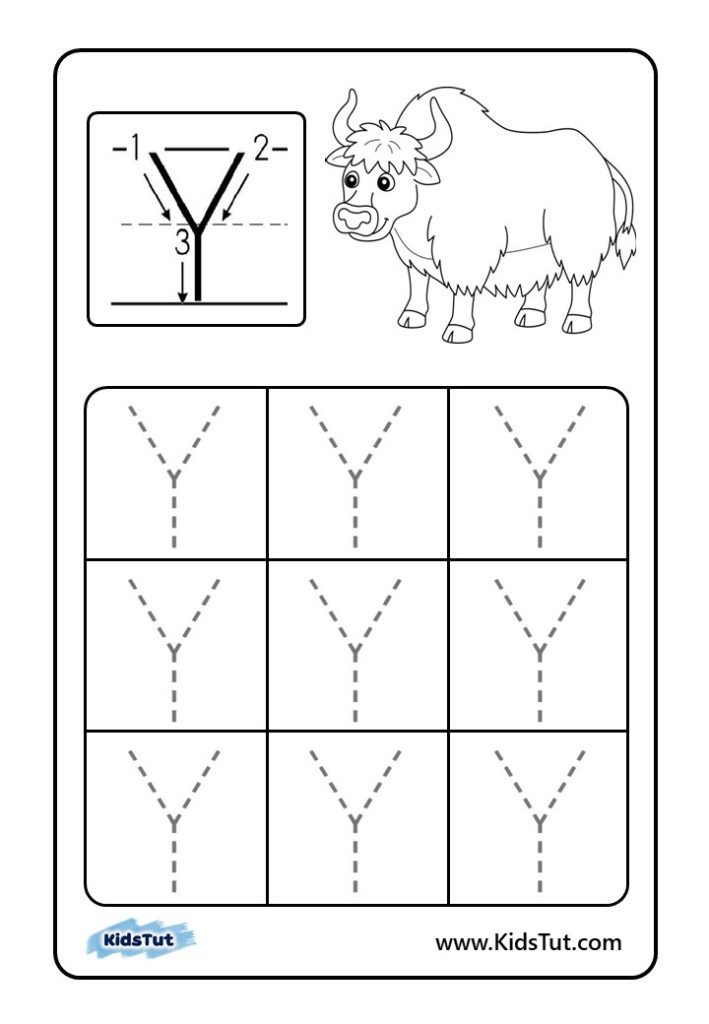
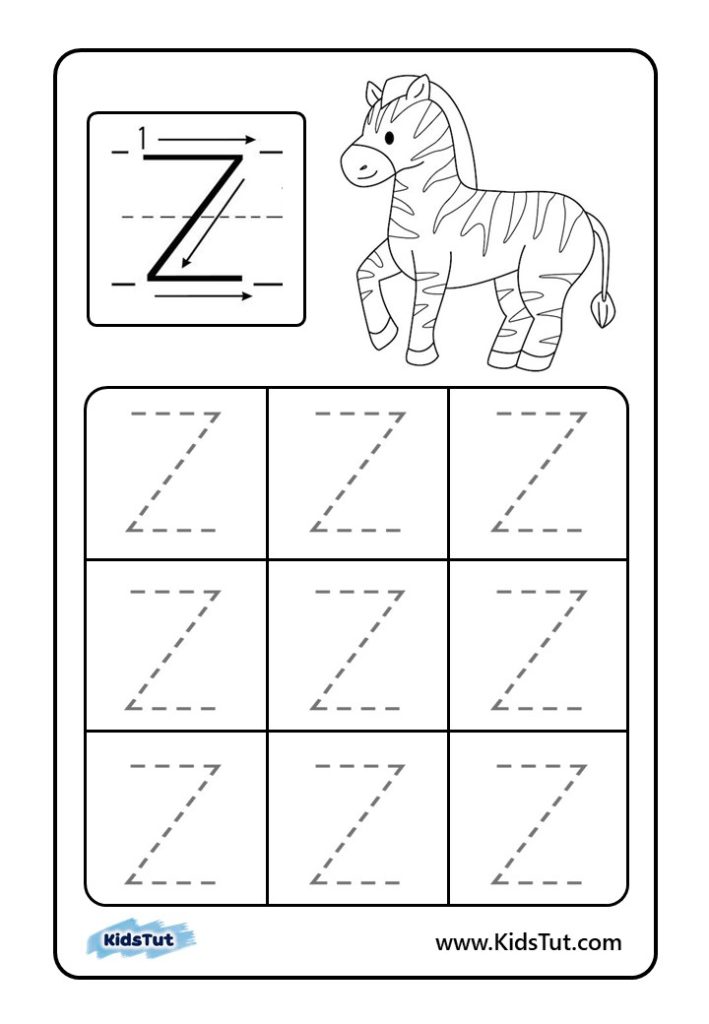
Letter T-Z
Later, you can learn to write the capital letters T, U, V, W, X, Y, and Z from pages 20-26. Also, on these pages, you are given a picture of each letter to color and how to write the letter correctly.