
We’ve brought you a variety of craft ideas to keep you entertained throughout this festival. Here’s another creative opportunity. So this is a great way for kids to develop their skills while having fun. This is a very easy Christmas craft to make. So let’s try making it.
What You Need for Making a Wreath:
- Printed templates
- Cardboard (for base)
- Crayons, markers, or paints (to color the templates)
- Yarn, ribbon, or string (for hanging)
- Glue
- Scissors
- Star stickers or glitter (optional)
How to Make:
- Step 01: First, print your templates on white sheets. These are made for A4 size, and you can adjust the paper size when printing.
- Step 02: Color your printed templates using crayons or markers, or you can use paint for your wreath base.
- Step 03: Cut out all your colored templates separately and carefully.
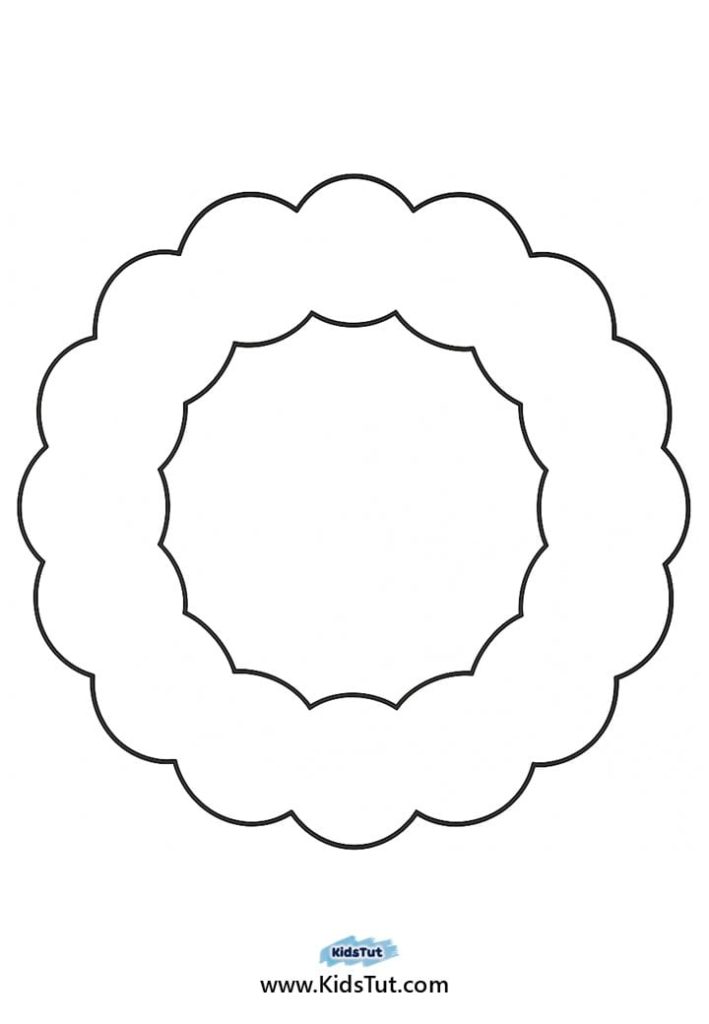
- Step 04: Make your wreath base. You’ve already colored and cut your wreath base, but it’s only paper. We want to give it strength. So, paste your paper wreath base onto cardboard. Then cut around the outline shape and remove the middle part to make it a ring shape. Let it dry. Now your wreath base is ready.
- Step 05: Paste your cut-out images around the base. You can arrange them as you like, but the bow shape should be pasted at the top of the wreath. Don’t paste the Christmas tree shape yet.
- Step 06: Now, attach the Christmas tree. Take a piece of ribbon, yarn, or string. Tape one end to the Christmas tree and the other end to the base, just under the bow shape.
- Step 07: Punch a hole to hang, or paste it on your door, wall, or a matching place in your classroom or hall.
Extra Tips:
- Use a paper plate instead of cardboard. You can cut and color it directly into a wreath shape to make the base.
- You can use star stickers instead of star templates. I think it’s easier for kids to make this craft.
Templates:


**** Click here to get the free PDF template: Download