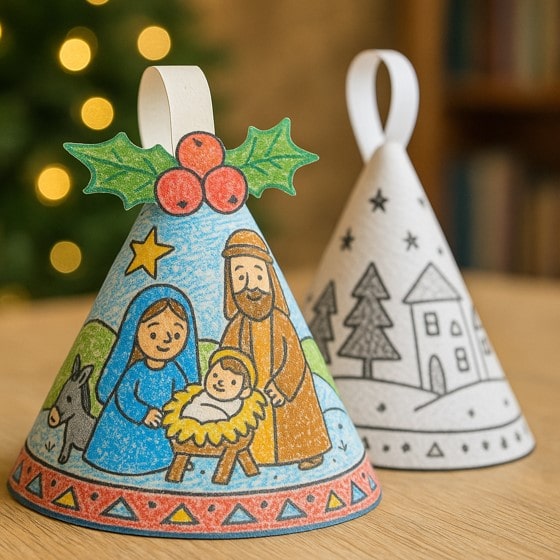
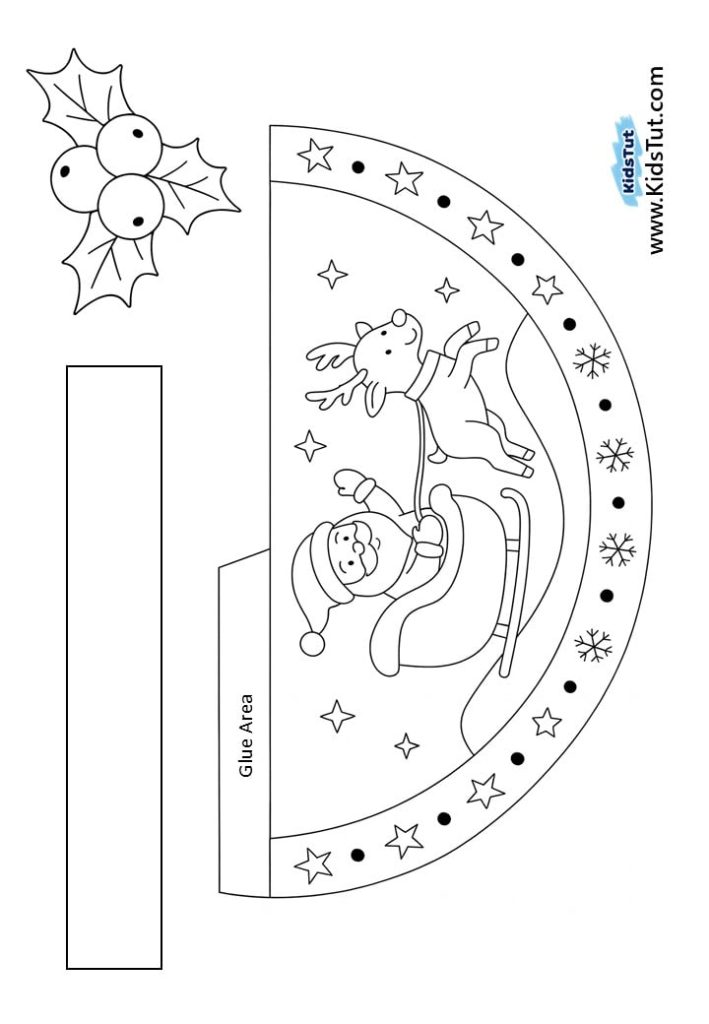
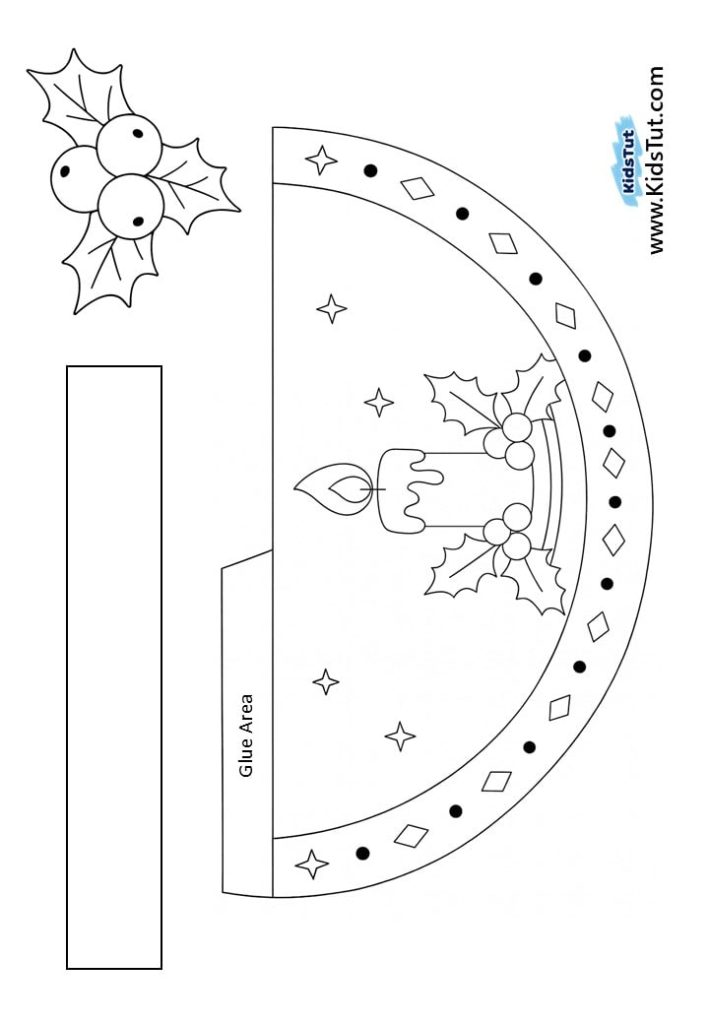
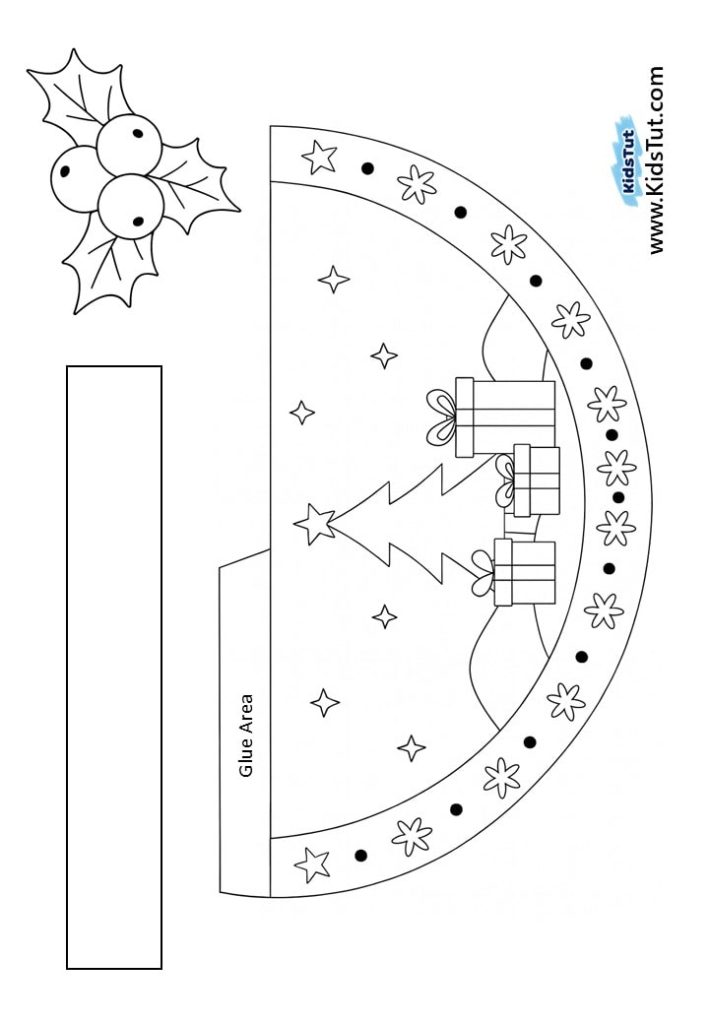
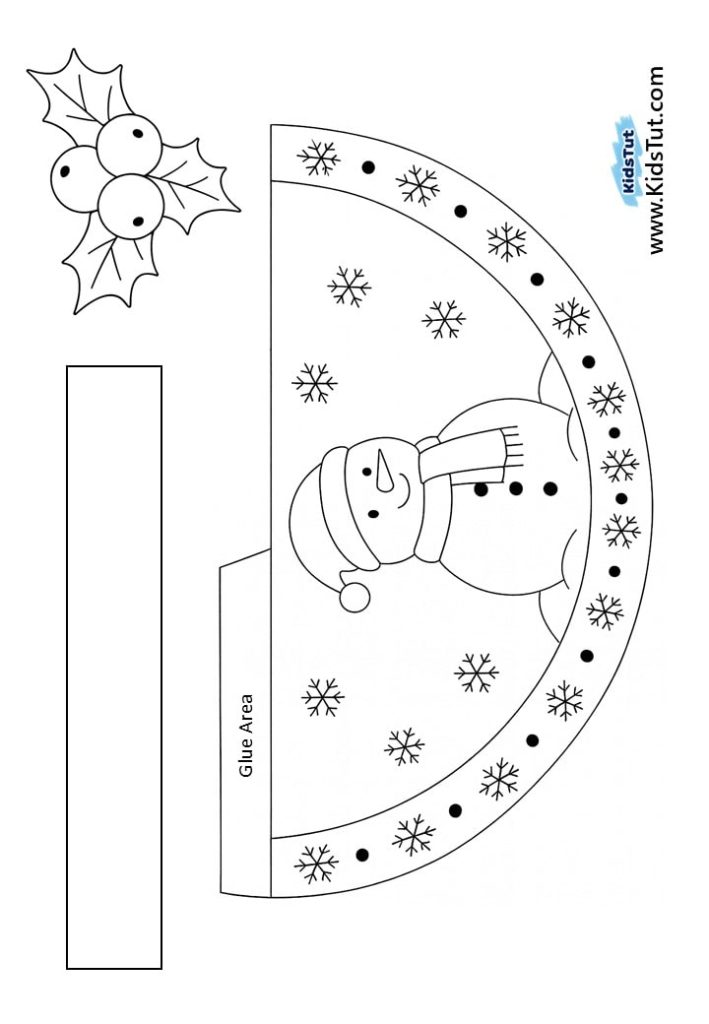
Welcome to today’s new lesson. Here’s a fun holiday craft. This is a beautiful bell decoration craft idea to decorate your home, classroom, or office as you prepare for the holidays. So, these bell ornaments can be easily created using simple steps like coloring, cutting, and gluing. So, let’s see how to make these bell ornaments.
What You Need:
- Printed templates
- Crayons or markers
- Scissors
- Glue
- Ribbon, yarn, or string (instead of the paper strip part)
How to Make Your Christmas Bell Cone Craft:
Step 1: Choose your favorite template and print it on white printing paper.
Step 2: Use crayons or markers to color your template beautifully.
Step 3: Cut out each part of the template separately. You’ll get:
- The cone-shaped main part
- The paper strip (or use ribbon/yarn)
- The holly berry with three leaves
Step 4: Take the cone part and apply glue to the marked Glue Area. Roll it into a cone shape and press both sides together to stick.
Step 5: Fold the paper strip (or use ribbon/yarn) and glue both ends together. Then glue the holly berry decoration on top of the strip. Finally, attach this part to the top of your cone.
Step 6: Hang your finished bell cone on your Christmas tree or anywhere you’d love to decorate!
Templates:
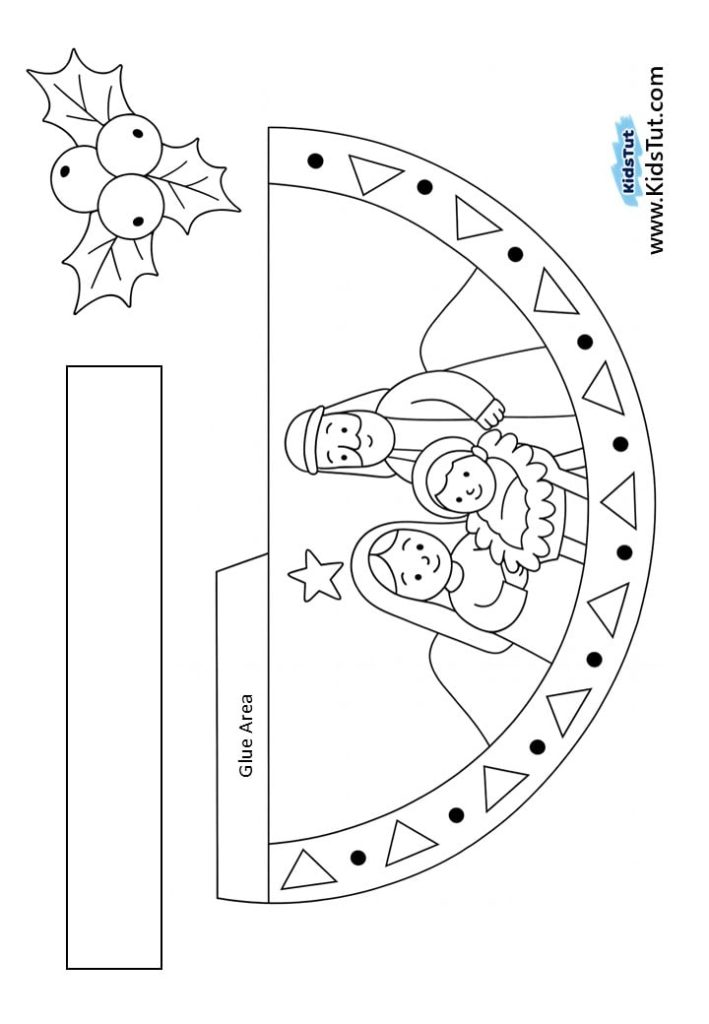
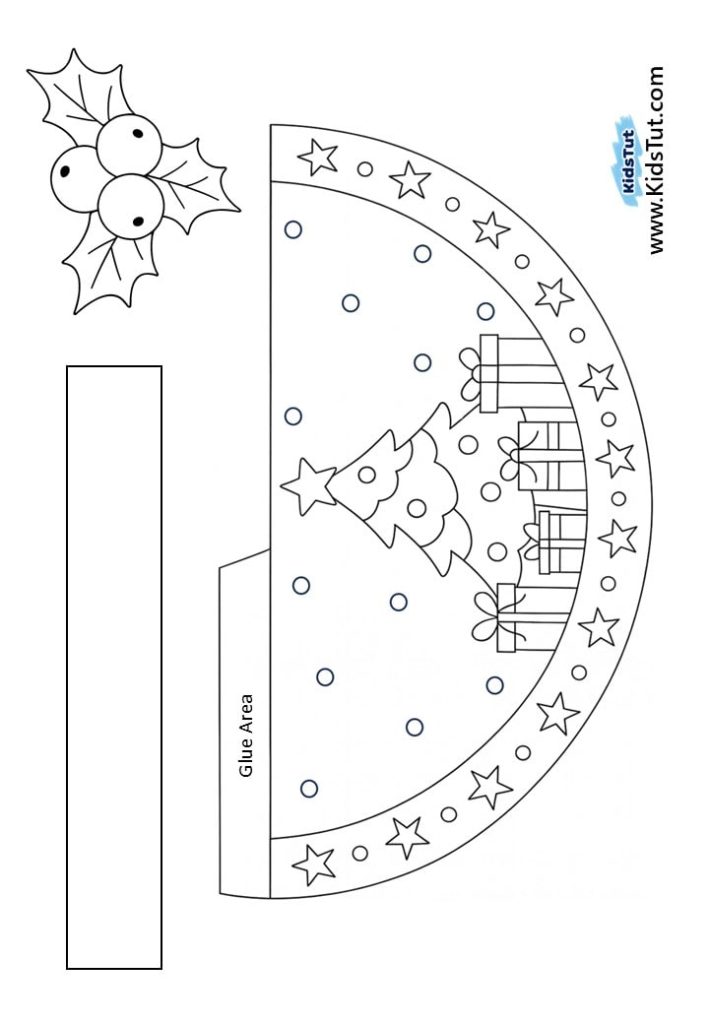
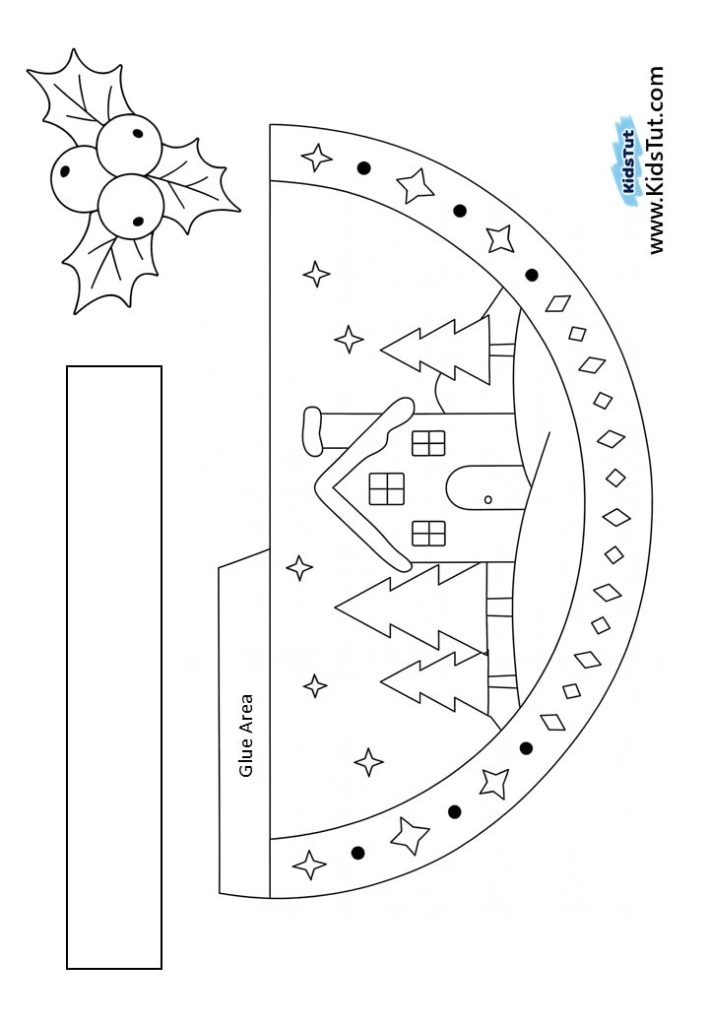
**** Click here to get the free PDF template: Download