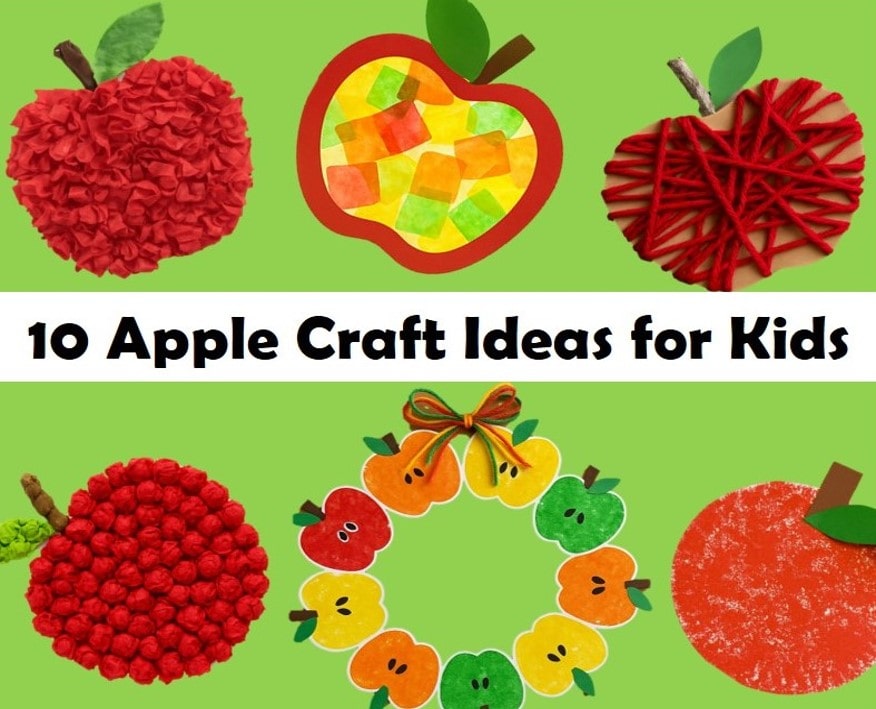
Autumn is the perfect time for apple crafts. Because it’s apple picking season. Also, apples are one of the favorite fruits of children. So these apple craft ideas will really please your children. This is a great opportunity for kids to have fun, learn, and get creative with delicious and nutritious apples. So come on, let’s create these easy apple craft ideas.
01. Tissue Paper Stained Glass Apple Crafts 🍎

What You Need to Make It:
- Red construction paper or cardstock (for the apple outline)
- Brown paper (for the stem)
- Green paper (for leaves)
- Colored tissue paper (red, yellow, orange, green—cut into small squares)
- Clear contact paper or laminating sheets
- Scissors ✂️
- Glue stick or tape
How to Make It:
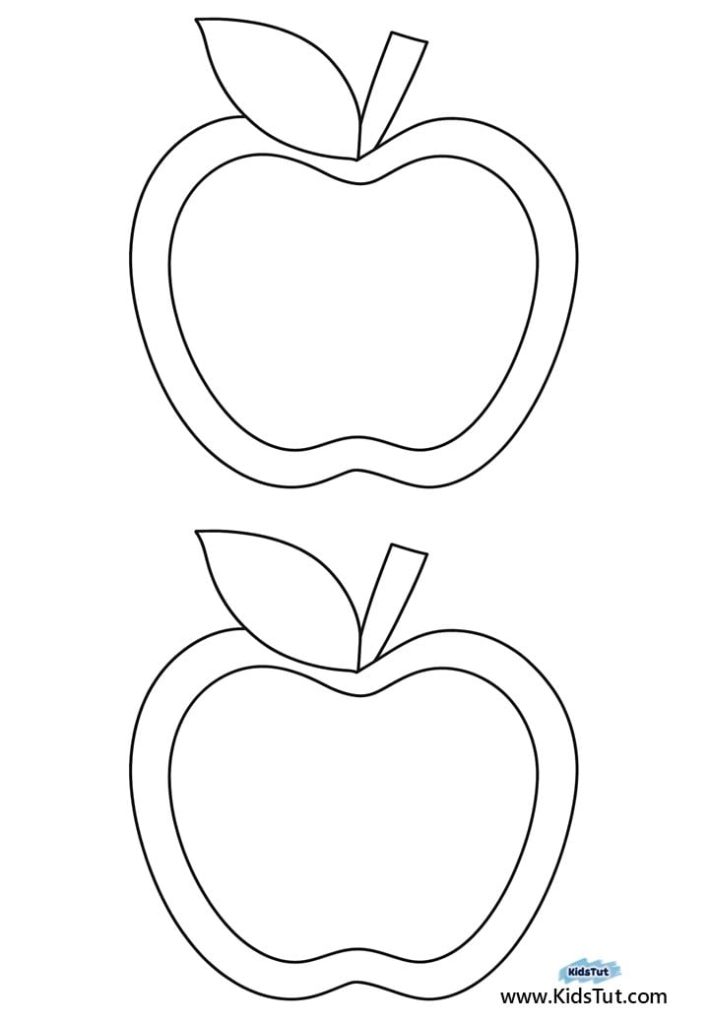
- Create the Apple Frame: Cut out the large apple shape template shown below. Then color the solid outline red. Otherwise, cover it with a strip of red paper. Then cut out the inside of the apple shape, leaving a thick outline.
- Prepare the Sticky Base: Now, take a piece of clear contact paper. Keep the sticky side facing up. Then, stick the apple block you prepared (red side facing the sticker) onto this clear contact paper.
- Add the Tissue Paper Mosaic: Let kids place the tissue paper squares inside the apple frame, overlapping colors to create a stained glass effect.
- Seal the Design Cover the finished apple with another piece of contact paper (sticky side down) to seal it.
- Add Stem and Leaves: Cut and glue a brown stem and green leaves to the top of the apple.
- Trim and Display Finally, cut off the excess clear paper around the apple frame and hang it in the window.
Apple Template:
02. Apple Wreath Craft 🍎
What You Need to Make It:
- Crayons/Markers or colored pencils
- Cardboard ring base for structure
- Yarn or ribbon for the bow
- Scissors
- Glue stick or tape
How to Make It:
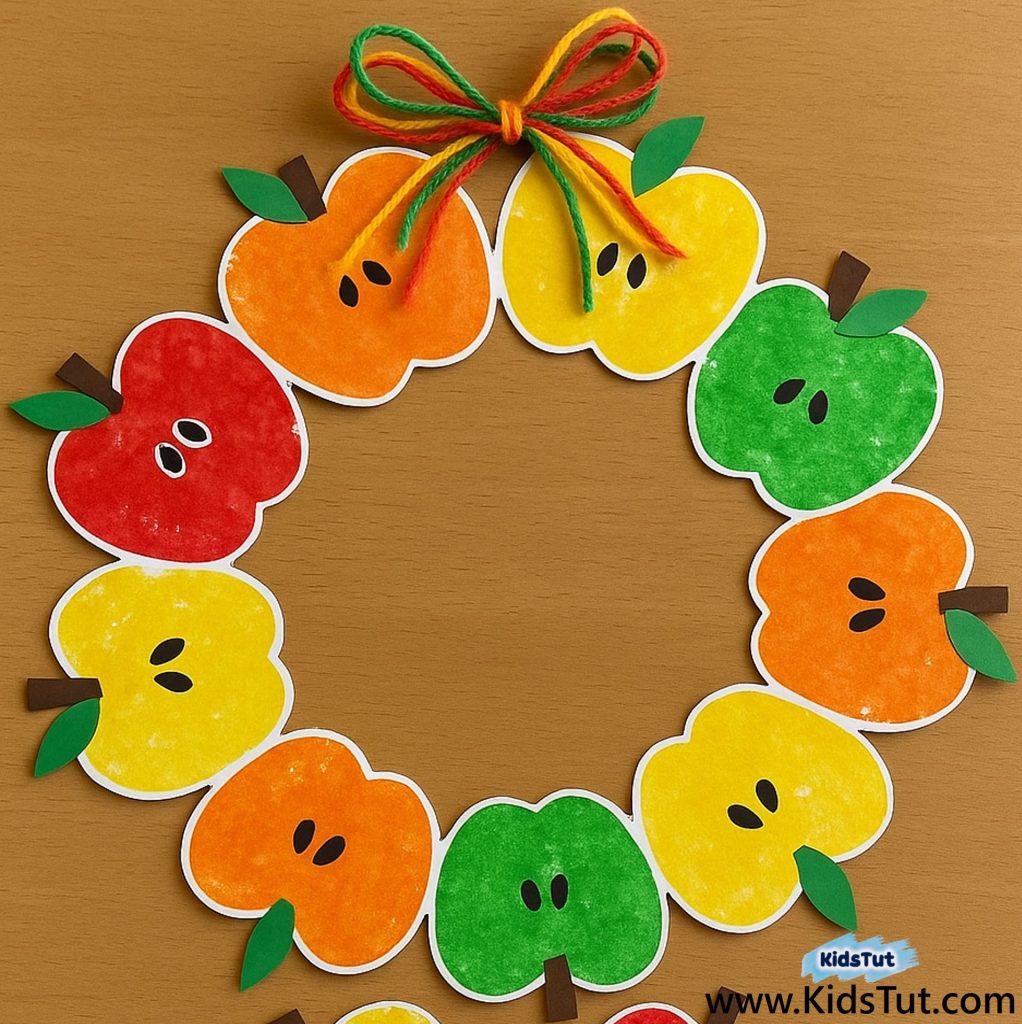
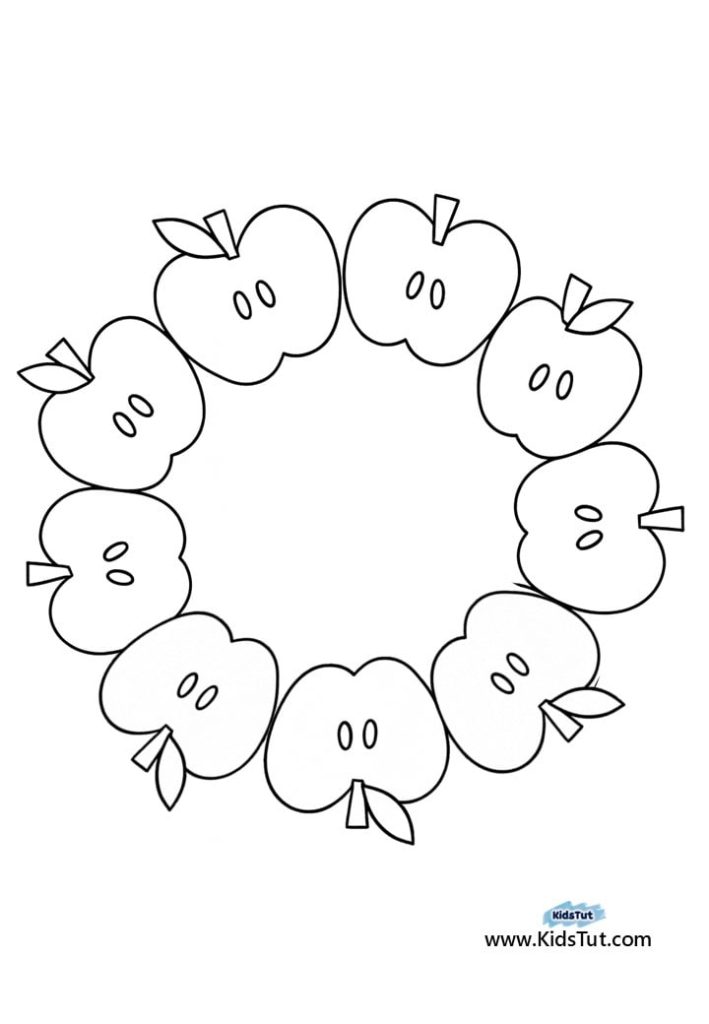
- Print the template: First, print the apple wreath template below on white printer paper.
- Color the printed wreath: Next, let the children color the printed template. You can use pencils, markers, or colored pencils to do this. Also, use different colors for the middle part of the apple, coloring the leaves green, the stem brown, and the seeds black.
- Add a Bow Tie a bow: using yarn or ribbon and glue it to the top center of the wreath.
- Display Your Craft: Hang it on a wall, door, or bulletin board for a seasonal touch!
Apple Wreath Template:
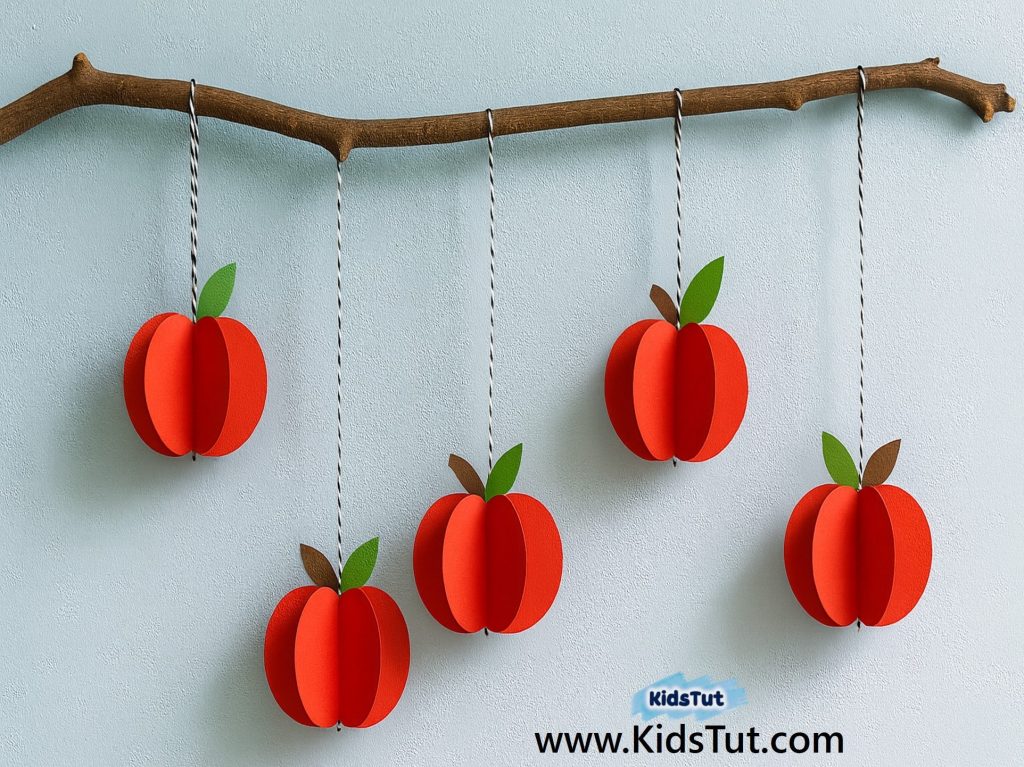
03. 3D Paper Apple Garland 🍎
What You Need to Make It
- Red paper (for apple segments)
- Green and brown paper (for leaves and stems)
- Twine or string (for hanging)
- Scissors ✂️
- Glue stick or double-sided tape
- Tree branch or dowel (optional for display)
How to Make It :
- Print the templates: Print the template below on white printer paper. Or print on red paper. (If you print directly onto red paper, cover the stem and leaves with brown and green paper after printing). Print as many templates as you need to create your Apple garland
- Color the templates: Color the templates you printed using red, brown, and green.
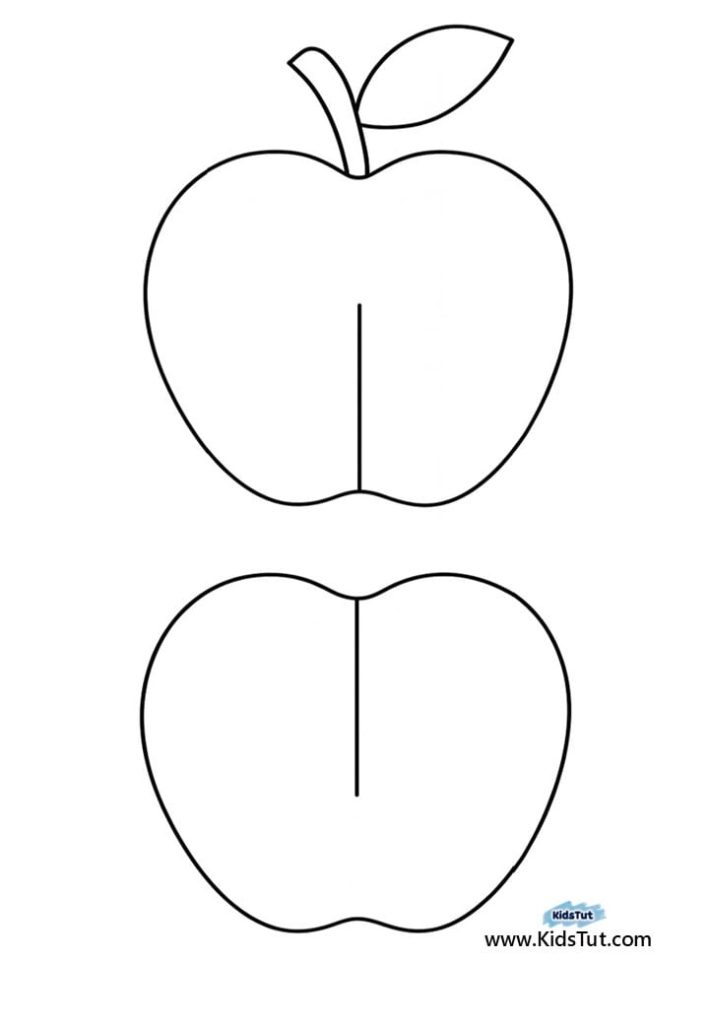
- Cut out the apple sections and along the lines: First, cut out the apple sections you colored separately. This will give you two sections to make one apple. You can also see a line drawn slightly upwards from the bottom of the cut pieces. Next, cut along those lines as well.
- Make a 3D apple: For this, take the two pieces of the apple template you prepared. Insert them perpendicular to each other along the lines you cut. Now you have a 3D apple craft.
- Attach a 3D apple to the stick: You can use a real, fairly long stick for this. If desired, you can cover it with colored paper. Or leave it as is for a natural look. Then, attach the string to the 3D apple you prepared and tie the string to the stick. Vary the length of the string for more creativity.
Apple Template:
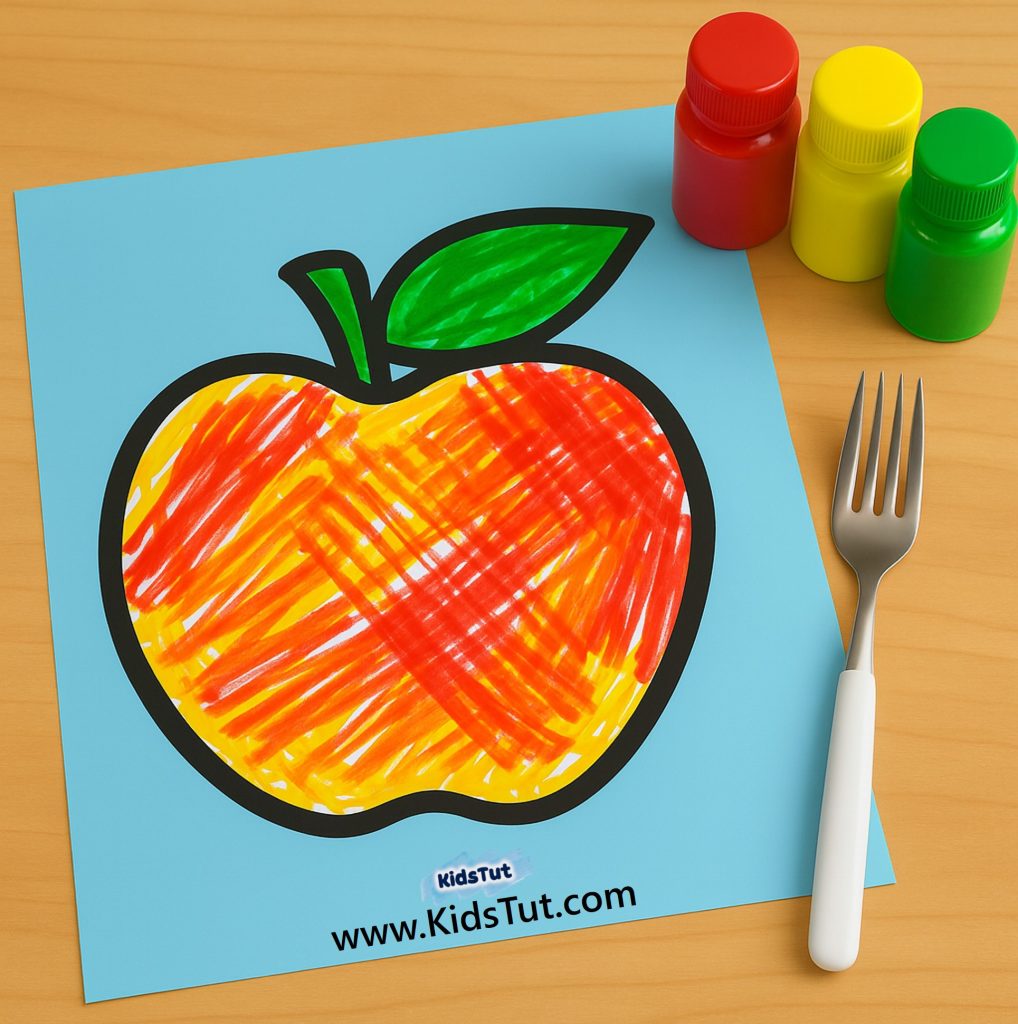
04. Fork-Painted Apple Crafts 🍎
What You Need to Make It:
- Colored sheet of paper (or any background color)
- Red, yellow, and green or any color paint
- Fork (plastic or metal)
- Paint/ crayons/ markers
- Paper towel or cloth for cleanup
How to Make It:
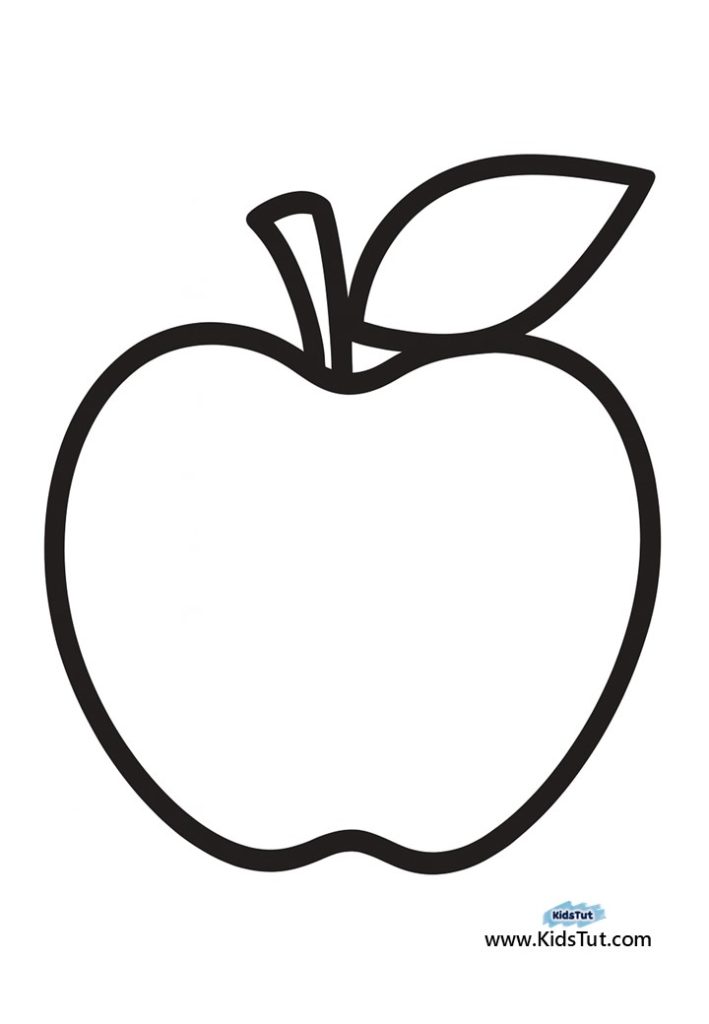
- Print the given apple template: Print the large apple template given below. You can use white or light-colored printer paper for this.
- Get colorful paint and forks: Give the children small plates with different colored paint. Also, give the children a small fork that is easy to handle.
- Put the fork-painted marks on the apple: Instruct the children to dip the fork in paint and smear it onto the apple shape.
- Color the stem and leaves of the apple template: Using pencils, markers, or paint, color the stem and leaves of the template. Use brown and green colors.
- Let It Dry: Allow the paint to dry completely before displaying.
Apple Template:
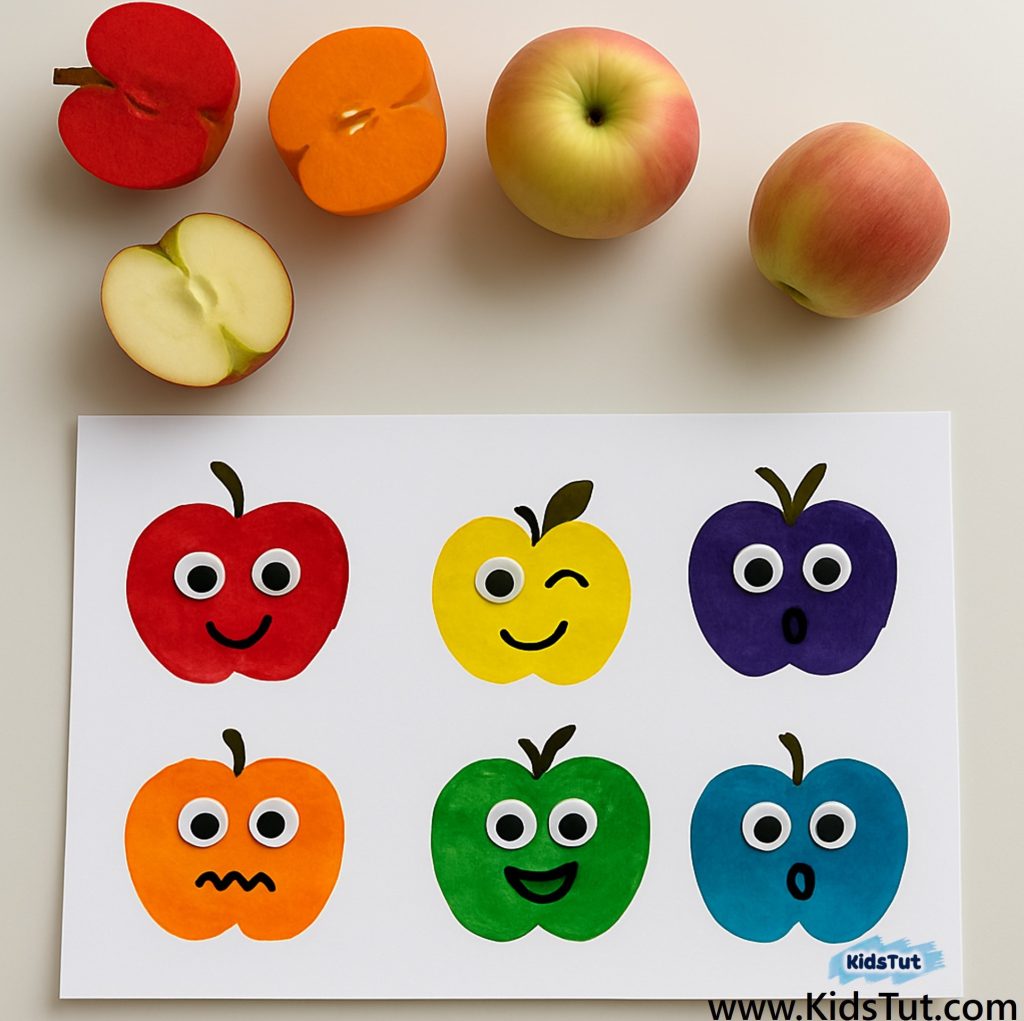
05. Googly-Eyed Emotion Apple Print Craft 🍎
What You Need:
- Real apples (cut in half)
- Washable paint (red, yellow, green, etc.)
- Paper or cardstock
- Googly eyes
- Glue stick
- Black color Marker
- Paper plate or brush (for applying paint)
How to Make It:
- Cut the Apple: Slice apples in half. Dab dry with a paper towel.
- Apply Paint: Use a brush or dip the apple into paint. Cover the cut surface evenly.
- Stamp the Apple: Press the painted apple onto paper to create a print. Lift carefully.
- Add Googly Eyes: Once dry, glue googly eyes onto each apple print.
- Draw Expressions and stem: Use markers to add smiles, winks, surprised faces whatever emotions you like! Also, draw the stem and leaves using a black marker.
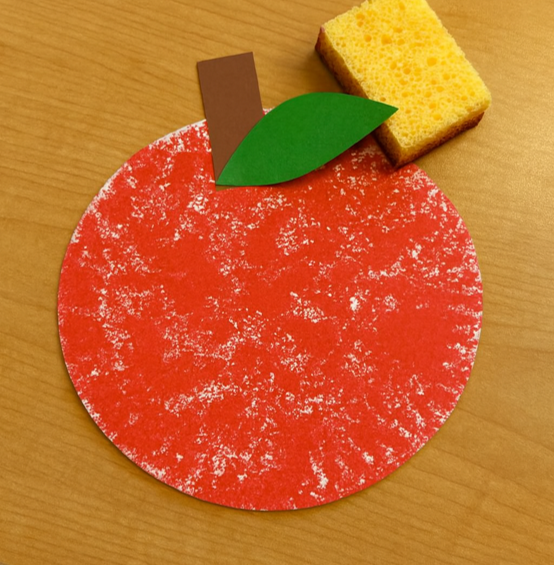
06. Sponge Painted Apple Crafts 🍎
What You Need
- Red paint
- sponge
- Paper plate or White cardboard circle
- Brown paper (for the stem)
- Green paper (for the leaf)
- Scissors
- Glue stick
How to Make It:
- Make the Apple Shape: You can take a piece of white cardboard and cut it into a large circle. Otherwise, you can use a round paper plate for this.
- Dip Sponge in Paint : Take a piece of sponge, dip it in red paint, and apply the paint thoroughly to the sponge.
- Place the sponge print on the prepared apple shape: Now, take the apple shape you have prepared and place the sponge dipped in red paint on it, leaving red sponge marks.
- Let It Dry: Allow the paint to dry completely before adding details.
- Add Stem and Leaf: Cut a small brown rectangle for the stem and a green leaf shape. Glue them to the top of the apple.
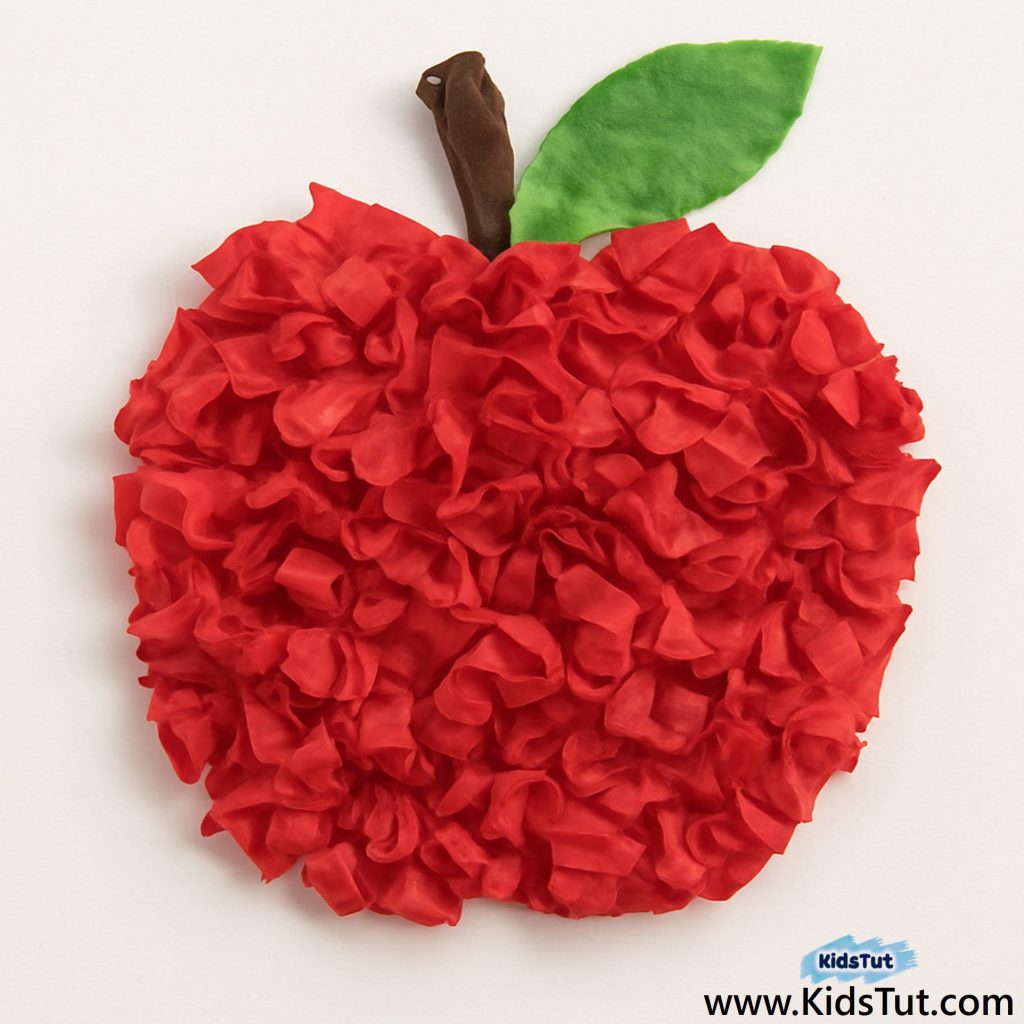
07. Tissu Paper Apple Craft 🍎
What You Need:
- Red tissue paper or crepe paper (cut into small squares or strips)
- White or colored paper (for the apple base)
- Brown paper (for the stem)
- Green paper (for the leaf)
- Glue stick or liquid glue
- Scissors ✂️
How to Make It:
You can use the apple template below to create this craft. Also, take pieces of tissue paper, crush them and keep them aside. Then color the stem and leaf of the apple template. Then, apply glue to the apple shape and glue crumpled pieces of tissue paper on it.
Apple Template:
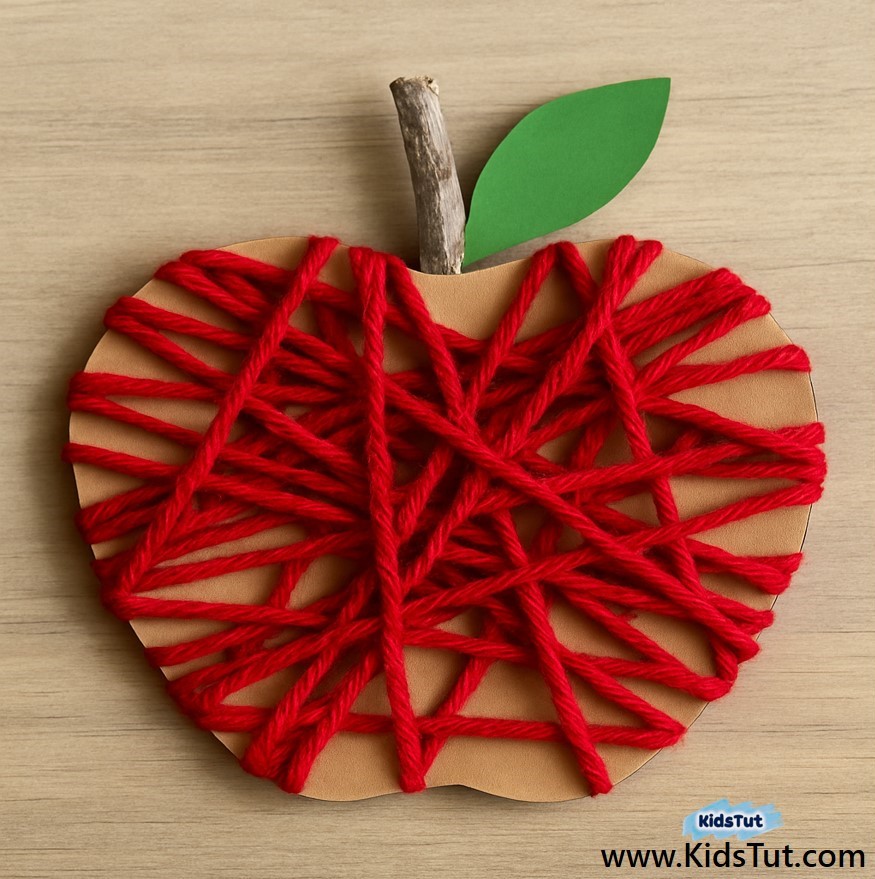
08. Yarn-Wrapped Apple Craft 🍎
What You Need:
- Brown cardboard or thick paper (cut into an apple shape)
- Red thick yarn or string
- Small stick or twig (for the stem)
- Green paper (for the leaf)
- Scissors
- Glue or tape
How to Make It:
Take a piece of sturdy cardboard and cut it into the shape of an apple. Then take a dark red string (cotton thread) and wrap it around the apple-shaped board. Attach a small piece of stem to the board wrapped around the apple as the stem. Also, cut and glue a piece of green paper for the leaf.
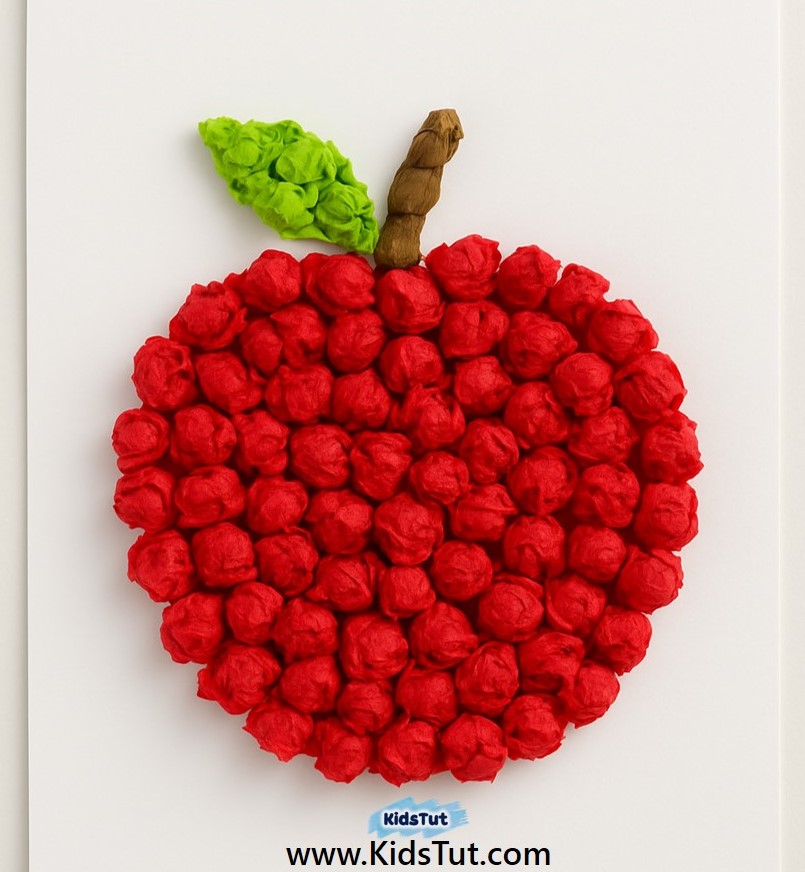
07. Crumpled Tissue Paper balls Apple Craft 🍎
What You Need:
- Apple shape template
- Red tissue, Green, and brown tissue paper (cut into small squares)
- Glue stick or liquid glue
- Scissors
How to Make It:
Print out the apple-shaped template below. Then take pieces of red, green, and brown tissue paper and crumple them into small balls. Then, apply glue to the apple shape and stick crumpled tissue paper balls on it. Use red crumpled tissue paper balls for the apple shape, green for the leaf, and brown for the stem.
Apple Template:
10. Paper Plate Apple Frame Craft 🍎
What You Need:
- Red paper plate or paint a white one red
- Scissors
- Brown paper (for the stem)
- Green paper (for the leaf)
- Glue stick or tape
- White craft stick, straw, or popsicle stick (for holding)
How to Make It:
First, take a sheet of red paper and cut a ring in the middle. Next, cut a stem and leaf out of brown and green paper and attach them to the top of the prepared ring. Then take a straw and attach it to the bottom of the paper plate ring. This can also be used as an apple face mask for children.
**** Click here to get the free PDF template: Download