
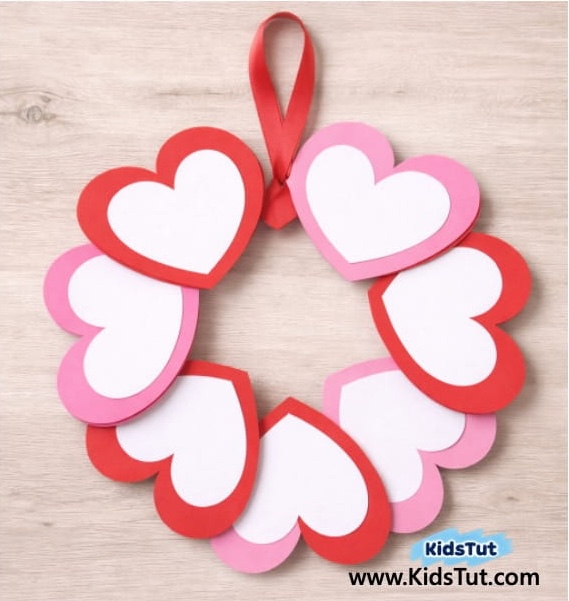
This month of February is a great time to instill good qualities like love, kindness, and respect in children. Let’s use this Valentine’s month to teach children that it is very easy to treat parents, teachers, friends, and elders with kindness, respect them, and love them. So today we are going to create a heart wreath. Let the children create this with patience and cooperation with each other. Also, use heart wreaths in the classroom and at home to teach children the importance of being a loving person.
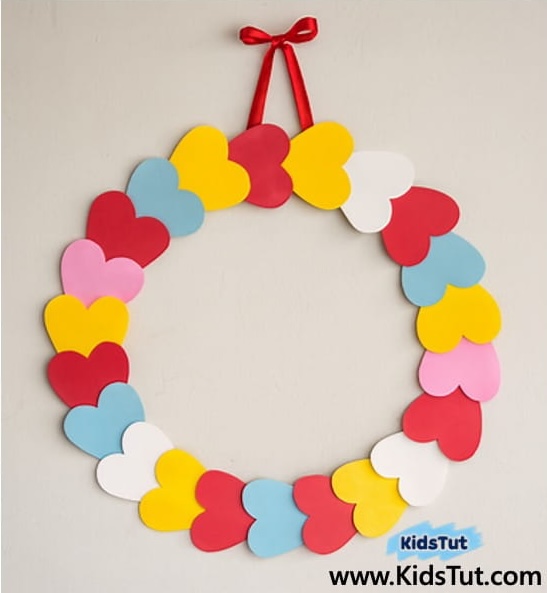
Colorful Heart Wreath Craft
What You Need
- Colored papers (for cutting heart shapes)
- Scissors
- Glue stick
- Ribbon or string (for hanging)
- Pencil (for tracing hearts)
- Cardboard circular base (to build the wreath on)
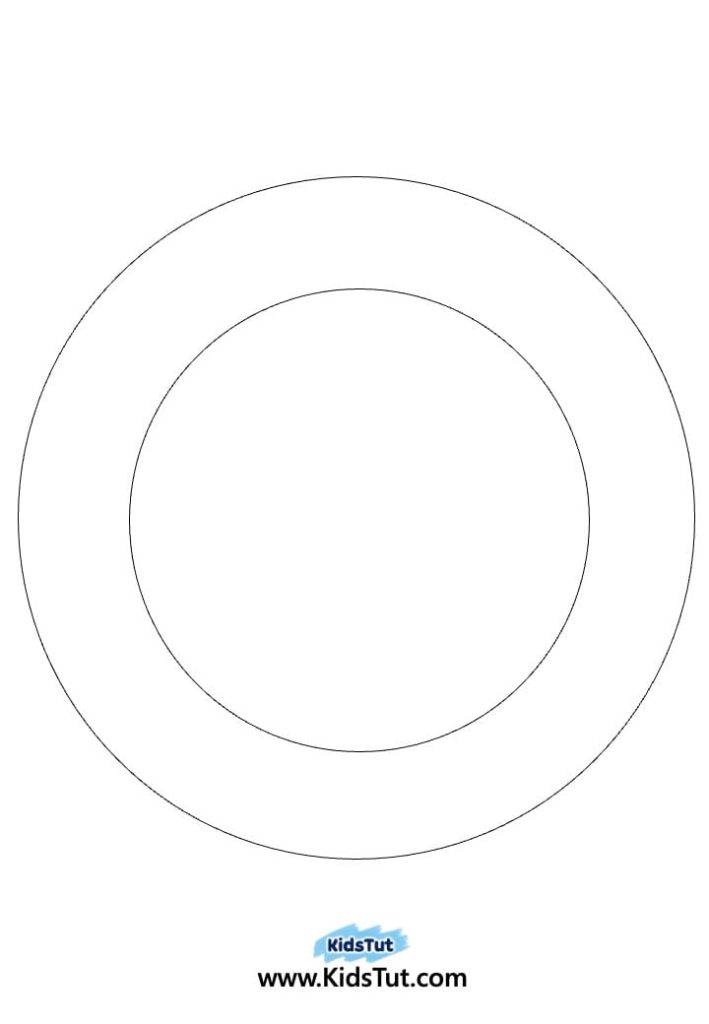
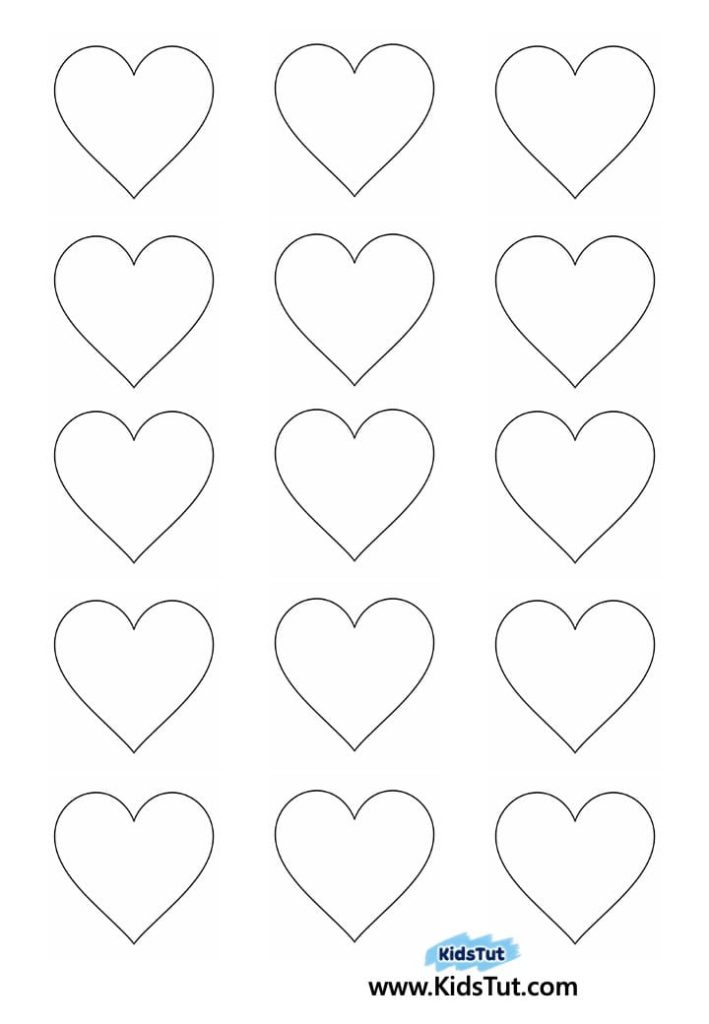
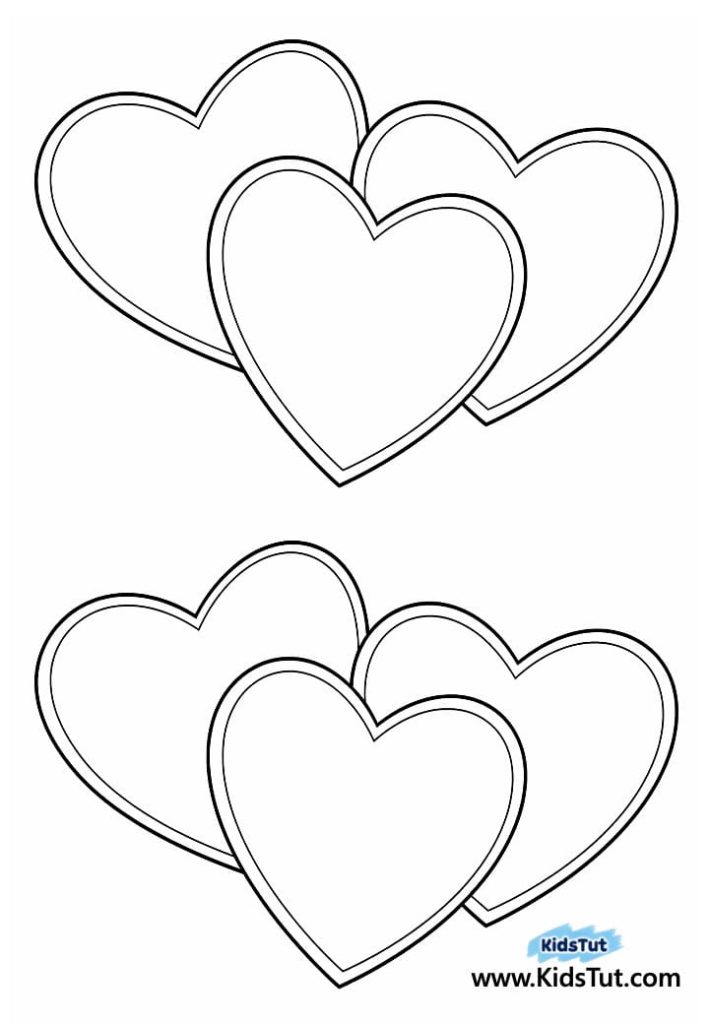
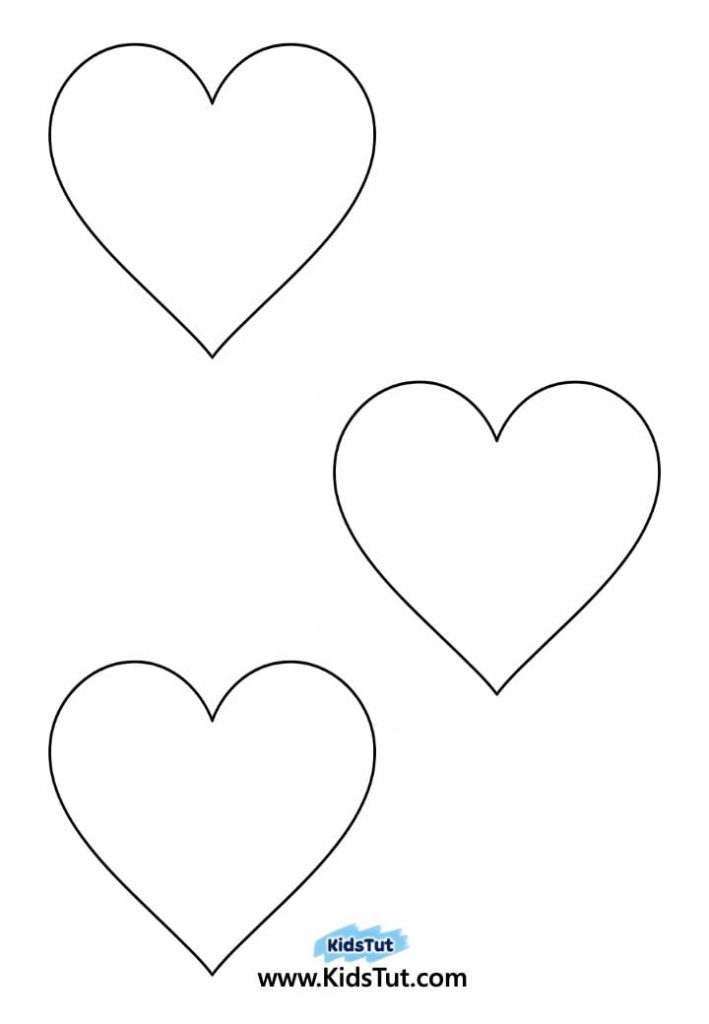
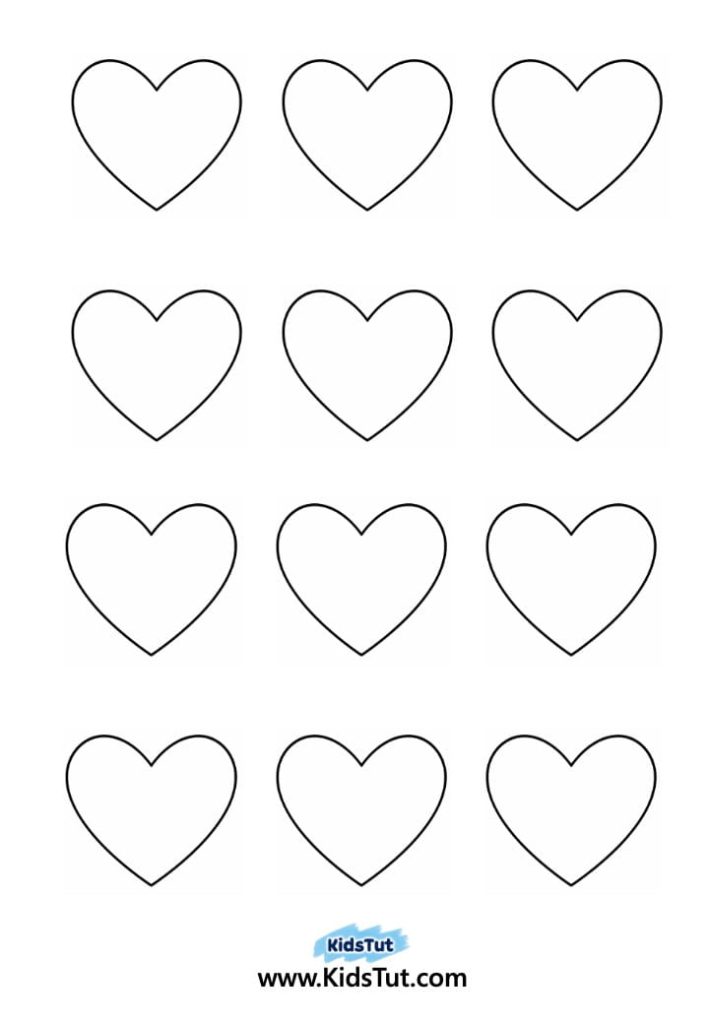
Templates:
How to Make
- Draw or print hearts: On colored papers, draw or print heart shapes. Use a variety of colors to make your wreath bright and cheerful.
- Cut out the hearts: Carefully cut out each heart shape separately.
- Prepare the wreath base: Print the circular wreath base on paper. Place it on cardboard and cut it out to make a strong base. Cut out the middle part too, so it looks like a ring.
- Arrange the hearts: Before gluing, place your hearts around the cardboard ring to see how they look. Try different color patterns until you like the style.
- Paste the hearts: Glue the hearts one by one around the ring until the whole base is covered.
- Add a ribbon: Attach a small piece of ribbon at the top of your wreath.
- Display your wreath: Hang your colorful heart wreath on a wall or door to spread Valentine’s love!
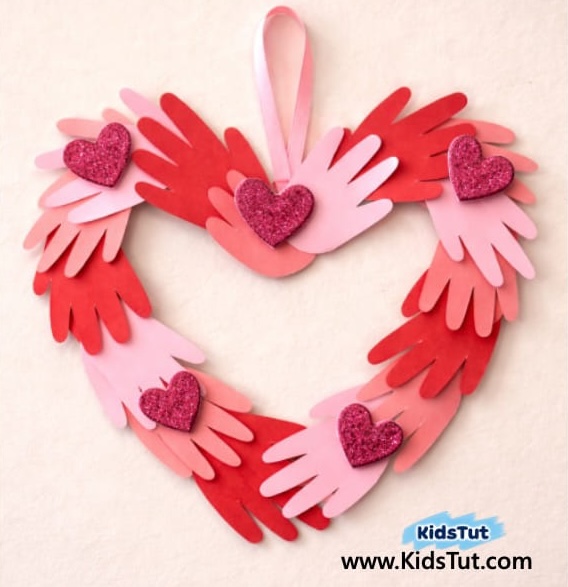
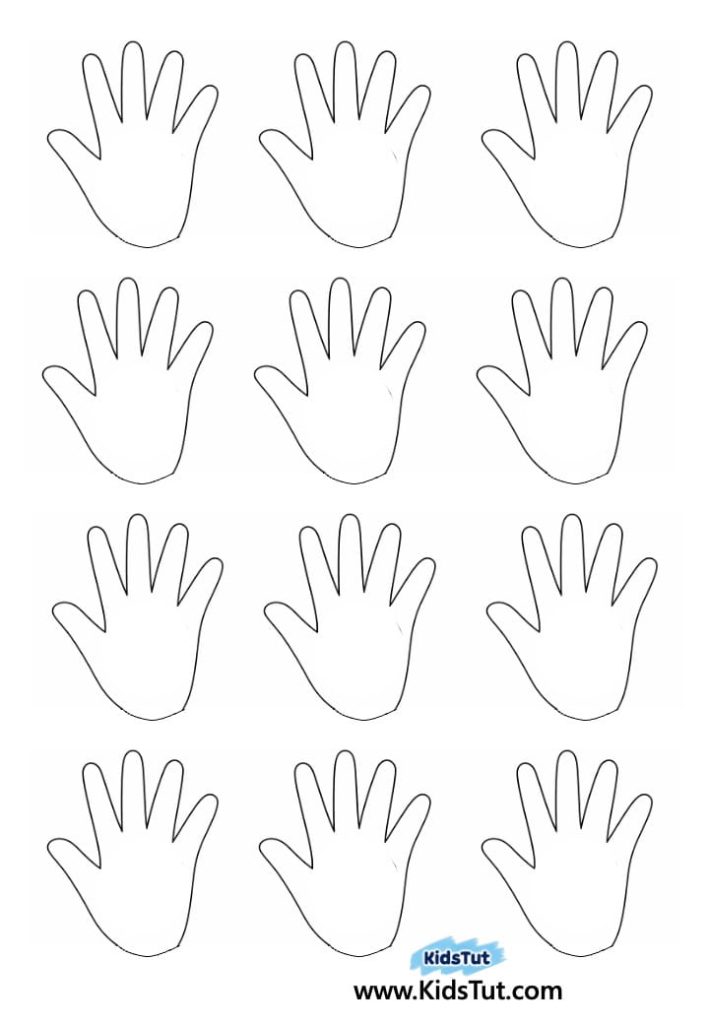
Handprint Heart Wreath Craft
What You Need
- Colored papers (for tracing or printing handprints)
- Glitter sheets (for extra sparkle)
- Heart-shaped cardboard base
- Scissors
- Glue stick or liquid glue
- Ribbon (for hanging your wreath)
Templates:
How to Make
- Make the handprints: Kids can place their hands on colored paper, trace around them, and cut out the shapes. Or, print hand templates and cut them out.
- Prepare the base: Print the heart-shaped base and trace it onto cardboard. Cut it out carefully, so you have a strong heart base to build your wreath.
- Arrange the handprints: Place the hand cutouts around the cardboard heart base. Try different patterns until you like the look, then glue them down one by one.
- Add glitter hearts: Cut small heart shapes from glitter sheets. Paste them on top of the handprints in different spots to decorate your wreath.
- Attach the ribbon: Tie or glue a ribbon loop at the top of the wreath so it can hang easily.
- Display your wreath: Hang your finished handprint heart wreath on a wall or door to spread Valentine’s love and joy!
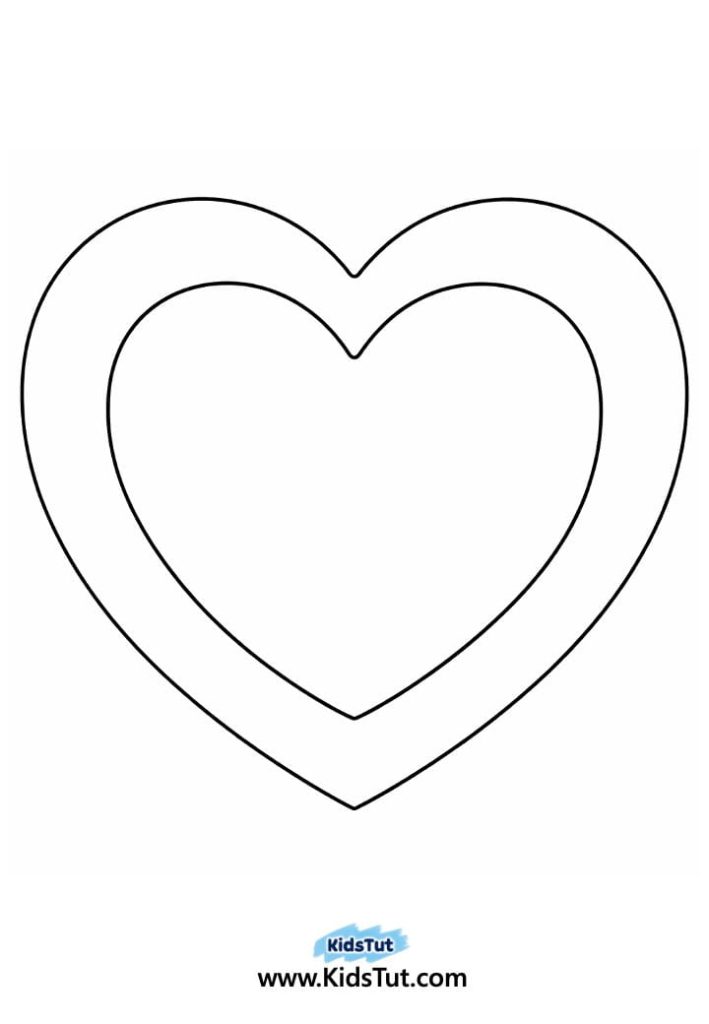
Layered Heart Wreath Craft
What You Need
- Colored papers (use two colors like red and pink)
- White paper (for layering hearts)
- Cardboard pieces or a circular cardboard base
- Scissors
- Glue stick
- Ribbon (for hanging your wreath)
- Optional: heart template for easy cutting
Templates:

How to Make
- Draw or print big hearts: On colored papers, draw or print large hearts. Make sure they are all the same size. Use two colors together, like red and pink, blue and purple, orange and yellow, or pink and purple.
- Make small white hearts: On white paper, draw or print smaller hearts (same size for each). Cut them out neatly.
- Layer the hearts: Paste one small white heart inside each big colored heart. This makes a pretty layered look.
- Prepare the base: You can glue the big hearts onto cardboard and cut them out for strength, or use a circular cardboard ring as the base.
- Arrange the wreath: Place the layered hearts around the base in a circle. Try different color patterns until you like the style. Then glue them down to form your wreath.
- Add the ribbon: Attach a ribbon at the top of the wreath so it can hang.
- Display your craft: Hang your layered heart wreath on a wall or door to spread Valentine’s love!
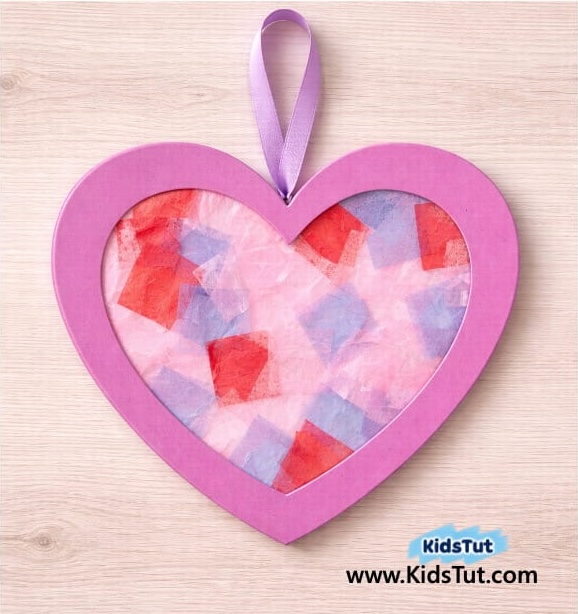
Tissue Paper Heart Wreath Craft
What You Need
- Colored cardboard (cut into 2 heart shapes)
- Colored tissue paper pieces (red, pink, purple, etc.)
- Scissors
- Glue stick or liquid glue
- Ribbon (for hanging your wreath)
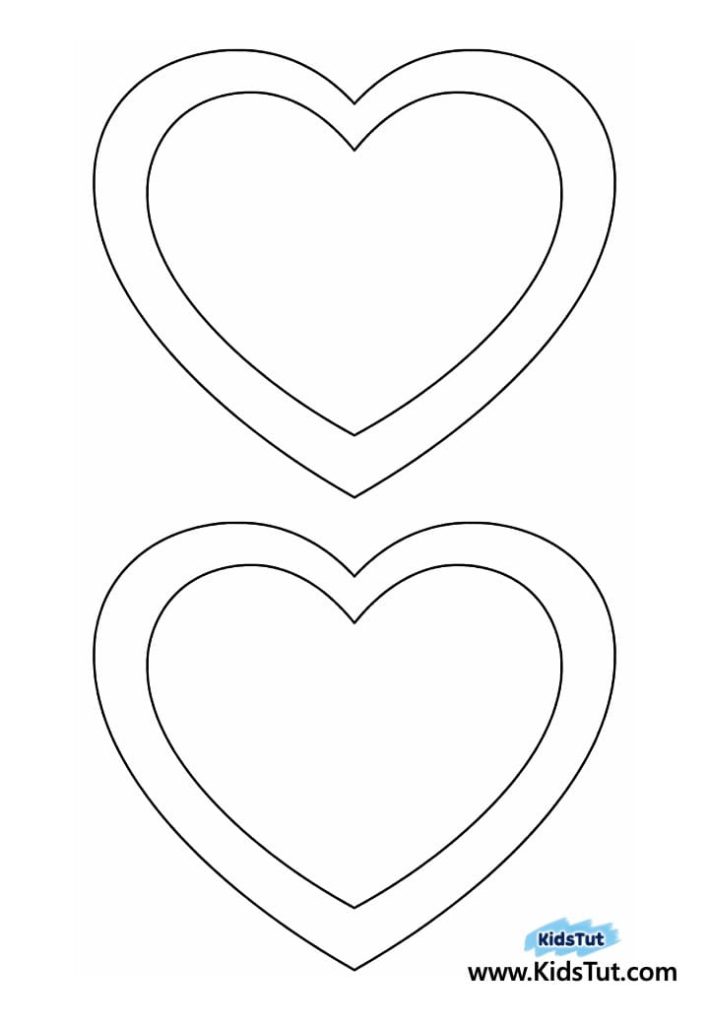
Templates:
How to Make
- Draw or print hearts: On colored cardboard, draw or print two big heart shapes with double lines. Cut them out carefully.
- Make the heart ring: Cut out the middle part of each heart so they look like heart-shaped rings.
- Prepare tissue pieces: Tear or cut colored tissue paper into small pieces (red, pink, purple, or any colors you like).
- Add the transparent sheet: Take one of the cardboard hearts and paste a white transparent sheet (like tracing paper or thin plastic) on the back side.
- Paste tissue pieces: Glue the tissue paper pieces onto the transparent sheet, covering the inside of the heart with colorful layers.
- Cover with the second heart: Place the second cardboard heart on top to cover the glued side, making your wreath neat and strong.
- Attach the ribbon: Tie or glue a ribbon at the top of the heart so it can hang.
- Display your wreath: Hang your tissue paper heart wreath on a wall or door. it will shine beautifully with the light coming through the tissue!
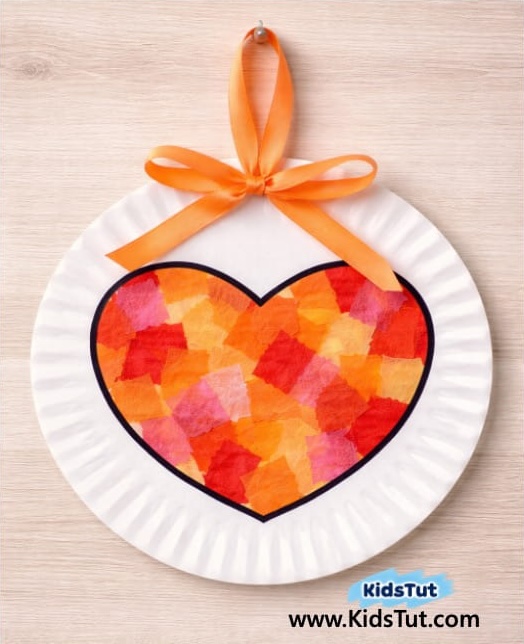
Paper Plate Mosaic Heart Craft
What You Need
- Colored cardboard (cut into 2 heart shapes)
- Colored tissue paper pieces (red, pink, purple, etc.)
- Scissors
- Glue stick or liquid glue
- Ribbon (for hanging your wreath)
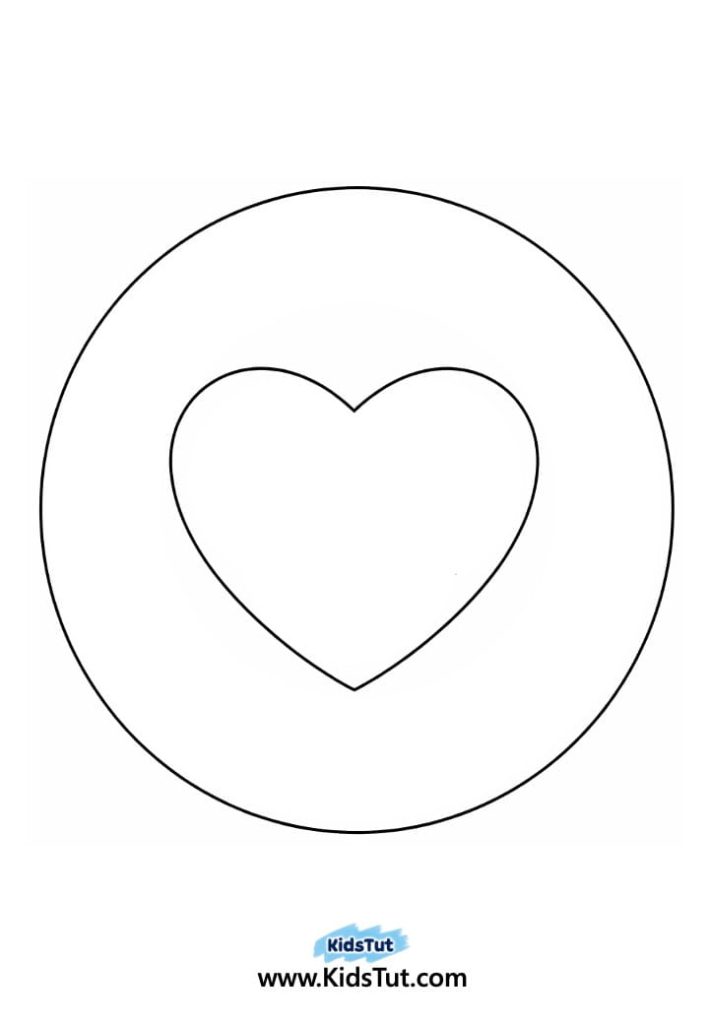
Templates:
How to Make
- Prepare the plate: Take a white paper plate and cut out the middle in the shape of a big heart. This will be the window of your wreath.
- Cut tissue pieces: Tear or cut colored tissue paper (red, pink, orange, yellow) into small pieces.
- Make the tissue backing: To cover the empty heart space, paste the tissue pieces onto a large square sheet of thin paper or tissue. Make sure it’s big enough to cover the heart opening.
- Attach the backing: Glue this tissue-covered sheet to the back side of your paper plate so the colorful tissue shows through the heart cutout.
- Cover the back: To make it neat and strong, paste another cardboard circle, paper plate, or paper circle (same size as your plate) over the back side.
- Add the ribbon: Tie or glue a ribbon at the top of the plate so it can hang.
- Display your wreath: Hang your paper plate mosaic heart wreath on a wall or door—it will glow beautifully with the colorful tissue design!
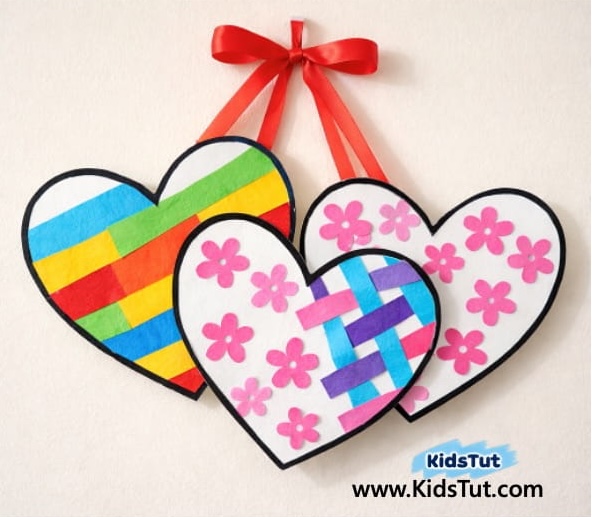
Hanging Heart Trio Craft
What You Need
- Cardboard (cut into 3 heart shapes)
- Colored papers (for decorating and weaving)
- Shape cutouts (like flowers or stars)
- Scissors
- Glue stick or liquid glue
- Ribbons (for hanging and bows)
- Optional: heart and flower templates for easy cutting
Templates:
How to Make
- Cut out the hearts: Use white cardboard to cut out 3 big heart shapes. You can also print paper heart templates and cut them out.
- Decorate each heart: Decorate the hearts separately in your own style.
- Add paper cutouts like flowers, stars, or circles.
- Use stickers for fun designs.
- Try strips of colored paper to make woven or striped patterns.
- Arrange the hearts: Once decorated, paste the three hearts together in a fan-like arrangement (side by side or slightly overlapping), just like in the example.
- Attach the ribbons: Tie or glue ribbons at the top of each heart, then gather them together with a bow so they hang nicely.
- Display your craft: Hang your trio of decorated hearts on a wall or door to spread Valentine’s cheer!
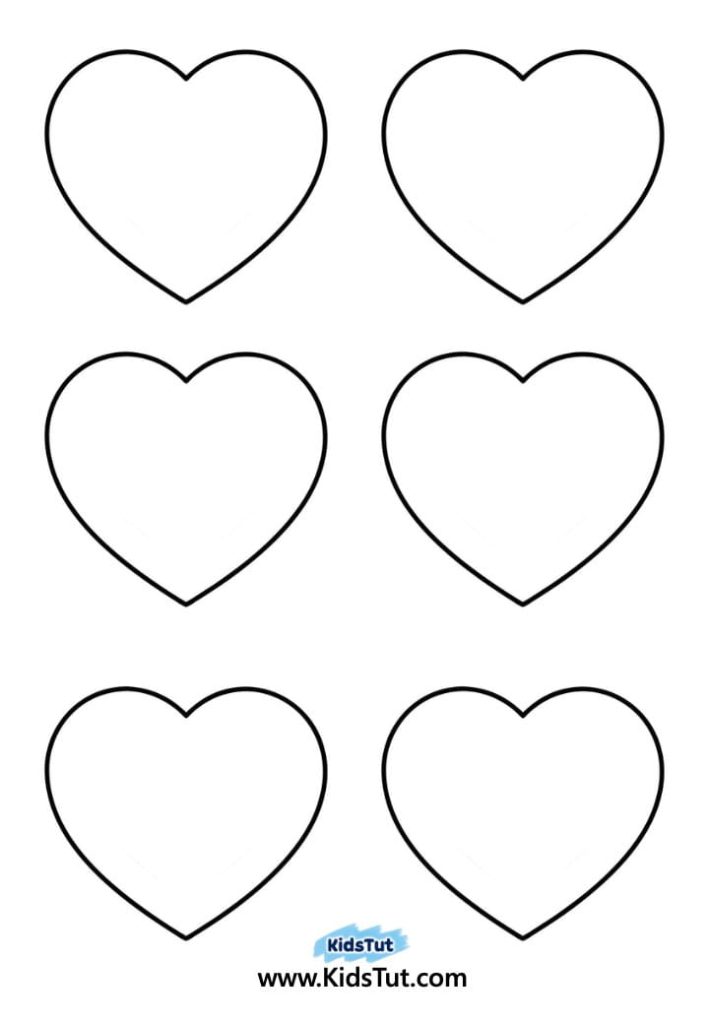
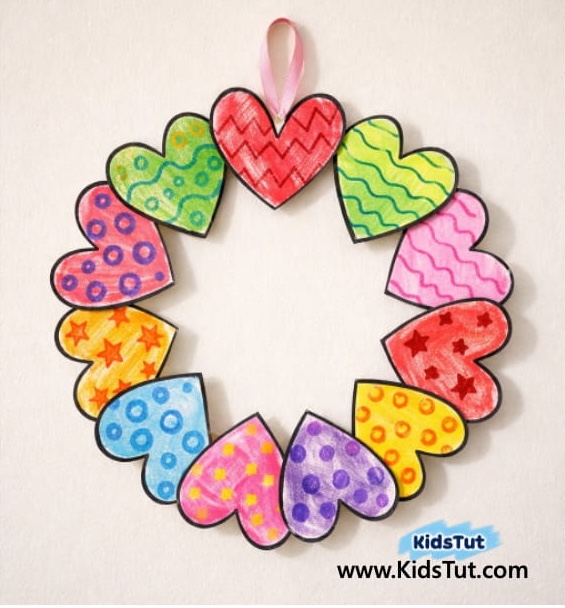
Patterned Paper Heart Wreath Craft
What You Need
- Printed heart shapes with or without patterns
- Markers, crayons, or paints (for coloring and decorating)
- Black Marker (if drawing your own patterns)
- Scissors
- Glue stick or liquid glue
- Circular base (cardboard ring or paper plate)
- Ribbon (for hanging your wreath)
Templates:
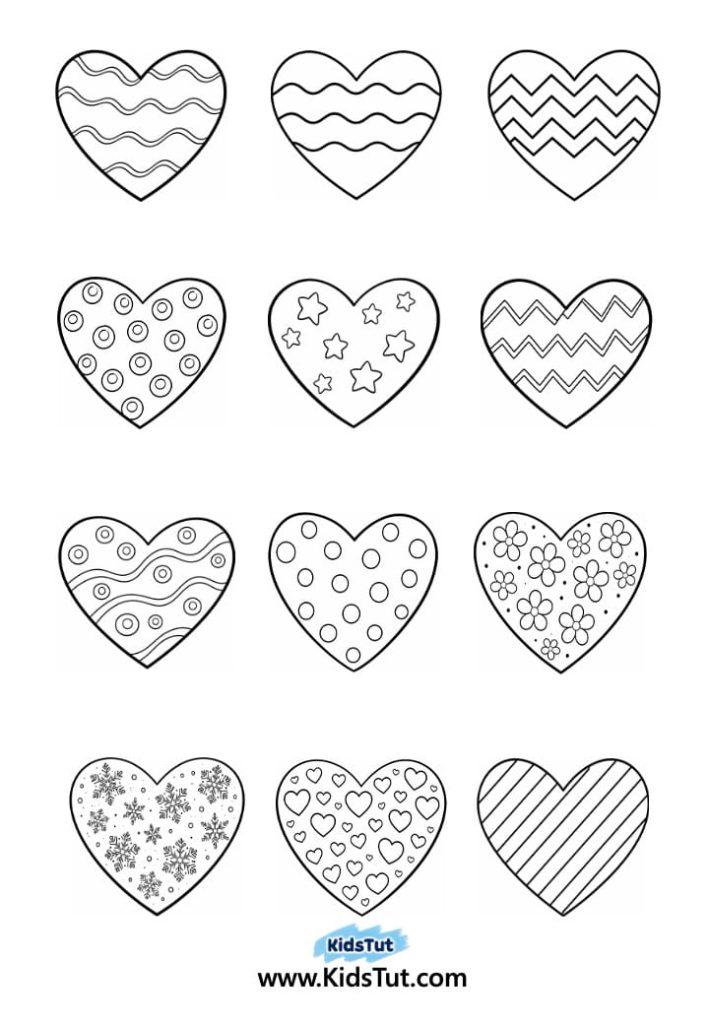
How to Make
- Choose your heart patterns: If you print hearts with patterns, you don’t need to draw—just color them using crayons, markers, or paints. If you print hearts without patterns, kids can draw their own designs using a black marker (zigzags, dots, stars, waves, etc.), then color them with crayons, markers, or paints.
- Cut out the hearts: Carefully cut out all the decorated hearts once they are finished.
- Prepare the base: Use a cardboard ring or circular base to build your wreath.
- Attach the hearts: Glue the decorated hearts around the base in a circle, overlapping them slightly to make a full wreath.
- Add the ribbon: Tie or glue a ribbon at the top so the wreath can hang.
- Display your craft: Hang your patterned heart wreath on a wall or door—it will look bright and cheerful with all the unique designs!

Click here to get the FREE PDF template: Download ( Printable )