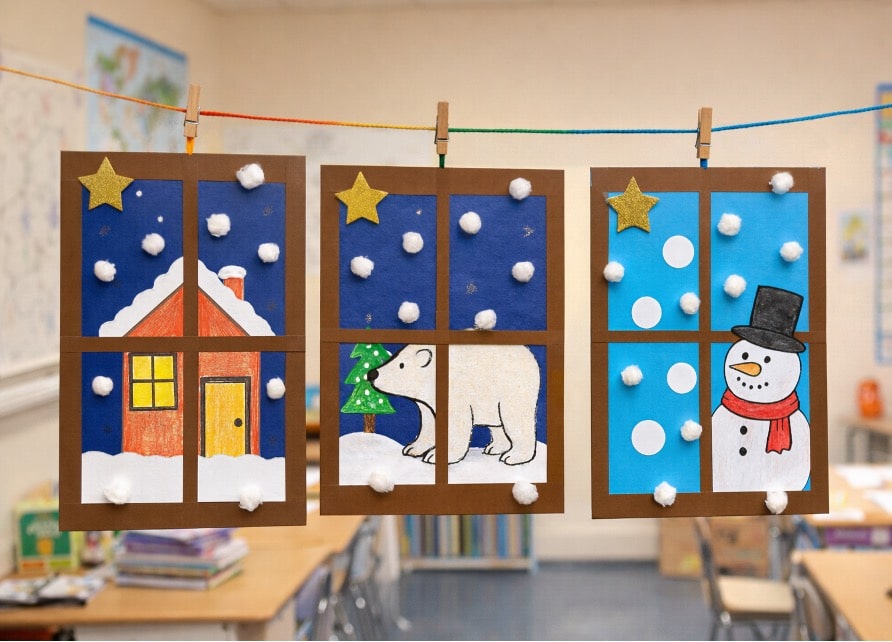
Looking for a fun way to spend this winter with your kids? Then let’s make a fun and easy craft. Kids can get creative, develop skills, and experience winter from the comfort of their own home. You now have all the materials you need to create this craft. So it will be a very simple activity. So, prepare for the activity by following the instructions below.
What You Need for Winter Window Craft:
- Printed templates
- Colored paper and white paper
- Scissors
- Glue
- Cotton pieces
How to Make the Window Frame for Winter Crafts:
Method 1: Using Printed Templates
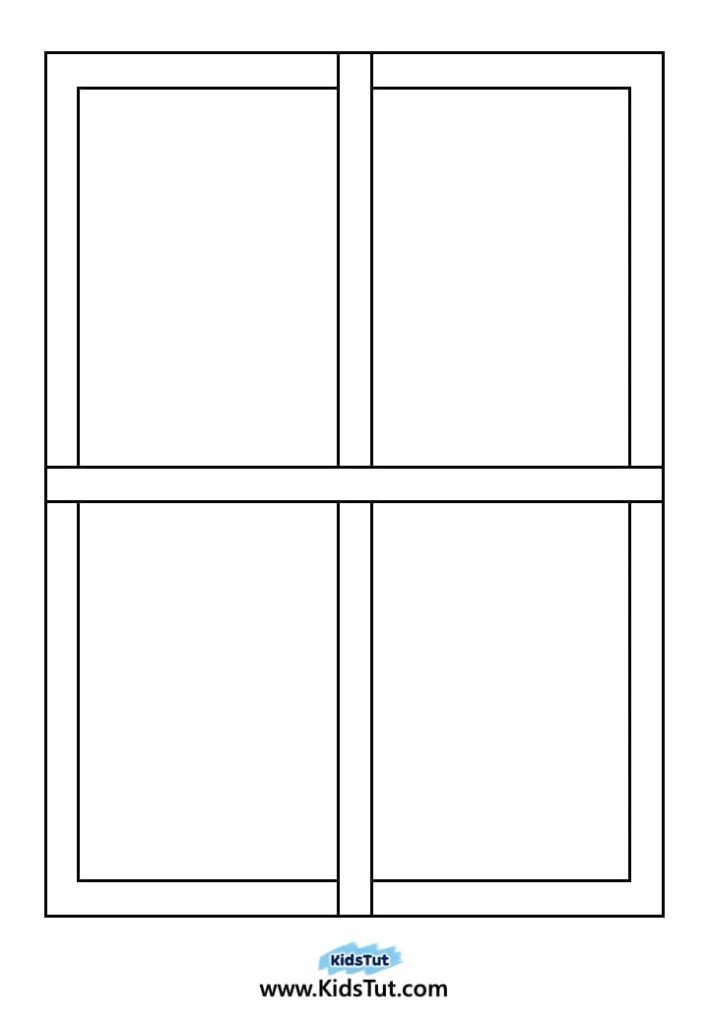
Step 1: Print the window shape and square background.
- Use brown paper for the window frame.
- Use a colored A4 sheet (like blue or purple) for the background.
Step 2: Cut out the window frame from the brown sheet.
- Carefully cut out the middle parts to create the four window panes.
Step 3: Set the window frame aside.
- Now, take the colored rectangle sheet and start building your winter scene on it.
✏️ Method 2: Drawing and Cutting by Hand
Step 1: Draw the window frame and background shapes directly on colored sheets.
- Use brown paper for the window frame.
- Use a colored sheet for the background.
Step 2: Cut out the shapes and follow the same steps to build your craft.
Window Frame and Rectangle shape Templates:

Polar Bear Winter Window Craft:
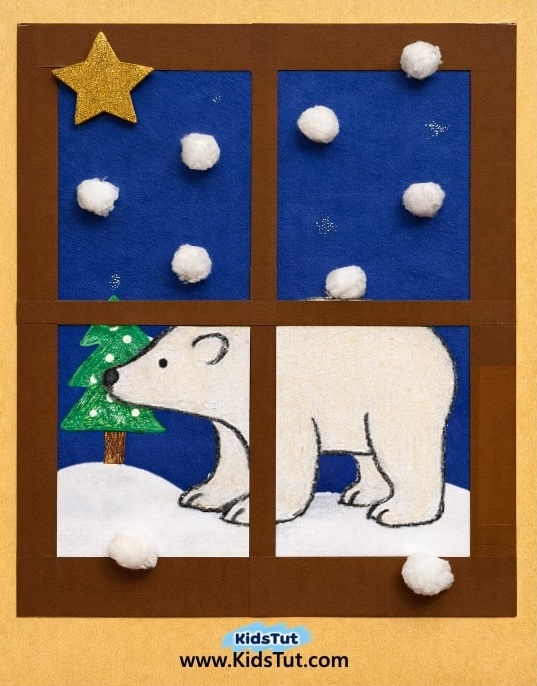
How to Make:
Step 1: Prepare the window frame and a light blue rectangle sheet.
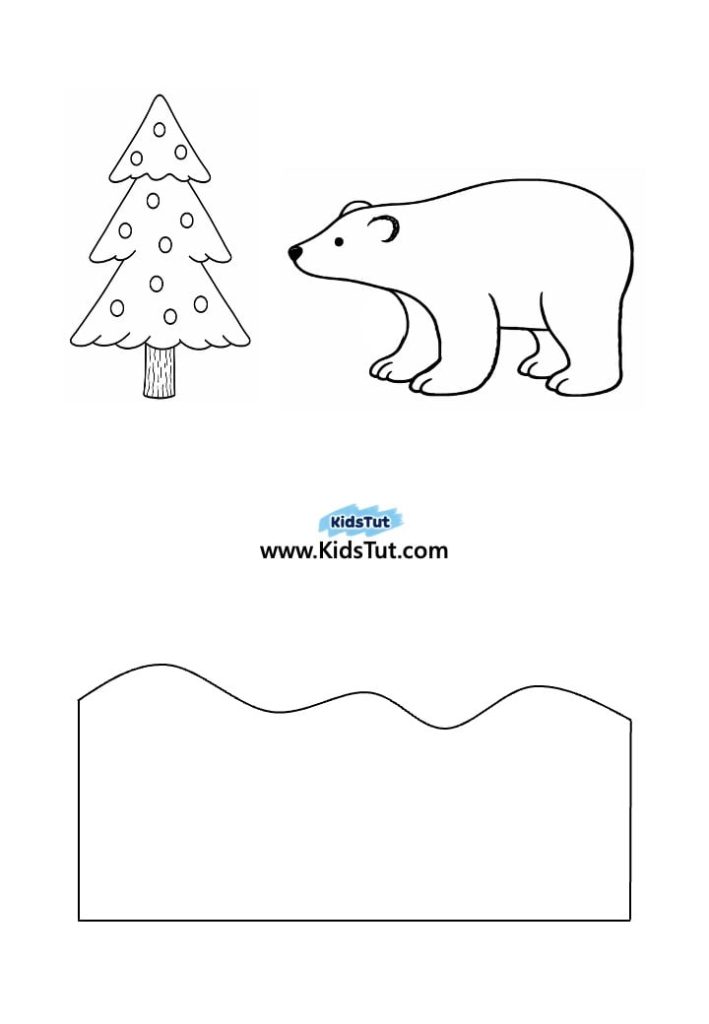
Step 2: Print the bear, snow, and tree templates on white paper.
Step 3: Color the bear and tree with crayons or markers.
- Keep the snow part white.
Step 4: Cut out the bear, tree, and snow shapes.
Step 5: Paste them onto the light blue rectangle sheet to build your winter scene.
Step 6: Take the brown window frame and glue it over the scene.
Step 7: Add cotton pieces around the picture to make fluffy snow.
Step 8: Let it dry, then proudly display your finished winter craft.
Templates:
Snowy Tree Window Craft:
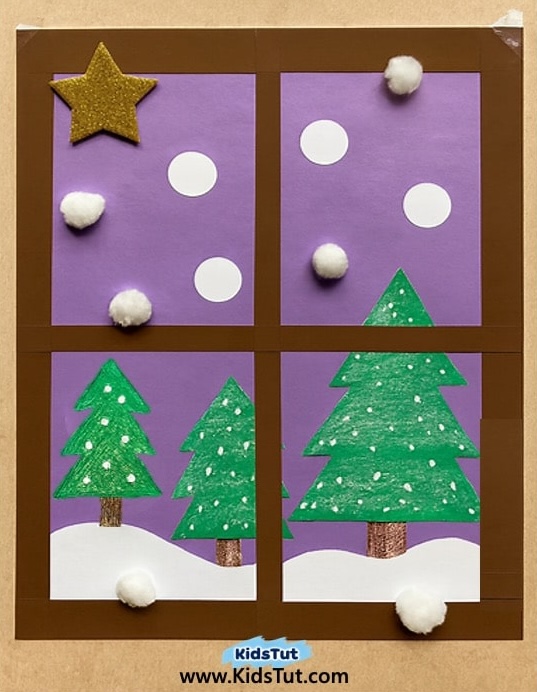
How to Make:
Step 1: Prepare the window frame and a light purple rectangle sheet.
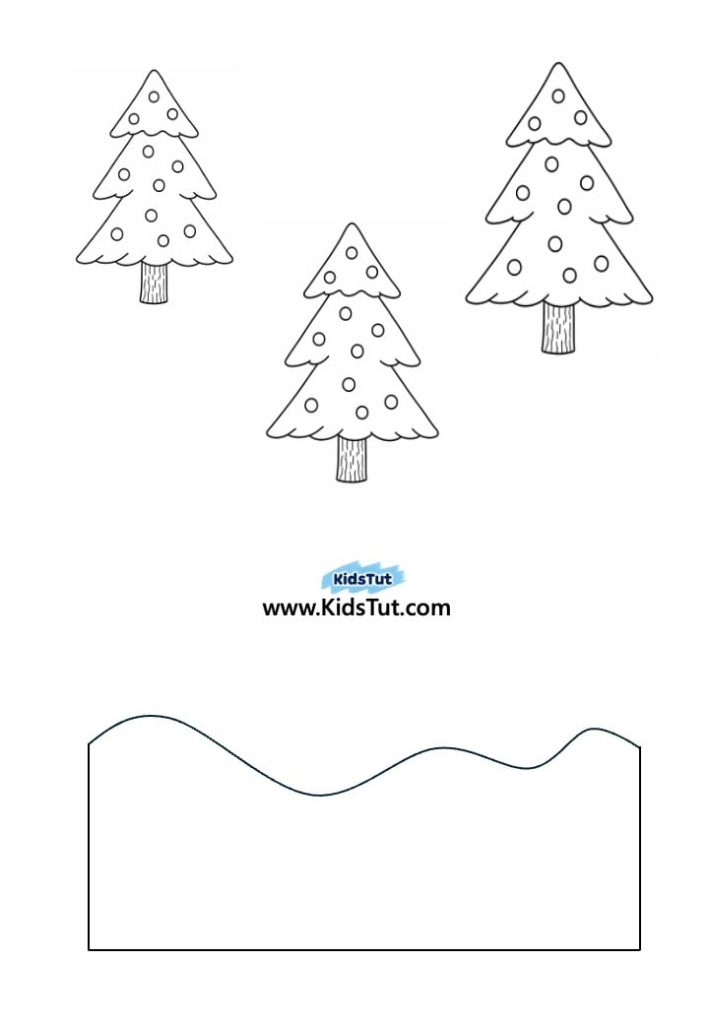
Step 2: Print the snow and snowy tree templates on white paper.
Step 3: Color the trees with crayons or markers.
- Keep the snow part white.
Step 4: Cut out the trees and snow shapes.
Step 5: Paste them onto the light purple rectangle sheet to build your winter scene.
Step 6: Take the brown window frame and glue it over the scene.
Step 7: Add cotton pieces around the picture and let it dry.
Templates:
Snowman Winter Window Craft:
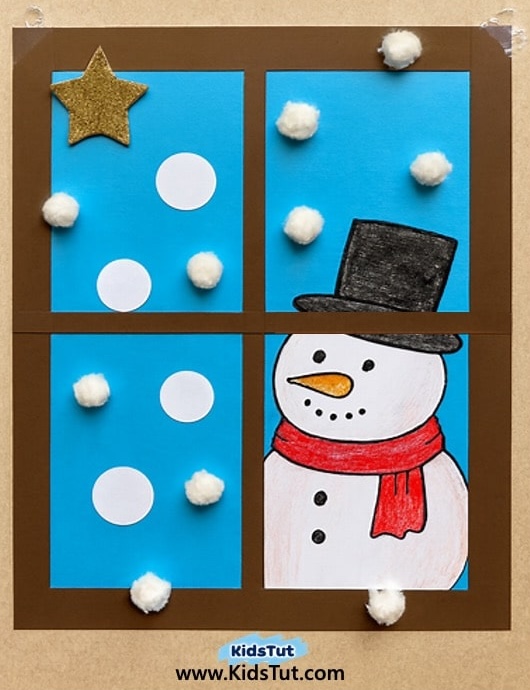
How to Make:
Step 1: Prepare the window frame and a light blue rectangle sheet.
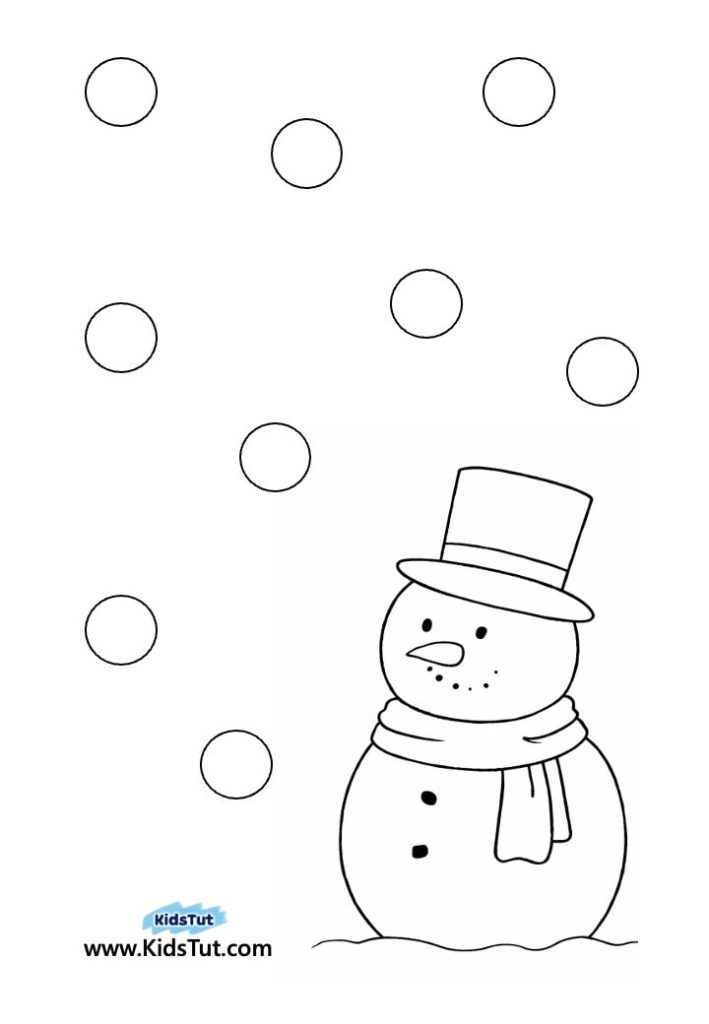
Step 2: Print the Snowman and Circle templates on white paper.
Step 3: Color the Snowman with crayons or markers.
- There is no need to color the circles.
Step 4: Cut out the snowman and circle shapes.
Step 5: Paste them onto the light blue rectangle sheet to build your winter scene.
Step 6: Take the brown window frame and glue it over the scene.
Step 7: Add cotton pieces around the picture.
Step 8: Finally, let it dry and display your snowman’s winter scene.
Templates:
Snowy House Window Craft:
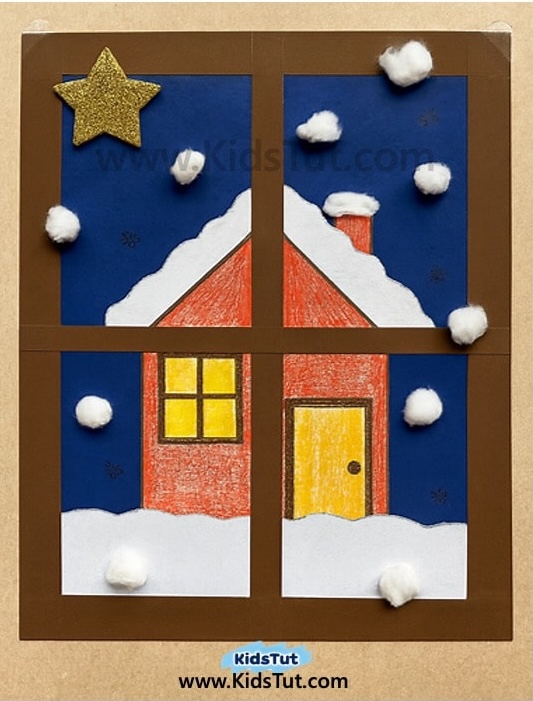
How to Make:
Step 1: Prepare the window frame and a dark blue rectangle sheet.
Step 2: Print the Winter house and Snow part on white paper.
Step 3: Color the Winter house with crayons or markers.
- Keep the snow part white.
Step 4: Cut out the Winter house and the snow part.
Step 5: Paste them onto the dark blue rectangle sheet to build your winter scene.
Step 6: Take the brown window frame and glue it over the scene.
Step 7: Paste some cotton pieces around the picture for the final look.
Templates:

Penguin Window Craft:
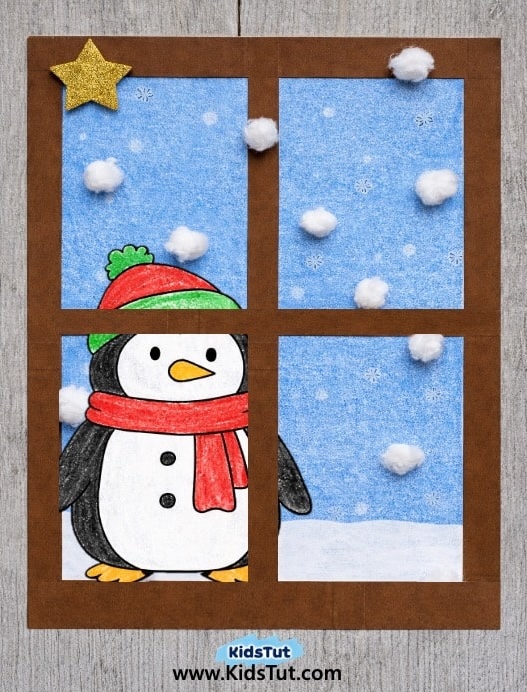
How to Make:
Step 1: Step 1: Get the window frame and a white rectangle sheet.
Step 2: Color the rectangle to make a winter background.
- Use blue for the sky.
- Use white at the bottom to show snow.
Step 3: You can use crayons, markers, or paint to color the background.
Now your winter background is ready for the window craft
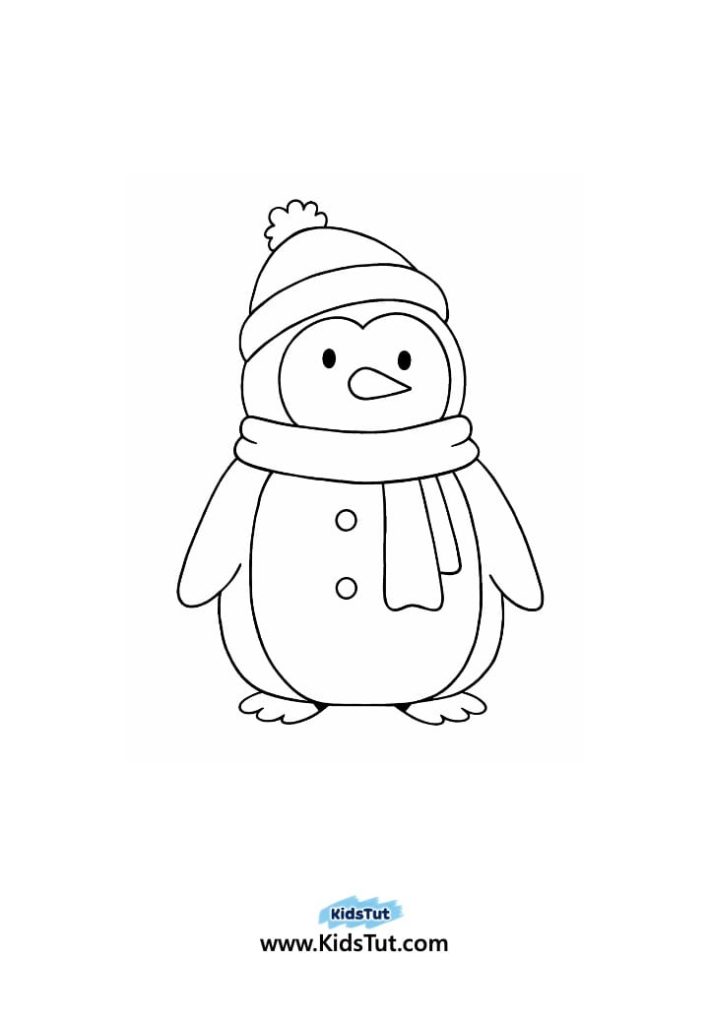
Step 4: Print the Penguin on white paper.
Step 3: Color the Penguin with crayons or markers.
Step 4: Cut out the Penguin shape.
Step 5: Paste it onto the colored rectangle sheet to build your winter scene.
Step 6: Take the brown window frame and glue it over the scene.
Step 7: Paste some cotton pieces around the picture for the final look.
Step 8: Let it dry, then proudly display your finished winter craft.

Click here to get the FREE PDF template: Download ( Printable )